Starting a new bottle production line feels risky when you do not know the process. You worry about incorrect specifications, wasting money on the wrong materials, or the mold not fitting your machine.
The process of creating a custom PET bottle mold involves 8 critical steps: defining specifications, creating 3D designs, selecting materials like Aluminum 7075 or Steel, determining cavity numbers, checking machine compatibility, manufacturing, testing samples, and shipping.
.jpg)
Let me walk you through the exact roadmap I use for my clients at PET Molder. This guide will ensure you avoid expensive mistakes and get a mold that works perfectly from day one.
Step 1: Defining Your Bottle Concept and Specifications?
Many buyers rush into production without clear data, which leads to huge financial losses later.
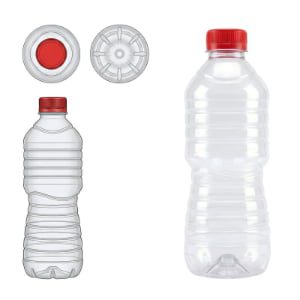
To start, you must define the exact bottle volume, the neck finish standard (like 30/25mm), and the preform weight you intend to use.
I see many new clients make mistakes here. I want to share a story about a client from Saudi Arabia. He came to me wanting to make a 300ml water bottle. However, he planned to use a preform designed for CSD (Carbonated Soft Drinks). I immediately stopped him.
I explained that CSD preforms are designed to hold pressure. They are thick and heavy. Using a CSD preform for a simple water bottle is unnecessary. It added about 2 grams of plastic to every single bottle. He did not think 2 grams was a big deal.
I did the math for him.
- Weight increase: 2 grams per bottle.
- Monthly production: 1,000,000 bottles.
- Total wasted material: 2,000 kilograms of resin per month.
When he saw that he would waste 2 tons of plastic every month, he understood immediately. That is a massive cost over a year. This is why Step 1 is the most important. We need to match your bottle concept to the right preform and the right weight.
Key Data We Need From You:
| Specification | Why It Matters | Example |
|---|---|---|
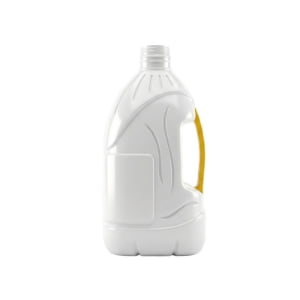
| Bottle Application | Determines the bottle strength needed. | Water, Juice, Carbonated Drink, Oil. |
| Volume | Defines the size of the mold cavity. | 300ml, 500ml, 1L, 5L. |
| Neck Finish | Must match your preform exactly. | 29/25, 30/25, PCO 1810, PCO 1881. |
| Preform Weight | Affects bottle thickness and cost. | 12g, 18g, 28g. |
| Target Diameter | Ensures the bottle fits your labeling machine. | 60mm, 75mm. |
If you have a sample bottle you want to copy, you can send it to us. If you only have a photo, we can work with that too. But knowing your preform specs is non-negotiable for a successful project.
Step 2: 3D Drawing Design and Confirmation?
A sketch on a napkin or a simple photo is not enough for a CNC machine to cut steel.
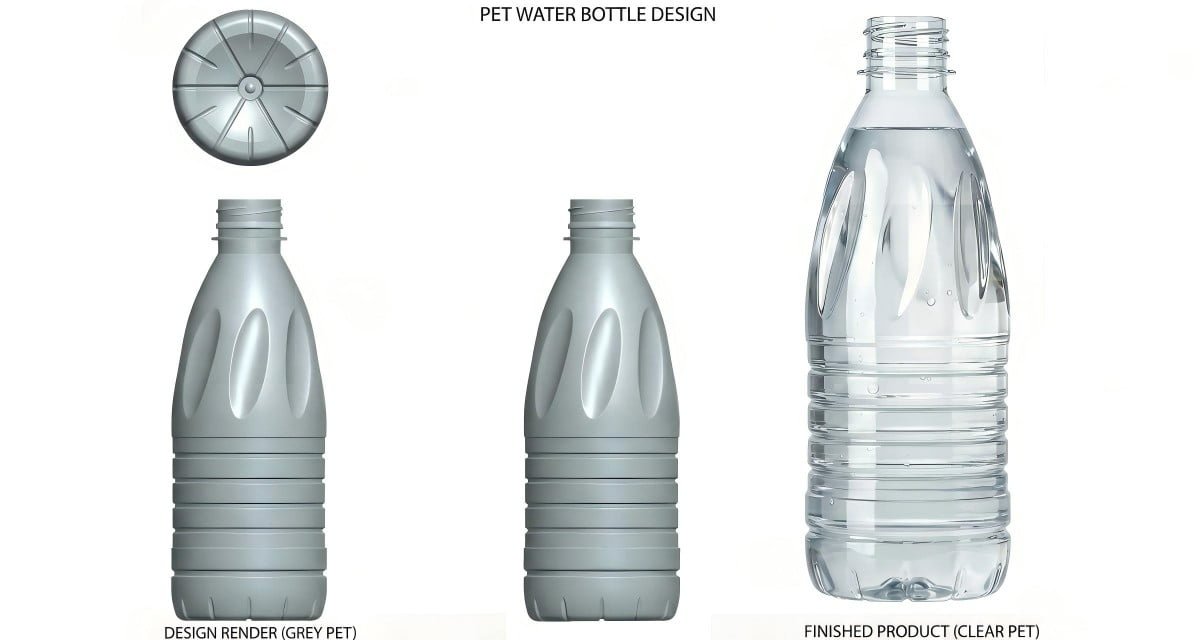
We take your concept and convert it into a professional 3D CAD engineering drawing that shows every curve and dimension.
Once we have your basic requirements from Step 1, my design team starts work. We do not just draw a pretty picture. We design for "manufacturability." This means we ensure the shape you want can actually be blown effectively.
Some shapes look great on paper but cause problems in production. For example, if a bottle has very sharp corners, the plastic might not stretch into them evenly. This creates weak spots where the bottle might burst. We adjust the angles slightly to ensure the plastic flows smoothly.
The Design Process:
- Initial Layout: We create a 2D outline of the bottle shape. This confirms the height and diameter.
- 3D Modeling: We build the 3D model. We add details like ribs for strength, logo engravings, and bottom designs.
- Volume Calculation: Our software simulates the volume. If you need exactly 500ml, we adjust the design to hold that amount at the fill line.
- Client Approval: We send this file to you. You check the look. You check the dimensions.
You must review this drawing carefully. Once the metal is cut, we cannot put it back. We only move to the next step after you say, "Yes, this is exactly what I want."
Step 3: Material Selection: Aluminum 7075 vs. Stainless Steel?
Choosing the wrong metal for your mold will result in slow production speeds or a mold that wears out too fast.
You need to decide between Aluminum 7075 for faster cooling and speed, or Stainless Steel for durability and high polish.
This is a decision I help my clients make based on their business goals. There is no "best" material, only the right material for your specific project. Let’s break down the two main contenders.
Option A: Aluminum 7075 (Aircraft Grade)
This is the choice for high-speed production. Aluminum transfers heat much faster than steel. In the blow molding process, the bottleneck is often cooling time. You have to wait for the hot plastic to harden before you open the mold.
- Pros: Excellent thermal conductivity. This reduces your cycle time. If you save 0.5 seconds per cycle, that adds up to thousands of extra bottles per day. It is also lighter, which is easier on your machine.
- Cons: It is softer than steel. If you are not careful, you can dent the parting line.
- Best For: Water bottles, high-volume orders, simple shapes.
Option B: Stainless Steel (S136)
This is the tank of mold materials. It is incredibly hard and resists corrosion.
- Pros: It keeps a perfect parting line for millions of shots. It can be polished to a mirror finish, which makes the bottle look crystal clear and premium. It resists rust if your cooling water quality is poor.
- Cons: Heat transfer is slower. Your cycle time might be slightly longer. It costs more to machine because the metal is so hard.
- Best For: Cosmetic bottles, high-end juice bottles, pharmaceutical bottles, or factories where mold maintenance is rough.
Comparison Table:
| Feature | Aluminum 7075 | Stainless Steel |
|---|---|---|
| Cooling Speed | Very High (Fast Cycles) | Moderate |
| Hardness | Medium | Very High |
| Polishing | Good | Excellent (Mirror) |
| Durability | Good | Extreme |
| Cost | Moderate | Higher |
I usually recommend Aluminum 7075 for most water bottle projects because the cycle time savings equal more profit for you.
Step 4: Determining Cavity Number Based on Your Output?
If you choose too few cavities, you cannot meet sales demand; if you choose too many, your machine might not handle the size.
You must calculate the number of cavities (1, 2, 4, 6, or 8) based on your required daily output and your machine size.
This calculation is pure math. We look at your sales target. Let's say you need to produce 20,000 bottles per day.
If your machine has a cycle time of roughly 3 seconds (2000 cycles per hour is a safe estimate for calculation):
- 2-Cavity Mold: 2 bottles * 2000 cycles = 4,000 bottles/hour. In 5 hours, you hit your target.
- 4-Cavity Mold: 4 bottles * 2000 cycles = 8,000 bottles/hour. You finish in 2.5 hours.
However, you cannot just pick the highest number. The constraint is your Blowing Machine.
Every machine has a physical limit on the mold size it can hold. A small semi-auto machine might only fit a 2-cavity mold for a 500ml bottle. A large rotary machine can take many more.
Factors We Analyze:
- Bottle Size: A 5-liter bottle takes up a lot of space. A standard machine might only fit 1 cavity for a 5L bottle, even if it fits 4 cavities for a 500ml bottle.
- Machine Clamping Force: More cavities mean more surface area. The machine needs enough power to keep the mold closed when the high-pressure air blows in. If the force is too weak, the mold opens slightly, and you get ugly "flash" lines on the bottle.
- Budget: A 4-cavity mold costs more than a 2-cavity mold. If you are just testing a market, maybe start with 2 cavities. If you have confirmed orders, go for 4 or 6 to lower the production cost per unit.
Step 5: Checking Compatibility with Your Blowing Machine?
The biggest nightmare in this industry is receiving a mold that does not physically fit onto your blowing machine.
We prevent this by requesting your machine's clamping parameters and technical drawings to verify every dimension before we cut metal.
This is a step where we act as your safety net. I never assume a machine is "standard." Even machines that look the same can have different mounting holes or backplate thicknesses.
We will ask you for a technical drawing of your machine's mold clamping area. If you do not have it, we ask you to take photos and measure specific distances.
What We Verify:
- Mold Thickness: Every machine has a minimum and maximum mold thickness it can accept. If our mold is too thin, the machine cannot clamp it tight. If it is too thick, it won't fit. We adjust the mold backplate to match this exactly.
- Center Distance: For multi-cavity molds, the distance between the center of one bottle and the next must match the nozzle distance on your machine. If your machine nozzles are 80mm apart, and we build the mold with 100mm spacing, the machine cannot blow the bottles.
- Fixing Method: Does your machine use screws to hold the mold? Or does it use clamps? Where are the screw holes located? We drill the mounting holes in the mold to align perfectly with your machine platen.
- Cooling Connections: We check the size of your water pipes (e.g., 1/4 inch or 3/8 inch) so you can plug the water lines in immediately.
By spending extra time here, we ensure that when you open the crate, the mold slides into your machine and works instantly. This is the difference between a professional PET Molder and a cheap shop.
Step 6: Manufacturing Lead Time and Progress Updates?
You worry about silence from your supplier and whether your project will be delayed.
Our standard manufacturing cycle is 15-20 days, and I send you photos of the machining process so you always know the status.
Trust is built on transparency. Once we confirm the design and the machine details, we start the CNC machining. I know that waiting is the hardest part. You have customers waiting for you.
Here is what happens during those 15-20 days:
- Material Prep (Days 1-3): We order the raw block of Aluminum or Steel.
- Rough Machining (Days 4-8): We cut the basic shape. This removes most of the metal.
- Fine CNC Milling (Days 9-14): This is the precision work. We carve the intricate details, the logo, and the bottom shape.
- Assembly & Polishing (Days 15-18): We put the mold parts together. We install the cooling pins and air vents. We polish the surface to make it smooth.
During this time, I do not want you to guess. I will send you pictures. You will see the block of metal turning into your mold. If there is a delay—for example, if a tool breaks—I will tell you immediately. But typically, with our planned schedule, we hit the target.
We also plan the "Bottom Mold" and "Body Mold" separate assembly to ensure the movement is smooth. We check the water channels to ensure there are no leaks before we even put it on a trial machine.
Step 7: T1 Mold Trial and Sample Approval?
We do not ship the mold until we have proven that it produces perfect bottles.
We perform a T1 trial run in our factory, blow actual bottles, and ship these samples to you for final verification.
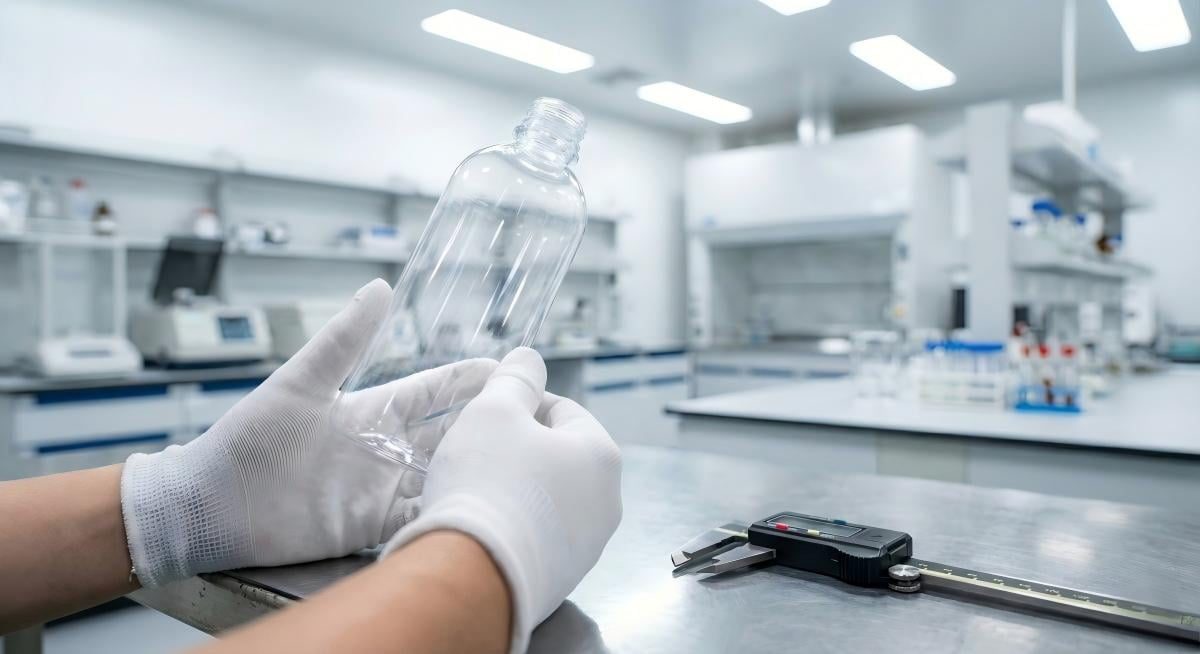
The "T1 Trial" is the first time the mold is used. This is the moment of truth. We mount your mold on our test machine. We use preforms that match your specifications.
What We Check During T1:
- Demolding: Does the bottle come out of the mold easily? Or does it stick? If it sticks, we need to polish that area more.
- Parting Lines: Are the lines where the mold halves meet visible? We aim for them to be almost invisible. If they are rough, we adjust the fit.
- Volume Accuracy: We fill the sample bottle with water to check the volume. If it is supposed to be 500ml, is it 500ml? If it is 490ml, we might need to deepen the mold slightly.
- Dimension Check: We measure the diameter and height to ensure they match the drawing.
After we test, we pack a box of these sample bottles and courier them to you. You get to hold the bottle in your hand. You can test your label on it. You can test the cap fit.
Only when you say, "This bottle is perfect," do we approve the mold for shipment. If you have changes, we modify the mold and test again. We do not ship problems; we ship solutions.
Step 8: Safe Packaging and Global Shipping?
A precision tool can be ruined by rust or impact during a long ocean voyage.
We apply anti-rust oil, wrap the mold in protective film, and secure it in a sturdy wooden crate to guarantee it arrives in perfect condition.
Shipping is the final step, but it requires care. Saltwater air is the enemy of metal molds. Even a small spot of rust inside the cavity can ruin the surface finish of your bottles.
Our Packaging Protocol:
- Cleaning: We thoroughly clean all cooling channels to remove any metal shavings or water.
- Anti-Rust Coating: We spray the entire mold, especially the inner cavities and mating surfaces, with a heavy-duty anti-rust agent. This forms a protective yellow barrier.
- Vacuum Seal: We wrap the mold in plastic and vacuum seal it. This keeps moisture out entirely.
- Wooden Crate: We place the mold in a wooden box. We do not just toss it in. We bolt the mold to the bottom of the box so it cannot slide around. We stuff the empty space with shock-absorbing material.
We also include a "Mold Maintenance Box" with the shipment. This usually includes spare cooling nozzles, extra screws, and sometimes a simple tool for assembly.
We handle the logistics paperwork, helping you with the commercial invoice and packing list so that customs clearance in your country is smooth. When the ship leaves the port, I send you the tracking number. My job is not done until that mold is running on your machine.
Conclusion
Creating a custom mold involves defining clear specs, precise design, smart material choices, and rigorous testing.
By following these 8 steps, we ensure your investment yields a high-quality production line. If you are ready to start your project without the guesswork, would you like me to review your bottle concept and give you a free technical analysis today?
FAQ
Q: How long does a custom PET mold last?
A: It depends on the material. An Aluminum 7075 mold can typically last for 1 to 2 million shots. A Stainless Steel mold can last for over 5 million shots with proper maintenance.
Q: Can you make a mold if I only have a photo of a bottle?
A: Yes. We can design the 3D drawing based on a photo and your description of dimensions (height and diameter). We will create the engineering file for you to approve.
Q: Why is the preform weight so important for the mold design?
A: The preform weight determines the thickness of the bottle walls. If the preform is too heavy for a small mold, the plastic will be too thick and waste money. If it is too light, the bottle will be paper-thin and crush easily.
Q: Do you test the mold before shipping?
A: Absolutely. We perform a T1 trial run, blow actual bottles, and send those samples to you for approval. We never ship a mold without verifying it works.
-1-300x300.jpg)