I am Vivian, a founder with 20 years of experience in PET mold and preform mold manufacturing in Zhongshan, China. In our daily factory work, we build tooling for water plants worldwide. During our quarterly client visits, I see a big problem. Many clients have very weak awareness of mold maintenance. They think maintenance is optional. They think it is a waste of time. This is a mistake. For example, I have a Dutch client. They ordered 15 custom PET blow mold sets last year. At the end of the year, our engineers visited their plant. We saw their unused molds dumped in a corner of the workshop. We saw four bad things. First, the mold cavities had no rust inhibitor. Second, the guide pins had no lubrication. Third, the molds sat directly on the wet floor. Fourth, the molds had no identification tags. Our engineers communicated with their team immediately. We told them to change these bad habits. Good habits save money and extend tool life. Today, my team and I share this detailed technical guide for stretch blow molding preventive maintenance.
PET blow mold preventive maintenance dictates cycle time and part clarity. Routine care maintains high thermal conductivity and prevents foggy bottle surfaces. You must use neutral solvents for 7075 aluminum and dedicated rust inhibitors for S136 stainless steel. Proper descaling, lubrication, and storage stop early tool degradation and save production costs.
1. The Cost of Neglect: Why maintenance dictates cycle time and part quality.
You ignore mold maintenance. Your cycle time gets longer and bottle surfaces become foggy. We implement strict maintenance schedules to keep thermal conductivity high and keep bottle clarity perfect.
Poor maintenance drops cooling efficiency and degrades mold cavity surfaces. This directly increases single-shot cycle times and creates foggy plastic bottles. You lose thermal conductivity and surface shine. Routine checks save money and stop bad bottles.
In my experience, I saw a client lose $5,000 in one week. They ignored their cooling water quality. Their cycle time increased by 2 seconds per bottle. This is a bad loss. Mold maintenance is not just about physical life. It is about thermal physics. You must maintain the highest thermal conductivity. You must maintain exact surface clarity.
When you do not clean the tool, heat transfer drops. The PET material stays hot longer. You must increase the blowing time. This slows down your machine. Slow machines waste money. Also, poor maintenance ruins the cavity finish. Many engineers think a steel mold lasts forever without help. This is a mistake. Metal degrades under environmental stress. Constant hot and cold water cycles cause thermal fatigue.
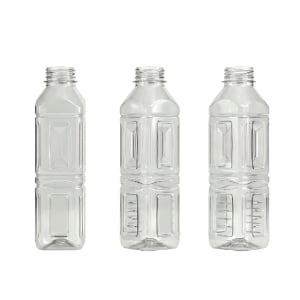
You must use preventive care to stop these physical changes. You must keep the mold surfaces clean. If you store the mold badly, the stainless steel surface gets a foggy layer. Moisture and oxidation dull the polished metal. This foggy metal surface transfers directly to the hot PET. The final bottle looks cloudy. The bottle loses its clear shine. The bottle design looks cheap.
Don't skip the daily checks. Stop ignoring mold storage rules. You must treat the mold like a precise machine. We measure the cooling efficiency every month. We record the cycle time data. If the time goes up, we stop the machine. We inspect the tool. We clean the surfaces. A well-maintained mold produces crystal-clear bottles every single cycle.
2. Material Vulnerabilities: 7075 Aluminum vs. S136 Stainless Steel.
Aluminum and steel react differently to chemicals. Wrong cleaners destroy expensive cavities. We match specific cleaning protocols to 7075-T6 aluminum and S136 stainless steel.
7075-T6 aerospace aluminum provides high thermal conductivity but is soft and sensitive to alkaline chemicals. S136 stainless steel resists corrosion and suits hot-fill tooling but suffers from metal galling under high pressure. You must separate maintenance strategies based on the exact metal type.
I heard from a client in Dubai about a ruined tool. They washed a 7075-T6 aluminum mold with a strong steel degreaser. The chemical ate the metal surface. The mold lost its shine. They had to scrap the tool. This is a mistake. You must know your metal.
We build many tools. We use 7075-T6 aluminum for standard water bottles. Aluminum is good. It cools fast. It has excellent thermal conductivity. But aluminum is soft. The surface hardness is low. It scratches easily. Also, aluminum hates alkaline chemicals. Alkaline fluids cause fast chemical pitting. Pitting leaves permanent holes in the cavity.
We use S136 stainless steel for hot-fill bottles and base inserts. We also use it for the preform mold. S136 is very hard. It stops rust. It handles high mechanical pressure. But S136 has a bad weakness. When two S136 parts rub together dry under high pressure, they stick. They tear each other. We call this metal galling.
You must not treat aluminum and steel the same way. Don't use heavy steel tools on aluminum. Stop buying cheap alkaline cleaners for your aluminum tools. You must write two different maintenance manuals. A strict manual saves your mold from permanent chemical damage and mechanical galling.
Material Comparison Table
| Feature | 7075-T6 Aluminum | S136 Stainless Steel |
|---|---|---|
| Thermal Conductivity | Very High | Low |
| Surface Hardness | Low | High |
| Chemical Resistance | Weak against alkaline | Strong |
| Main Failure Risk | Chemical pitting, scratching | Metal galling |
| Maintenance Rule | Use neutral solvents only | Needs high-temperature grease |
3. Surface Cleaning Protocols: The zero-tolerance rule for metal tools.
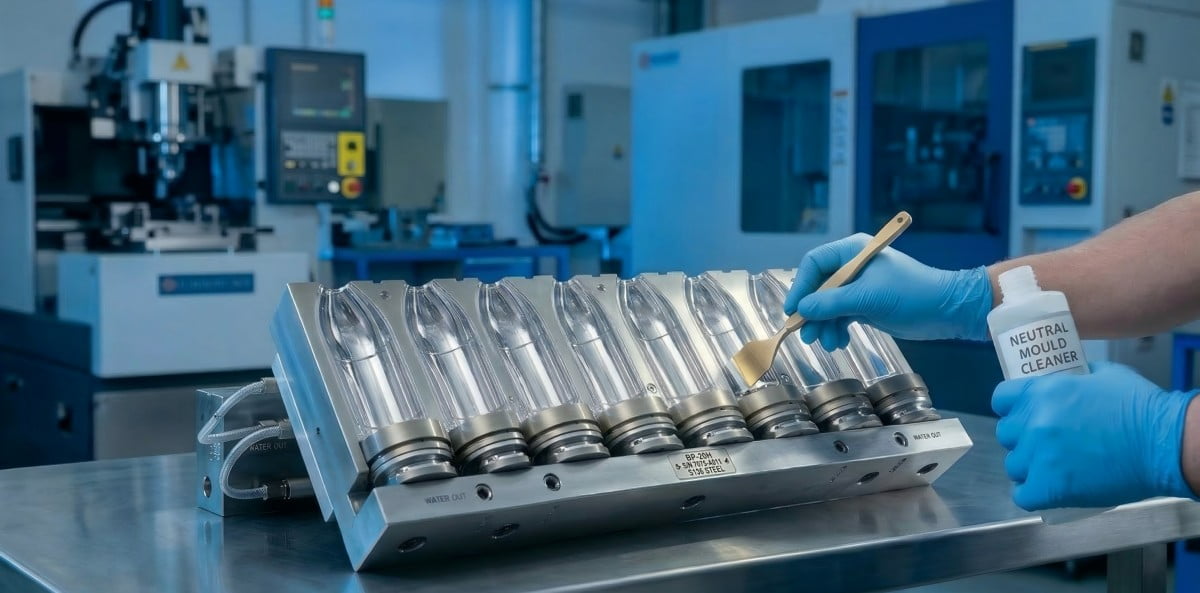
PET leaves oligomer dust during high-temperature stretching. Hard brushes scratch the mold surface. We use neutral solvents and brass tools to remove buildup safely.
You must apply a zero-tolerance rule for metal tools on cavity surfaces. Hot PET releases oligomer dust. You must clean aluminum molds with pH-neutral solvents and brass tools or non-woven wipes. Strong alkaline degreasers cause chemical pitting on aluminum. Steel scrapers permanently damage the mold cavity.
I heard from a client last month. They hired a new, novice operator. The new operator used a steel screwdriver to scrape hard dirt off an aluminum cavity. The steel left deep gouges in the soft metal. They had to find a local machine shop to polish the cavity. Shipping a mold back to China costs half the price of a new tool. They wasted production time and paid high local repair fees. I told them, "Don't do this." This is a mistake.
When you heat and stretch PET plastic, a chemical reaction happens. The plastic releases oligomer dust. You can call it oligomer buildup PET. This dust sticks to the cold metal walls. It forms a hard, white layer. You must remove this layer. If you leave it, the bottles look cloudy. The bottles lose their clear shine.
You must follow a strict cleaning rule. We use a zero-tolerance rule for hard metal tools. You must never bring a steel brush near the cavity. We use brass tools. Brass is softer than 7075-T6 aluminum and S136 steel. Brass pushes the dirt off but does not scratch the mold. We also use soft non-woven wipes.
The liquid cleaner is very important. You must use pH-neutral solvents. Buy industrial cleaners with a pH level of 7. Do not buy strong alkaline degreasers. The alkaline chemicals dissolve the protective oxide layer on the aluminum. This causes chemical pitting. Pitting is irreversible metal damage.
Steps for proper cavity cleaning:
- Stop the machine and open the mold.
- Spray pH-neutral solvent on the cavity.
- Wait 5 minutes. Let the solvent soften the oligomer dust.
- Wipe the surface gently with a non-woven cloth.
- Use a brass scraper only for stubborn spots.
- Wipe dry completely.
4. Unclogging the Micro-Vents: Restoring aerodynamic balance.
Blocked vents trap air. Trapped air causes soft and undefined bottle details. We use dry ice blasting to clear 0.05mm vents and restore aerodynamic balance.
Mold parting lines have 0.05mm to 0.1mm micro-vents. Oligomer dust blocks these small channels. Blocked vents cause trapped air and soft bottle details. You must use dry ice blasting or ultrasonic cleaning every one million shots. This restores air escape and keeps dimensions exact.
I saw a client run a machine for two months without cleaning the vents. The bottle logos looked flat. The base corners looked round. They thought the blowing pressure was too low. The pressure was fine. The problem was the blow mold micro-vents cleaning.
Every blow mold has micro-vents. We cut these tiny grooves on the parting line and in the bottom corners. They are very small. They measure 0.05mm to 0.1mm deep. When the high-pressure air pushes the hot PET outward, the air inside the cavity must escape. The air escapes through these micro-vents. This is aerodynamic balance.
Oligomer dust loves to hide in these vents. The dust builds up layer by layer. Soon, the vent is totally blocked. The air cannot leave the cavity. We call this trapped air. The trapped air pushes back against the hot plastic. The plastic cannot reach the metal wall. The bottle detail becomes soft and undefined.
You must clean these vents. Wiping is not enough. The cloth cannot reach inside a 0.05mm groove. We recommend advanced cleaning methods. You should use dry ice blasting. Dry ice pellets freeze the dirt and blast it away without scratching the metal. You can also use ultrasonic cleaning in a fluid bath.
Don't wait until the bottles look bad. Stop guessing the problem. Set a strict schedule. Clean the vents deeply every 1,000,000 shots. A clean vent guarantees sharp bottle details. A clean vent saves rejected parts.
Vent Cleaning Frequency Table
| Cleaning Method | Frequency | Tool Used | Target Area |
|---|---|---|---|
| Surface Wipe | Every shift (8-12 hours) | Non-woven wipe | Main parting line |
| Light Scraping | Every 100,000 shots | Brass tool | Deep corners |
| Dry Ice Blasting | Every 1,000,000 shots | Dry ice machine | 0.05mm micro-vents |
| Ultrasonic Bath | Yearly (Decommissioning) | Ultrasonic tank | Entire mold block |
5. Cooling Channel Descaling: Preventing thermal insulation.
Water scale forms inside cooling lines. Scale blocks heat transfer and slows down production. We pump chemical descalers through the channels to restore fast cooling.
Scale buildup in cooling channels is a hidden problem. A 1mm scale layer drops thermal conductivity by 30%. You must use non-corrosive descalers for aluminum to stop galvanic corrosion. You can use stronger acid for stainless steel. You must check water flow and temperature difference daily.
Last month, I had a video call with a client in Mexico. The factory manager was confused. His machine ran perfectly, but the cycle time kept increasing. I asked him to remove the water hose and show me the mold inlet on the camera. The cooling channel was full of white scale. The cooling water could not cool the mold.
Water contains minerals. When water gets hot, minerals fall out. They stick to the metal walls inside the mold. This is scale buildup. Scale is a bad thermal insulator. It stops heat transfer. Just 1mm of scale drops the thermal conductivity by 30%. The PET plastic stays hot. Hot plastic deforms when the mold opens. To fix this, operators add blowing time. This makes the cycle time slow. Slow cycles waste money.
You must perform blow mold cooling channel descaling regularly. Do not ignore the inside of your tool. You cannot see the scale, but it is there. We use chemical pumps to push descaling fluids through the channels.
You must choose the right fluid. For 7075-T6 aluminum molds, you must be very careful. Do not use strong acids. Strong acids cause galvanic corrosion inside the aluminum. The acid eats the metal and causes internal water leaks. You must use dedicated, non-corrosive aluminum descalers. For S136 stainless steel, you can use standard industrial acid descalers. Steel resists acid better.
Always check the water parameters. Measure the water flow rate (liters per minute). Measure the temperature difference between the water entering the mold and the water leaving the mold. If the flow drops, or the temperature difference changes, you have scale. Clean it immediately.
6. Lubrication of Moving Parts: Guide pins, bushings, and base mechanisms.
Fast open and close cycles create high friction. Dry metal parts scrape and wear out quickly. We apply food-grade high-temperature grease to stop metal wear.
Guide pins, bushings, and base mold cams take heavy friction during fast blowing cycles. You must apply food-grade high-temperature grease regularly. Lubrication stops surface scraping and metal galling on stainless steel parts. You must control grease volume. Excess grease contaminates the mold cavity.
I heard from a client about a base mold cam locking up during a high-speed run. The machine stopped violently. The S136 steel sliding parts were completely dry. They rubbed together under high pressure. The metal surface tore apart. We call this galling. The client had to buy a new base mold mechanism. This is a mistake.
Blow molds open and close thousands of times a day. This creates massive mechanical friction. The guide pins align the mold halves. The bushings absorb the sliding force. The base mold cams push the bottom insert up and down. All these moving parts need mold guide pin lubrication.
You must use the right grease. Standard car grease is bad. It melts at high temperatures. It drips into the mold cavity. It makes the bottles dirty. You must buy food-grade high-temperature grease. It stays thick when hot. It is safe if it touches a food package.
Lubrication stops metal galling on S136 stainless steel. It creates a smooth film between the metal parts. But you must be smart. Do not over-lubricate. Stop putting massive blobs of grease on the pins. Too much grease spreads out. It reaches the mold cavity. It ruins the PET bottles. Apply a thin, even layer with a brush. Wipe away any extra grease.
Lubrication Rules:
- Clean the old, dirty grease off first.
- Use only food-grade high-temperature grease.
- Apply a thin film with a clean brush.
- Lubricate guide pins every 48 hours of operation.
- Never let grease touch the parting line or cavity.
7. O-Ring and Seal Inspection: Preventing internal water leaks.
Rubber seals age from hot and cold water. Leaks cause water marks on hot PET. We replace EPDM and Viton O-rings during every deep maintenance check.
Mold O-rings use EPDM or Viton rubber. Thermal cycling causes elastomer degradation. Rubber loses elasticity over time. Small water leaks enter the cavity. Cold water hits hot PET and causes severe water mark defects. You must replace sealing rings during every deep maintenance cycle.
I heard from a client about unexplained water marks on their bottles. They checked the blowing pressure. They checked the heating lamps. Everything was normal. I told them to take the mold apart. They found a flat, cracked O-ring. A tiny drop of cooling water was leaking into the cavity.
We use O-rings to seal the water channels inside the mold block. We use EPDM or Viton rubber. These are good materials. But they do not last forever. The mold gets hot. Then it gets cold. This constant temperature change causes elastomer degradation. The rubber gets hard. It loses elasticity. It flattens out.
When the rubber fails, water escapes. Even a micro-leak is very bad. The cooling water is cold. The PET plastic is hot. When cold water hits the hot PET during stretching, it shocks the plastic. The plastic shrinks instantly. This creates a visible wave or line on the bottle. We call this a water mark defect. You must scrap these bottles.
Don't wait for a leak to happen. Stop using old O-rings. When you take a mold off the machine for deep maintenance, throw the old O-rings in the trash. Rubber is cheap. Steel molds are expensive. Always install brand new EPDM or Viton seals before you put the mold back together.
O-Ring Material Comparison
| Material Type | Temperature Resistance | Chemical Resistance | Best Application |
|---|---|---|---|
| EPDM | Good (up to 150°C) | Good against hot water | Standard cooling channels |
| Viton (FKM) | Excellent (up to 200°C) | Excellent against oils/acids | High-temp or hot-fill molds |
| Nitrile (NBR) | Poor (up to 90°C) | Good against oils | Avoid for mold cooling lines |
8. The Decommissioning SOP: How to store a blow mold correctly.
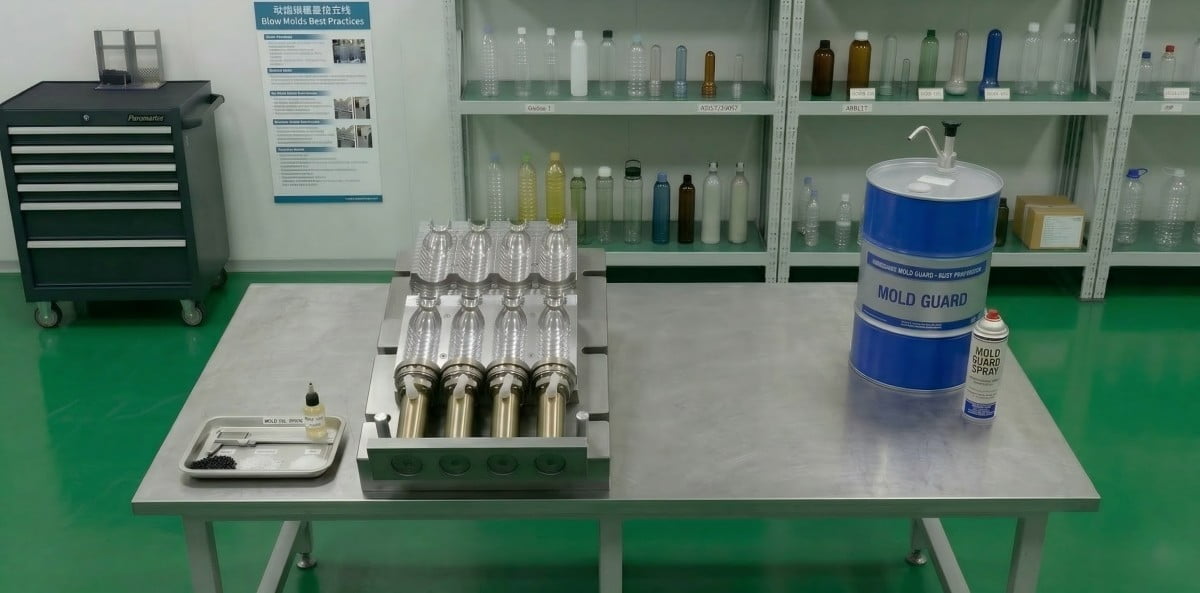
Operators throw molds into storage without prep. Rust and moisture destroy the metal over time. We follow a strict SOP to dry, oil, and store molds safely.
You must follow a strict decommissioning SOP. You must blow dry all cooling channels with high-pressure air. You must spray rust inhibitor on all S136 steel inserts and parting lines. You must close the mold completely. You must store it in a climate-controlled area to prevent condensation.
I saw the Dutch client make this mistake. They took the mold off the machine. They put it on a forklift. They dropped it on the floor. They walked away. This is a bad habit. A mold sitting on a wet floor will rust. Water left inside the cooling lines will corrode the aluminum. If you do not apply oil, the stainless steel gets a foggy layer. This foggy layer ruins bottle clarity during the next production run.
When a production run finishes, you must do the work. We call this the decommissioning Standard Operating Procedure (SOP). You must protect the tool before it goes into the warehouse. The air in the warehouse has humidity. Humidity creates condensation on cold metal. Condensation causes oxidation.
First, disconnect the water hoses. Connect a high-pressure air hose to the water inlet. Blow compressed air through the cooling channels for 5 minutes. You must remove all water drops. Internal water causes severe galvanic corrosion over months of storage.
Second, spray the cavity. For S136 stainless steel molds and steel inserts, spray a generous layer of industrial rust inhibitor. For 7075 aluminum, spray a neutral protective oil. Make sure the parting line is covered.
Third, close the mold halves tightly. Do not store molds open. Dust will fall inside. Fourth, do not put the mold on the floor. Put it on a wooden pallet or a dedicated steel rack. Finally, attach a clear tag. Write the date, the mold condition, and the total shot count on the tag.
5 Frequently Asked Questions (FAQ)
FAQ 1: Can I use the same industrial cleaner for both aluminum and stainless steel blow molds?
No. You must not do this. Many industrial degreasers for steel contain strong alkaline chemicals. If you put alkaline cleaners on a 7075-T6 aluminum mold, it destroys the surface instantly. It strips the hard oxide layer and causes chemical pitting. The cavity takes permanent damage. You must use dedicated pH-neutral solvents for 7075 aluminum mold cleaning.
FAQ 2: How often should the micro-vents on a PET blow mold be cleaned?
The frequency depends on your factory environment and the PET resin. If you use recycled PET (rPET), you get more oligomer dust. For standard production, wipe the parting line every 8 hours (one shift). For deep cleaning, you must use dry ice blasting or ultrasonic cleaning every 1 million to 2 million shots. This clears the 0.05mm vents completely to stop trapped air.
FAQ 3: What causes galling on stainless steel mold components?
Galling is a severe mechanical failure. It happens when two S136 stainless steel surfaces rub against each other under high pressure with no lubrication. The microscopic peaks on the dry metal surfaces collide. They cold-weld together and then tear apart. You must prevent this. Apply food-grade high-temperature grease regularly to all sliding parts.
FAQ 4: Why is my blow molding cycle time gradually increasing over the months?
The most common reason is scale buildup inside the mold cooling channels. If your mechanical settings are unchanged, thermal insulation is the problem. Calcium and minerals from the water stick to the metal walls. Scale is a powerful heat blocker. Heat cannot escape. The PET cools slower. Operators are forced to add blowing time. You must run a descaling acid wash.
FAQ 5: What is the correct way to store a PET blow mold after production?
You must follow strict storage rules. First, connect high-pressure air and blow all residual water out of the cooling channels to stop internal corrosion. Second, spray S136 stainless steel mold care rust inhibitor on all cavities and parting lines to stop foggy surfaces. Third, bolt the mold halves completely closed. Fourth, place the mold on an elevated rack in a dry, humidity-controlled warehouse.
Article Summary Table
| Category | Key Concept | Recommended Action | Avoid Doing |
|---|---|---|---|
| Material Care | 7075 Aluminum vs. S136 Steel | Use neutral solvents for Al; grease for Steel. | Do not use strong alkalis on aluminum. |
| Surface Cleaning | Oligomer dust removal | Clean with brass tools and soft wipes. | Stop using steel scrapers or hard brushes. |
| Ventilation | 0.05mm Micro-vents | Use dry ice blasting every 1 million shots. | Do not ignore soft/undefined bottle details. |
| Cooling System | Thermal conductivity | Descale cooling channels regularly. | Do not leave water in stored molds. |
| Mechanical Parts | Friction and Galling | Apply high-temp food-grade grease. | Do not run sliding steel parts dry. |
| Seals & Storage | Elastomer degradation | Replace O-rings; apply rust inhibitor to steel. | Do not store molds directly on the floor. |