The Crucial Premise: The Mold Passed FAT, So Why Does It Bulge Now?
I see clients lose money on base rollout. The mold passes our factory test. The bottles bulge in your factory. You waste time arguing. You must check your machine process.
The primary cause of a PET bottle rocker bottom is bad machine parameter settings, not bad CNC mold dimensions. If the PET blow mold passes the Factory Acceptance Test with flat bases, the tool is correct. You must fix your cooling and stretching process.
I am Vivian. I am the founder of PETmolder.com. I have 20 years of experience in PET mold manufacturing in Zhongshan, China. I have video meetings with overseas beverage factory owners every week. You buy molds from our factory. You install them on your blow molding machines. You produce PET bottles. Sometimes, the bottle base bulges. You get angry. You tell me the CNC mold dimensions are bad.
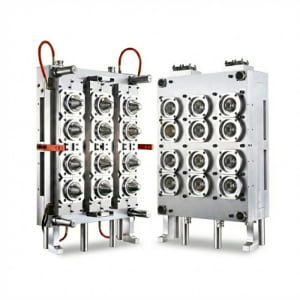
You are looking in the wrong direction. We test every preform mold and blow mold in our factory. We use high-precision CNC machines. We do not cut the base mold too shallow. If the sample bottles from our testing lab stand flat, the S136 steel has no errors. The steel does not change shape during shipping.
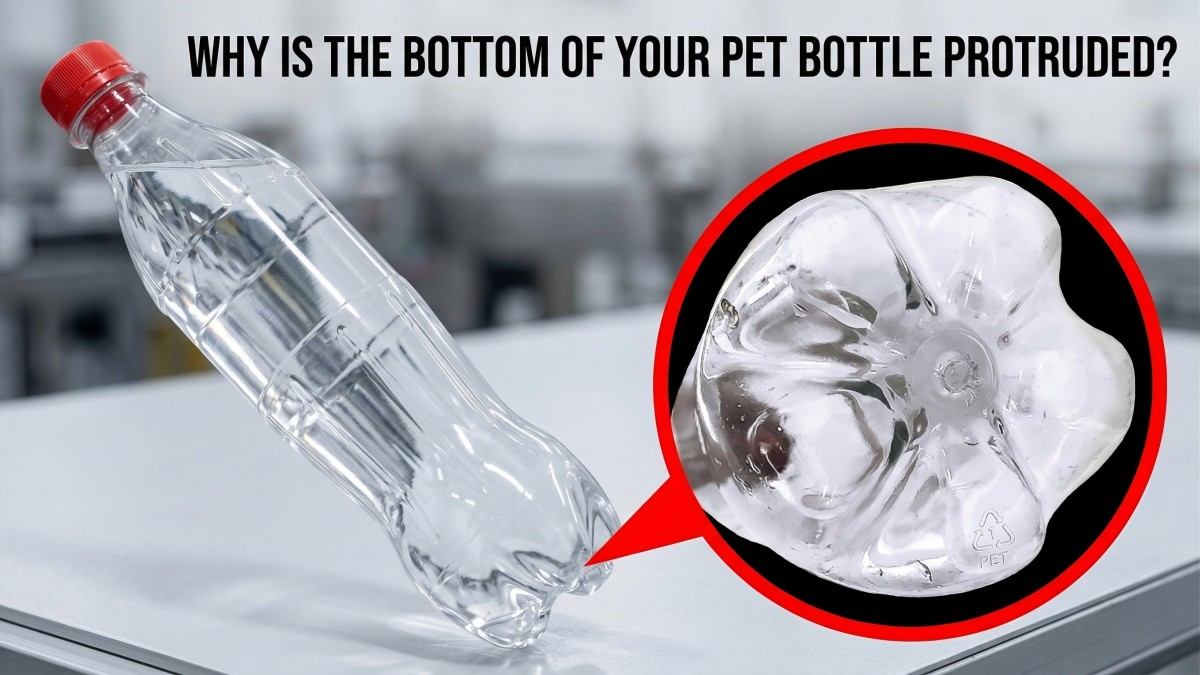
Base rollout is a delayed defect. The empty bottles eject from your machine. They stand flat on the conveyor. You approve the production. Later, you fill the bottles with liquid. You store them in the warehouse. After 24 hours, the base center pushes outward. The bottles fall over.
This delay proves the problem is process-related. The PET material at the base center is not fully frozen. The static pressure of the liquid forces the soft plastic to deform. You must adjust your machine parameters to lock the PET material into its final shape.
The Physics of the Base: Understanding Amorphous vs. Oriented PET
I see engineers ignore PET physics. The machine stretches the bottle body. The machine does not stretch the base center. You waste cooling efficiency. You must learn material structure.
Biaxial stretching makes the bottle body thin and strong. The base center receives minimal stretch and stays in an amorphous state. Amorphous PET is mechanically weak and holds high heat. You must force this hot area against cold steel to freeze its shape.
The bottle design dictates different physical states across the product. During production, the stretch rod pushes the preform down. High-pressure air expands the preform outward. This process aligns the polymer chains in the bottle body. This alignment creates a thin, strong wall. Thin walls cool fast.
The base center is different. The stretch rod contacts the injection gate directly. It pushes the gate to the bottom mold. The material at this point does not stretch. The polymer chains do not align. We call this amorphous PET.
Amorphous PET is very thick. Thick plastic holds thermal energy. High heat keeps the plastic soft. If you do not extract this heat rapidly, the plastic undergoes secondary shrinkage in the room air. The base pushes outward. You must stop this heat rebound.
Physical States of PET in a Bottle
| Bottle Area | Material State | Wall Thickness | Cooling Speed | Structural Strength |
|---|---|---|---|---|
| Bottle Body | Biaxially Oriented | Thin | Fast | High |
| Shoulder | Biaxially Oriented | Medium | Fast | High |
| Base Center | Amorphous | Thick | Slow | Very Low |
You are looking in the wrong direction if you apply general cooling rules to the base center. You must treat this amorphous zone with specific mechanical pressure and low temperatures.
Step 1: Stretch Rod Clearance - The Thickness Minus Compression Rule
In my video meetings, I hear clients guess the stretch rod gap. The rod fails to press the plastic against the cold steel. You waste material. You must use a strict calculation.
You must calculate the stretch rod clearance using the actual preform base thickness minus a 0.2mm to 0.5mm compression margin. For a 2.0mm thick base, the correct gap is 1.5mm to 1.8mm. Under-compression causes bulging. Over-compression causes stress cracking.
I saw an operator adjust the stretch rod without measuring the preform. You are looking in the wrong direction if you do this. The stretch rod must press the amorphous PET tightly against the base mold. This pressure creates physical contact. Physical contact forces heat transfer.
You must measure the actual thickness of the preform base with a caliper. Do not use the design drawing. Assume the actual thickness is 2.0mm.
You must subtract the compression margin. The standard margin is 0.2mm to 0.5mm.
Calculation 1: 2.0mm - 0.5mm = 1.5mm gap.
Calculation 2: 2.0mm - 0.2mm = 1.8mm gap.
You must lock the stretch rod exactly between 1.5mm and 1.8mm from the base mold surface. If the gap is 2.0mm, you have zero compression. The rod stops. The plastic does not touch the cold steel. The base stays hot and bulges. If the gap is 1.0mm, the rod crushes the gate. The base will crack.
Stretch Rod Clearance Data (Preform Base = 2.0mm)
| Set Clearance | Compression Margin | Physical Action | Final Result |
|---|---|---|---|
| 2.0mm | 0.0mm (Zero) | Rod fails to press material. | Bad cooling, Bulging. |
| 1.8mm | 0.2mm (Good) | Rod presses material firmly. | Good cooling, Flat Base. |
| 1.5mm | 0.5mm (Good) | Rod presses material firmly. | Good cooling, Flat Base. |
| 1.0mm | 1.0mm (Over) | Rod crushes the gate area. | Stress Cracking. |
Do not start production without this calculation. Measure the preform and lock the rod gap.
Step 2: Pre-Blow Timing - Do not displace the material too early
I see machines blow air too early. High-pressure air moves the plastic before the rod secures the bottom. You waste the thick material at the center. You must delay the pre-blow air.
Pre-blow timing controls material distribution. High-pressure air must not enter the cavity until the stretch rod secures the injection gate against the base mold. Early pre-blow pushes the heavy material away from the center, causing an uneven base that fails to cool.
I heard a client complain about base thickness. He changed the oven lamps. He changed the stretch rod. The base still failed. You are looking in the wrong direction if you ignore the pneumatic timing.
The machine process follows a strict sequence. First, the stretch rod descends. Second, the rod hits the bottom and compresses the gate. Third, the pre-blow air enters.
If your PLC triggers the pre-blow air too early, the air hits the hot preform. The air pushes the plastic outward. The thick gate moves away from the center line. The rod continues downward, but it misses the gate. It hits a thin side wall.
The displaced gate forms an uneven lump. The rod cannot apply the 0.2mm compression. The thick material does not touch the cold mold. It stays hot and deforms later. You must delay the pre-blow timing in your machine PLC.
Step 3: Base Mold Cooling - Freezing the amorphous center
I saw a factory run warm water in the mold. The base steel cannot absorb the heat from the PET. You waste production time on defective bottles. You must supply 10 to 12 degrees Celsius water.
The base mold requires independent cooling channels supplying water at 10 to 12 degrees Celsius. The thick PET must experience rapid heat extraction. Warm water or scale buildup prevents heat transfer, leaving the core hot and prone to secondary shrinkage.
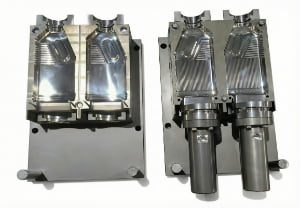
Thermodynamics control the plastic. We build molds using S136 stainless steel and 7075 aluminum. These metals conduct heat very well. But the metal needs a cold water source.
The injection gate holds intense thermal energy. You must extract this energy in a 2-second cycle. You need a huge temperature difference. You must configure your chiller to send water at 10 to 12 degrees Celsius directly to the base mold.
You are looking in the wrong direction if you connect the body cooling and base cooling in one series circuit. The water absorbs heat from the bottle body. It becomes too warm to cool the base. You must use parallel water circuits.
You must also check for calcium scale. Factory water has minerals. Hot molds bake these minerals inside the channels. Scale is a thermal insulator. It stops heat transfer. The water flows, but the steel stays hot. Clean your water channels with acid.
Step 4: Base Venting - When trapped air acts as thermal insulation
I hear from clients that their molds are clean. They only wipe the surface. Trapped air compresses between the plastic and the steel. You waste your cooling water. You must clean the microscopic exhaust vents.
Blocked base vents trap cavity air, creating a high-pressure air cushion. Air is a highly effective thermal insulator. This trapped air prevents the hot PET from making physical contact with the cold steel. The cooling process fails, and the base bulges.
During the blow process, high-pressure air pushes the PET outward. The ambient air inside the empty mold must escape. We machine tiny exhaust gaps in the base mold. These vents let air out but keep plastic in.
Heating PET preforms creates oligomer dust. This is a sticky white powder. Blow pressure pushes this dust into the exhaust gaps. Over thousands of cycles, the dust blocks the vents.
When vents block, the cavity air has nowhere to go. The expanding plastic compresses this air. The air forms a high-pressure cushion. The plastic stops expanding. It hovers above the steel.
Air is a thermal insulator. You are looking in the wrong direction if you think the mold surface is clean. The trapped air blocks heat transfer. The cold steel never touches the hot plastic. The base center stays hot and deforms after ejection. You must remove the base inserts and clean them with an ultrasonic bath.
Step 5: Oven Bottom Zone - Preventing excess heat at the gate
I see operators run oven bottom lamps at 100% power. The injection gate becomes liquid. You waste material structure during stretching. You must lower the heating power in the bottom zone.
Excessive heat melts the amorphous gate. The highly fluid material flows away when the stretch rod touches it, leaving a thin, weak center. An over-heated gate also overloads the mold's cooling capacity. Maintain a lower temperature at the injection point.
Heating a preform requires a specific temperature curve. The bottle body needs high heat to stretch. The base center needs low heat.
The injection gate is very thick. If you use high lamp power, the outside melts before the inside warms up. The amorphous PET turns into a fluid state.
When the stretch rod hits a fluid gate, the plastic cannot resist. The material flows away from the center. The rod pushes through. The base center becomes extremely thin. A thin center cannot support liquid weight. It will burst or bulge.
You are looking in the wrong direction if you try to speed up production with hot lamps. A super-heated gate also carries too much heat into the blow mold. The 10-degree water cannot cool a melted gate in 2 seconds. Reduce the power percentage on your bottom lamps.
The Validation Protocol: Why the Hydrostatic Test is mandatory
I see QA teams approve empty bottles off the machine. The bottles look flat but bulge in the warehouse. You waste thousands of products. You must perform a 24-hour hydrostatic test.
Empty bottles hide internal stress and thermal defects. To validate base parameters, you must fill sample bottles with room-temperature water and let them rest for 24 hours. The static liquid pressure will expose any unresolved creep deformation.
Empty bottles have no internal pressure. When a bottle drops from the machine, the plastic supports its own empty weight. The base looks flat. But if the amorphous center did not freeze completely, internal stresses remain locked inside.
When you fill the bottle with water, you introduce static weight. The liquid pushes down on the base. At the same time, the unfrozen PET tries to release its stress. We call this creep deformation. This deformation takes hours to appear.
You are looking in the wrong direction if you validate parameters using empty bottles. Every time you change the stretch rod, clean the vents, or adjust the water, you must test the bottles properly.
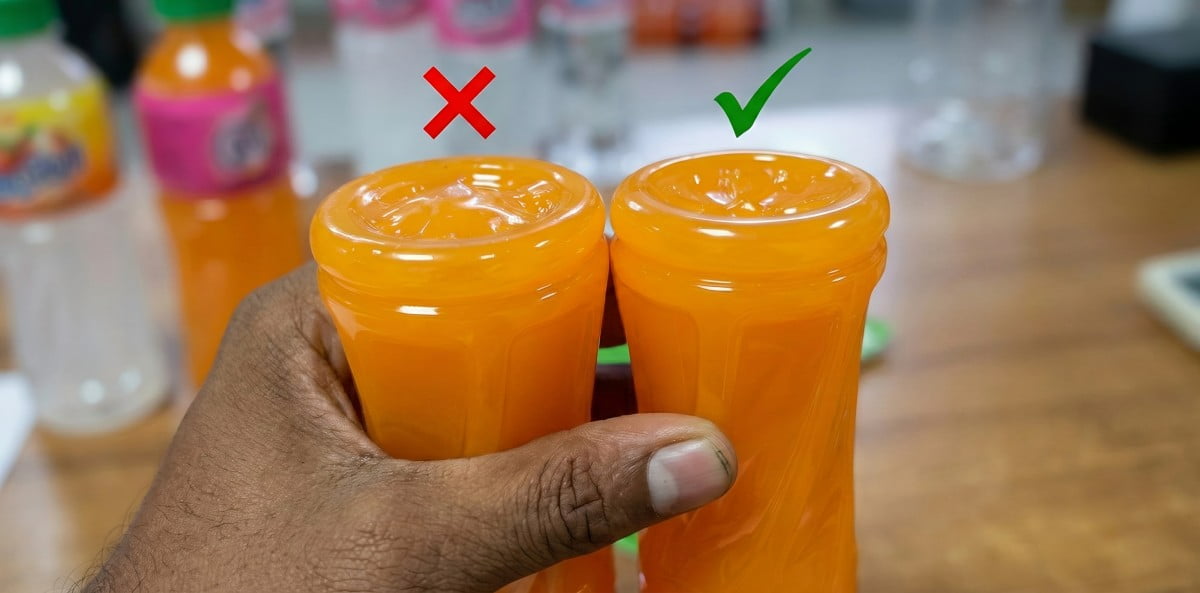
Take 10 bottles from the machine. Fill them with room-temperature water. Seal the caps. Put them on a flat table. Wait exactly 24 hours. Press the cap. If the bottle wobbles, your parameters are wrong. If it stands solid, your process is correct.
5 Frequently Asked Questions (FAQ)
FAQ 1: What is the main cause of a PET bottle rocker bottom?
The main cause is the failure to mechanically compress and thermally freeze the amorphous PET at the base center. This happens because of bad machine parameters, like wrong stretch rod clearance or blocked mold vents.
FAQ 2: How do I calculate the stretch rod clearance?
Measure the actual preform base thickness. Subtract a 0.2mm to 0.5mm compression margin. If the base is 2.0mm thick, set the rod gap between 1.5mm and 1.8mm. Do not guess this number.
FAQ 3: Why do bottles bulge only after I fill them with liquid?
Empty bottles lack internal static pressure. When you fill them, the liquid weight applies continuous force. If the thick base center did not freeze properly during molding, it slowly releases internal stress over 24 hours, causing a bulge.
FAQ 4: Does pre-blow timing affect the bottle base?
Yes. If the machine triggers pre-blow air too early, the high-pressure air pushes the heavy gate material away from the center. The stretch rod misses the plastic, failing to compress it against the cold steel.
FAQ 5: How does trapped air inside the mold cause bulging?
PET dust blocks the microscopic exhaust vents. During blowing, cavity air gets trapped between the plastic and the steel. Air is a thermal insulator. This air cushion stops the hot plastic from touching the cold metal, causing cooling failure.
Complete Summary: Base Rollout Troubleshooting Matrix
| Process Step | Check Component | Objective Target | Defect Mechanism | Corrective Action |
|---|---|---|---|---|
| Premise | CNC Dimensions | Passed FAT test | You blame mold steel for a process error. | Stop checking steel. Check machine parameters. |
| Physics | Base Gate | Amorphous PET | Thick plastic holds high heat. | Force hot gate against cold mold steel. |
| Step 1 | Stretch Rod | Thickness minus 0.2-0.5mm | Gap too large means zero compaction. | Calculate correct gap. Lock rod position. |
| Step 2 | Pre-Blow Timing | Rod hits bottom first | Early air pushes gate off-center. | Delay PLC pre-blow valve trigger. |
| Step 3 | Mold Cooling | 10 to 12 degrees Celsius | Warm water stops heat extraction. | Use parallel circuits. Supply 10°C water. |
| Step 4 | Mold Venting | Clear microscopic gaps | Trapped air acts as an insulator. | Clean base inserts with ultrasonic bath. |
| Step 5 | Oven Bottom | Low radiation power | Melted gate flows, makes base weak. | Lower bottom lamp power percentage. |
| Validation | QA Protocol | 24-hour Hydrostatic Test | Empty bottles hide delayed deformation. | Fill with water, wait 24 hours, check stability. |