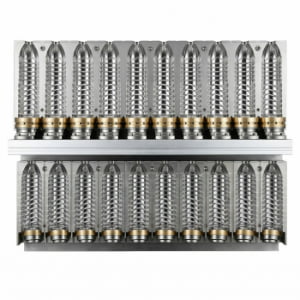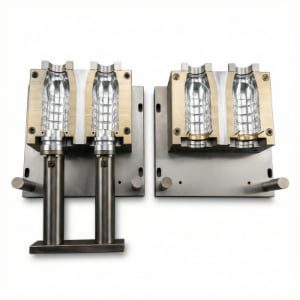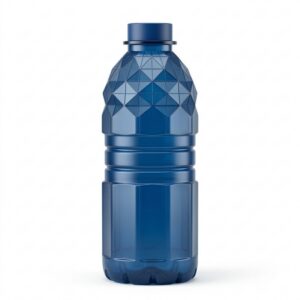
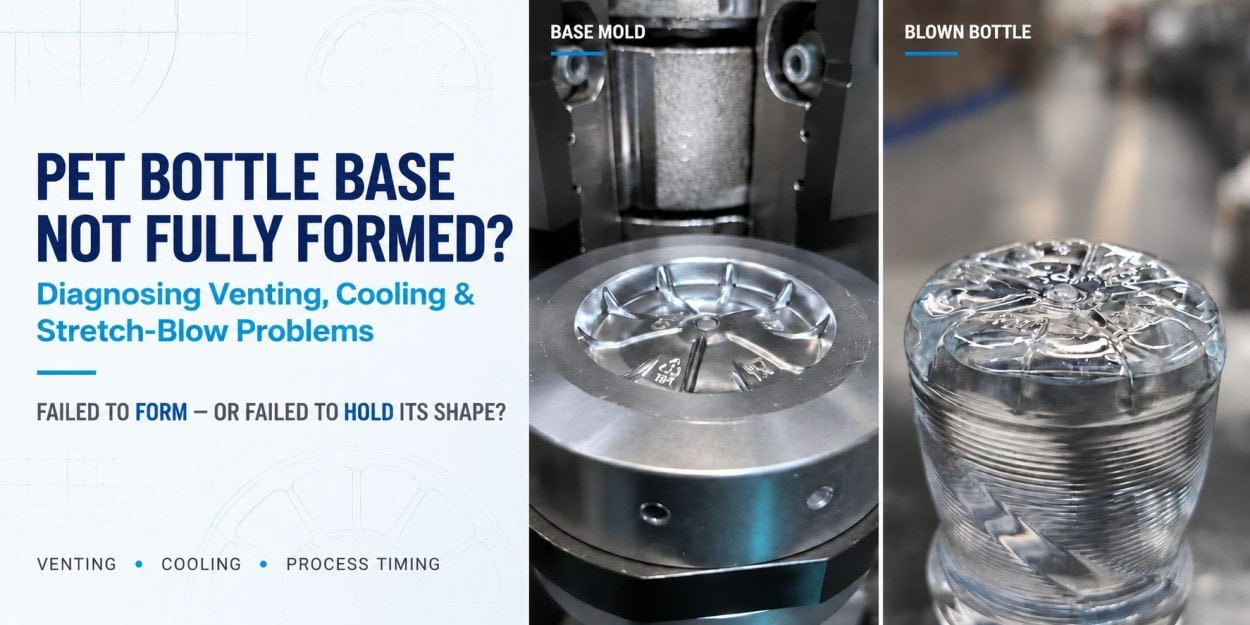
A well-known bottled-water company once contacted us about a PET bottle base that was not forming as clearly as expected. Some of the feet and recessed base details looked shallower and less defined than the corresponding geometry in the blow mold.
Their first suggestion was straightforward: add more vent holes to the base mold.
We did not modify the mold immediately.
An incomplete-looking PET bottle base does not automatically mean insufficient mold venting. Before changing the base mold, we first need to determine whether the PET never reached the cavity surface correctly, or whether it reached the surface but could not retain the shape after the mold opened.
Those two defects can look similar in a finished bottle, but their causes and corrective actions are very different.
If trapped air prevents the PET from reaching the deepest base details, venting deserves close attention. If the bottle base forms inside the mold but remains too hot when released, additional vent holes will not correct the underlying cooling problem. If insufficient material reaches the feet in the first place, the investigation may need to move further upstream to preform end-cap stretching, heating, stretch-rod motion, or material distribution.
This is why we normally evaluate a bottle-base problem as a system involving base geometry, venting, material distribution, stretching, blowing, cooling, and production speed, rather than assuming that every poorly defined base requires another hole in the mold.
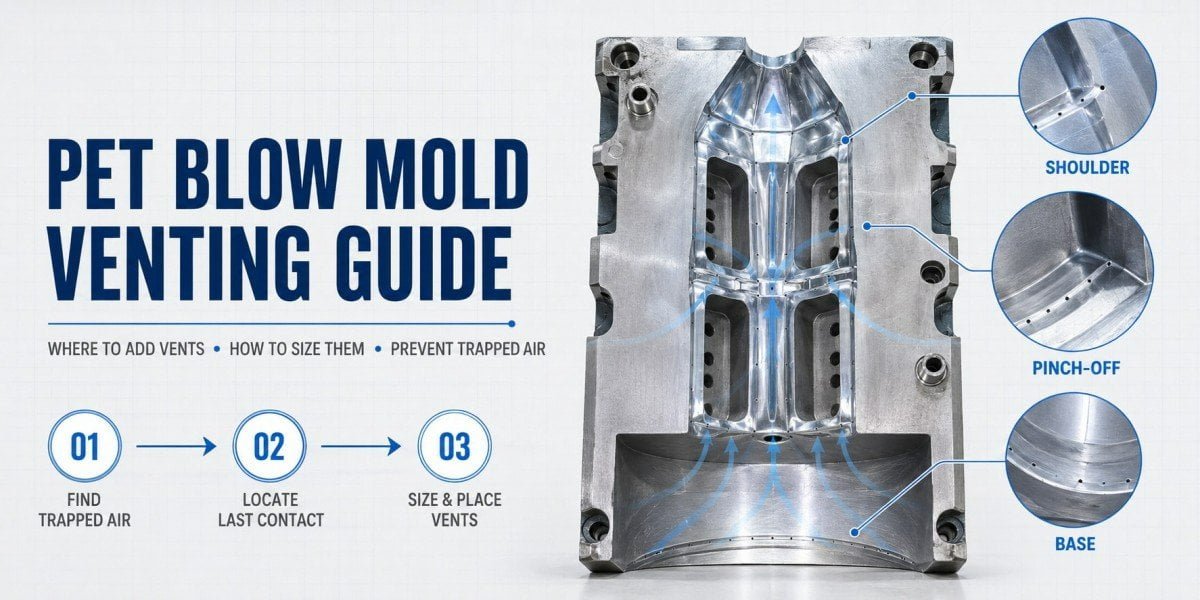
Why We Did Not Immediately Add Vent Holes to the Customer’s Base Mold
The customer’s concern about venting was reasonable, but the finished bottle alone could not prove that trapped air was the root cause. A base can look under-formed because PET did not reach the mold, because it reached the mold too late, or because the hot material lost definition after release.
The customer’s rotary blow mold had a relatively detailed base geometry. The feet, valleys, and curved transitions had to be reproduced clearly if the bottle was to match the approved design.
When the customer compared the molded bottle with the metal base insert, some bottle areas did not appear as full or sharply defined as expected.
It was natural to suspect air trapping.
During high-pressure blowing, the PET moves toward the cavity while the air already occupying the space between the expanding bottle and the mold surface must escape. Deep bottle-base geometry can create areas where that air has a more difficult escape path.
However, there was another possibility.
The PET might have reached the base surface correctly while still inside the closed mold, but the material could have remained too warm when the bottle was released. The base would then relax or deform slightly after opening, making the final bottle appear as though it had never been completely formed.
There was also a third possibility: the right amount of PET might not have reached the affected base region at all.
That would move the investigation away from venting and toward preform geometry, end-cap temperature, stretching, and material distribution.
The first diagnostic question was therefore not:
“Where should we drill another vent?”
It was:
“Did the PET fail to form the base, or did the formed base fail to hold its shape?”
That distinction should be made before machining an already completed blow mold.
Did the Base Never Fully Form, or Did It Deform After the Mold Opened?
This is the most important diagnostic separation. If PET never reaches the deepest base details, investigate forming conditions such as venting, material distribution, stretching, and final blowing. If the base looks correct in the mold but loses definition after release, cooling and thermal stability become more important.
A finished bottle only shows the final result. It does not directly show at which moment in the stretch-blow cycle the geometry was lost.
For this reason, we try to combine the bottle appearance with process observations.
| Observation | More Likely Diagnostic Direction |
|---|---|
| The same deep groove or foot is consistently shallow immediately after blowing | Venting, local geometry, material distribution, final blow |
| One local feature repeatedly fails while surrounding areas form correctly | Local air trapping, geometry, vent path, local material distribution |
| The base appears acceptable at mold opening but changes shortly afterward | Base cooling, mold temperature, thermal relaxation |
| Reducing production speed noticeably improves base definition | Cooling capacity or available cooling time |
| Increasing an appropriate pressure-hold period improves definition | Final forming conditions and time against the cavity |
| Several feet appear generally rounded rather than one isolated feature | Overall process, temperature, cooling, material distribution |
| Base wall thickness differs strongly from foot to foot | Preform stretching, centering, heating, or material distribution |
| Only one station on a rotary machine shows the defect | Local mold venting, cooling, station condition, or mechanical issue |
| The same defect appears across many stations | Common process, preform, heating, pressure, or cooling condition |
This distinction is also important because PET bottle-base defects can have very different mechanisms.
For example, a base that rolls outward after filling is not the same defect as a base that never replicated a deep cavity feature. We discuss that different mechanism in our guide to PET bottle base rollout and rocker-bottom problems.
Similarly, if the injection gate remains within the base but is displaced away from the center, the investigation should follow a different path. Our article on PET bottle bottom gate eccentricity focuses specifically on that condition.
For the customer in this case, the first objective was therefore to determine when the base definition was being lost.
Only then could we decide whether the mold itself needed modification.
How Can Poor Venting Prevent the PET Base From Reaching the Mold Surface?
Venting becomes important during the final stage of cavity replication. As the expanding PET approaches the base insert, the air trapped between the plastic and the metal surface must escape. If the escape path is restricted, the remaining air can resist the final movement of PET into deep feet, narrow grooves, or local recessed details.
During stretch blow molding, the bottle cavity initially contains air.
As the hot preform stretches and expands, PET progressively occupies that cavity volume. Near the end of the forming stage, only a relatively small space remains between the PET and the mold surface.
That final space still contains air.
On a simple cylindrical wall, the air may escape relatively easily through the mold parting line and designed venting features. A complex bottle base is more difficult.
The foot geometry can create enclosed or nearly enclosed regions. Narrow valleys can become the last areas reached by the expanding PET. If air cannot leave those locations quickly enough, the plastic has to compress the trapped air before it can fully contact the metal surface.
The resulting bottle may show a foot that looks rounded, a groove that does not reach its intended depth, or a small region that repeatedly appears less sharply formed than the surrounding base.
This is why established bottle-base technologies combine base geometry and dedicated venting rather than treating them as separate issues.
Sidel describes its StarLITE-R bottle base for CSD as using a combination of grooves and venting holes to support high-precision base-foot formation. Its StarLITE-R STILL technology also combines optimized venting with controlled material stretching and base cooling rather than relying on pressure alone.
That does not mean that every incomplete bottle base needs additional vent holes.
The first practical step is to inspect the venting that already exists.
A small vent that worked correctly when the mold was new can become partially restricted by contamination. Air paths can also be affected by deposits, insufficient cleaning, or changes at interfaces around the base insert.
For this reason, preventive mold maintenance matters even when the cavity itself still looks visually acceptable. Our PET blow mold preventive maintenance guide explains why cleaning, vent condition, cooling passages, and tooling surfaces should be checked systematically rather than only after visible bottle defects appear.
If an existing vent path is restricted, drilling another hole can mask the maintenance problem instead of correcting it.
The defect location should also correspond logically to an air-trapping location.
If one deep valley repeatedly remains under-formed while adjacent geometry is complete, a local venting issue is more plausible than if the entire base is uniformly soft and rounded.
Venting should be modified because the evidence identifies trapped air—not simply because the bottle base looks imperfect.
Why Are More Vent Holes Not Automatically Better?
A vent hole is a functional mold feature, not a general-purpose correction. Adding more holes without identifying the actual air-trap location can create unnecessary mold changes while leaving the real cause untouched.
The customer in our case originally wanted additional holes because the base details looked incomplete.
Before making that change, we needed to consider what would happen if the real problem were cooling.
The new holes would not significantly reduce the PET temperature at mold opening.
If the real problem were inadequate end-cap material distribution, new holes would not move PET from the center or sidewall into an under-supplied foot.
If the base geometry itself required an unrealistic local stretch, additional holes would not fundamentally change that stretching requirement.
Even when venting is confirmed as part of the problem, its location is more important than simply increasing the number of holes.
The objective is to provide an escape path at the locations where air becomes trapped during the last stage of bottle formation.
This is particularly relevant in a complex base because not every cavity feature reaches final contact at the same time.
The correct mold modification should therefore follow the actual forming behavior.
We generally prefer the following logic:
Observe the defect → identify the last-forming area → inspect the existing air path → confirm that venting is restricted → then decide whether venting should be cleaned, optimized, or modified.
This approach protects the mold from unnecessary machining and gives a much better chance of correcting the actual defect.
Why Can Poor Base Cooling Make a Fully Formed Bottle Look Under-Blown?
Venting helps PET reach the mold surface. Cooling helps PET retain the geometry after it reaches the mold surface. If the base remains too warm when the mold opens, a correctly formed feature can partially relax, shrink, or distort after release.
This is one of the main reasons we did not want to treat the customer’s problem as venting alone.
PET does not become dimensionally stable at the exact instant it touches the mold.
The hot material must transfer heat into the mold surface while it remains constrained by the cavity geometry.
The bottle base can be especially demanding because the end-cap region of the preform often carries a relatively high concentration of material. The injection gate area and surrounding base can therefore cool differently from thin bottle-body regions.
Complex feet also contain tight transitions and varying wall distributions.
Sidel’s StarLITE-R base technology uses both an external base-mold cooling circuit and internal base cooling. The company specifically describes the external circuit as focusing on warmer bottle-base zones. This is a useful example of why base cooling is treated as a dedicated engineering problem rather than simply assuming that general mold cooling is sufficient.
KHS has also publicly emphasized rapid cooling of the base area in high-speed PET production. Its technical discussion of bottle-base cooling points out that the bottle leaving a stretch blow molder can still be hot and that complex base regions need effective stabilization before subsequent handling.
The practical implication is straightforward.
Suppose the PET successfully reaches the deepest foot in the mold.
At that moment, the bottle looks correct.
If the material is still too soft when the mold opens, the geometry is no longer fully constrained by the metal cavity.
The foot can then relax slightly.
A sharp local detail can become rounder.
A valley can become shallower.
The final bottle can therefore look similar to a bottle that never reached the bottom of the mold.
But the corrective action is completely different.
Adding vent holes helps trapped air escape. It does not provide the missing thermal stabilization.
This is why one of the most useful principles in base troubleshooting is:
Venting helps the PET reach the mold. Cooling helps the PET keep the shape after it reaches the mold.
Can Production Speed Expose a Base-Cooling Problem?
Yes. If a bottle base forms acceptably at lower output but loses definition as the machine runs faster, cooling capacity and effective cooling time should move higher on the diagnostic list. This does not prove that cooling is the only cause, but it provides strong process evidence.
Production speed changes more than the number of bottles produced per hour.
As the cycle becomes shorter, the available time for stretching, forming, pressure holding, and cooling has to be managed more tightly.
A bottle base that has a comfortable process window at lower speed may become sensitive when the machine approaches a higher production rate.
This is particularly relevant when the base contains heavier local material or complex feet.
The cooling system must remove enough heat within the available cycle so that the geometry remains stable after release.
If cooling performance is already marginal, increasing machine speed can expose the problem.
The diagnostic value of a controlled speed reduction is therefore significant.
When we troubleshoot this type of defect, a temporary test at a lower output can provide useful information. If the base becomes noticeably sharper and more stable while the main bottle design, preform, and mold remain unchanged, the cooling system deserves closer inspection.
That inspection should not stop at checking whether hoses are connected.
Water entering a mold does not automatically mean the base insert is being cooled effectively.
The actual inlet temperature, return temperature, flow condition, internal passage cleanliness, circuit balance, and local heat-transfer condition all matter.
A partially restricted base-cooling circuit can still show water at the return line while providing less cooling than intended.
The same principle applies to industrial scale-up.
A mold that produces acceptable bottles during a slow sample trial can still reveal cooling limitations when the customer moves to the intended production output.
This is why we do not approve a high-speed bottle only because the first few samples look correct.
The process must be stable at the required production condition.
Can More Cooling Time Solve Every Base-Formation Problem?
No. A slower cycle can reveal whether thermal stabilization is important, but it cannot correct a base that never received enough material or a cavity region blocked by trapped air. Cooling time is a diagnostic variable, not a universal repair.
This distinction prevents another common troubleshooting mistake.
Once an operator sees that reducing speed improves the base, it can be tempting to conclude that the problem is solved by simply running more slowly.
That may be acceptable during diagnosis, but production economics often require the original target output.
The real engineering question then becomes why the bottle needs more cooling time than expected.
The base mold may have insufficient flow.
The coolant temperature may be too high.
A local passage may be restricted.
The preform may be carrying excessive material into the base, increasing the thermal load.
The bottle-base geometry may also concentrate material in areas that are difficult to cool.
In other words, the test result points toward the thermal side of the system, but the final solution may involve the cooling circuit, material distribution, base design, or a combination of those factors.
A robust production solution should restore an acceptable process window rather than simply slowing the machine indefinitely.
Can Preform End-Cap Stretching Cause a Bottle Base to Look Incomplete?
Yes. The bottle base cannot form correctly if the required PET material never reaches the correct base regions. In that situation, additional venting or higher blow pressure may have limited effect because the problem started earlier during preform heating and stretching.
The bottom of a finished PET bottle is created largely from material originating in the lower preform body and end-cap region.
That material must be redistributed during stretching and blowing.
The movement is not automatically uniform.
The stretch rod controls axial stretching, while the preform temperature profile influences where the PET begins to deform and how readily different sections move.
If the end-cap region is too cold, too thick, poorly stretched, or not correctly controlled, material distribution around the finished base can become uneven.
One foot may receive sufficient material while another is thin.
Material may remain concentrated around the gate.
Some base regions may arrive late at the mold surface.
In a severe case, the injection gate itself may become displaced, which is why gate position is also a useful diagnostic observation.
Sidel’s StarLITE-R engineering is a useful industry example because it does not treat venting alone as the base-forming solution. Its published design combines an optimized mold-base profile, controlled material distribution, an advanced stretch-rod end design, venting, and dedicated cooling.
That system-level approach matches what we see in real bottle troubleshooting.
If a base foot does not form well, we want to know whether the PET was physically available in the right place before assuming that air could not escape.
This is particularly important for lightweight bottles.
When bottle weight is reduced, there is less material available to compensate for poor distribution. The preform, heating profile, stretch behavior, and base geometry therefore become more closely linked.
Our PET bottle lightweighting guide explains why reducing gram weight should be accompanied by structural and process evaluation rather than treated as an isolated material reduction.
The same principle applies here:
More blowing pressure cannot compensate for PET material that never arrived where the base design needs it.
Why Does Stretch-Rod Control Matter to Bottle-Base Formation?
The stretch rod helps determine how the preform end-cap moves during axial stretching. If the rod position, stroke, timing, or end interaction is incorrect, the bottle base can receive an uneven or poorly controlled material distribution before final blowing begins.
A good bottle base starts forming before the PET touches the base insert.
The material distribution is already being established during stretching.
If the stretch rod is not centered relative to the preform and mold, the end-cap movement can become asymmetric.
If the rod timing is unsuitable, the preform may begin radial expansion before the bottom material has developed as intended.
If the effective stroke does not match the bottle and preform combination, the relationship between axial stretch and radial expansion changes.
These conditions can influence both gate position and base-foot thickness.
A visual inspection of the finished bottle base can therefore provide useful clues beyond simple mold replication.
We compare the gate location, foot definition, local thickness, and symmetry.
If every foot is similarly rounded, the cause may be different from a base where one side receives substantially more material than the other.
The latter condition may justify checking stretch-rod alignment, preform centering, or heating symmetry before any base-mold machining is considered.
For a dedicated discussion of a gate that remains inside the base but is displaced from center, see our PET bottle off-center gate troubleshooting guide.
How Do Blow Pressure and Holding Time Affect Base Definition?
Final blow pressure helps push the stretched PET against the cavity, while the time spent under forming pressure helps maintain intimate mold contact during shape replication and cooling. However, more pressure cannot replace venting, material distribution, or thermal stabilization.
High-pressure blowing is an obvious variable when a bottle does not fully reproduce the mold surface.
That makes it one of the first parameters operators often want to increase.
Sometimes this direction is justified.
If the actual pressure reaching the blow station is lower than the required process condition, the bottle may not make sufficiently firm contact with the cavity.
Pressure build-up that is too slow can also affect the final stage of formation.
Insufficient time at the final forming condition may reduce the opportunity for the base to reach full definition and transfer heat to the mold.
However, the symptom must be interpreted correctly.
If trapped air is blocking a deep foot, adding pressure means the PET is being pushed harder against an air pocket that still has no effective escape route.
If cooling is insufficient, a higher pressure can make the bottle look excellent while the mold remains closed, but the base may still relax after release.
If PET material is missing from the affected region, pressure cannot create material that is not there.
This is why Sidel’s StarLITE-R STILL example is technically interesting. The company reports that optimized base venting allows its design to use lower blowing pressure while maintaining base formation. That demonstrates an important principle: improving the path for trapped air can sometimes be more effective than simply applying more force.
For troubleshooting purposes, we think of the relationship this way:
Pressure pushes the PET toward the mold. Venting allows displaced air to leave. Cooling stabilizes the geometry after contact.
Those three functions support each other, but they are not interchangeable.
Can Bottle-Base Geometry Itself Be Too Difficult to Form Reliably?
Yes. Some base details create demanding stretch distances, narrow valleys, sharp transitions, or local material concentrations that make the process unnecessarily sensitive. A mold can reproduce the CAD geometry perfectly in metal and still require design refinement for stable PET blowing.
This is especially relevant when a bottle base is developed primarily from an appearance or structural concept without enough consideration of PET stretch behavior.
Deep feet may increase the distance the material has to travel.
Very narrow grooves can become difficult final-contact areas.
Abrupt radii can make it harder for PET to distribute smoothly into the feature.
A detail that forms during a slow trial may become less stable at production speed.
This does not mean complex bottle bases should be avoided.
It means that their geometry should be developed together with the expected preform, bottle weight, blowing machine, and production output.
When we evaluate a bottle drawing, we prefer to identify these risks before the blow mold is manufactured.
Changing a CAD radius before machining is much simpler than repeatedly modifying the base insert after the production mold has been completed.
The same principle is used in other difficult PET geometries. Our article on rings and cold-stretch marks around PET bottle bottoms discusses another example where the final visual defect can only be understood correctly by considering material behavior and the blowing process, rather than blaming the metal mold surface alone.
How Can You Distinguish Venting, Cooling, and Material-Distribution Problems?
No single visual sign is sufficient in every case, but combining cavity comparison, speed testing, temperature behavior, base-wall distribution, and defect location can greatly narrow the diagnosis before the mold is modified.
| Diagnostic Test | If the Bottle Improves | What It Suggests |
|---|---|---|
| Clean and inspect existing base vents | Local detail becomes sharper | Existing vent path was restricted |
| Reduce machine speed while keeping major settings comparable | Base retains definition better | Cooling capacity or thermal stabilization deserves attention |
| Increase appropriate final forming/holding condition within machine limits | Base reaches cavity more completely | Final forming pressure or contact time may be insufficient |
| Compare wall thickness around all base feet | Strong asymmetry is found | Material distribution, stretch rod, heating, or centering |
| Compare multiple rotary stations | One station repeatedly differs | Local mold, venting, cooling, or station-specific condition |
| Compare bottle immediately at release and after short cooling | Shape changes after release | Thermal relaxation or insufficient cooling |
| Inspect gate position | Gate is displaced or unstable | Stretching, centering, end-cap control, or material distribution |
| Check coolant flow through the base circuit | Flow or temperature difference is abnormal | Base cooling system requires attention |
No single test should be treated as proof by itself.
For example, slowing the machine can improve both cooling time and some timing relationships. It therefore tells us where to investigate, but it does not automatically identify a blocked cooling channel.
Similarly, increasing final blow pressure may improve mold contact even when venting is marginal. That does not mean higher pressure is necessarily the most efficient permanent solution.
The purpose of diagnosis is to reduce uncertainty before metal is removed from the mold.
What Should Be Checked Before Adding Vent Holes to a PET Blow Mold Base?
Before modifying an existing base insert, confirm whether the defect is cavity-specific, whether the existing vent path is clear, whether cooling is effective, and whether the required PET material actually reaches the affected region. Only after these checks should new venting be considered.
For a rotary machine, cavity comparison is often one of the fastest ways to begin.
If one station produces an under-formed base while the remaining stations are acceptable with the same preform and central process settings, the local base insert deserves close attention.
Its vents may be restricted.
Its cooling flow may be different.
The base insert may have a local condition that does not exist in the other stations.
If every station shows almost the same incomplete geometry, a common process variable becomes more plausible.
The next step is to inspect existing venting.
Vents and air escape paths should be clean and open. The technician should also look at whether the suspected air-trap position corresponds to the defect location.
Cooling should then be checked as a real operating system rather than only by confirming that water hoses are connected.
The base circuit needs suitable flow and temperature under production conditions.
A controlled lower-speed test can help determine whether more thermal stabilization significantly changes the bottle.
Material distribution should also be inspected.
The gate position and base-wall thickness can show whether PET is arriving symmetrically and whether one region has been starved while another retains excessive material.
Only after these factors have been evaluated should the technician decide whether additional venting is justified.
A practical troubleshooting sequence is therefore not:
“The base is incomplete, so drill another hole.”
It is:
“Identify whether air, heat, material, pressure, or geometry is preventing the base from achieving and retaining the intended shape.”
That process takes more time at the beginning, but it reduces the risk of modifying an expensive production mold for the wrong reason.
What Did This Customer Case Teach Us?
The customer’s request to add vent holes was technically possible, but machining the base immediately would have skipped the most important diagnostic step: proving whether trapped air was actually responsible for the poor base definition.
The customer was comparing a detailed metal base insert with a bottle whose feet and grooves did not appear equally sharp.
From the customer’s perspective, the logic was understandable.
The mold has detailed geometry.
The bottle does not reproduce all of it.
Therefore, the mold must need more venting.
But PET blow molding has another layer.
The cavity defines the final shape, but the process determines whether hot PET can reach that shape and retain it.
The material must first arrive in the correct base region.
The trapped air must escape.
The final blow must provide adequate cavity contact.
The base must then cool sufficiently before it is released.
A weakness in any of these stages can create a bottle that looks under-formed.
This is why, from our manufacturing perspective, we prefer to diagnose the process before changing the metal.
The customer does not benefit from receiving a base mold with more holes if the real bottleneck is inadequate cooling.
The customer also does not benefit from increasing cooling capacity if the end-cap material never reaches the foot correctly.
The goal is not to make a mold modification.
The goal is to make a stable bottle at the required production speed.
How Should a New PET Bottle Base Be Validated Before Mass Production?
A new base should be approved under the intended production conditions, not only from a few visually acceptable samples. The validation should confirm geometry, material distribution, gate position, cooling stability, cavity consistency, and performance after the bottle leaves the mold.
For a detailed base, we want to see that the foot geometry is repeated consistently rather than appearing only on selected samples.
The gate should remain where the bottle design and process require it.
The bottle should stand as intended.
The base should not change significantly after it leaves the blow mold and continues cooling.
If the production machine is rotary, cavity-to-cavity comparison becomes especially important.
A bottle that works on most stations but repeatedly fails on one station is not yet a stable production solution.
Likewise, a bottle that looks excellent during a low-speed trial but loses base definition at the customer’s target output still requires additional engineering work.
The validation should therefore reflect the conditions under which the customer actually intends to manufacture the bottle.
This is especially important for lightweight water bottles, where low material weight, high production rate, and base stability must coexist within a relatively narrow process window.
FAQ
Why Is My PET Bottle Base Not Fully Formed?
A PET bottle base can look incomplete because trapped air prevents PET from reaching the deepest mold details, because insufficient material reaches the affected region, because final forming conditions are inadequate, or because the base remains too hot and loses definition after mold opening. The finished appearance alone is not enough to identify the root cause.
Will Adding More Vent Holes Improve PET Bottle Base Formation?
It can help when a genuine local air trap is preventing PET from contacting the base insert. However, additional venting will not correct insufficient cooling or poor material distribution. Existing vents should first be inspected for restriction, and the defect location should be compared with the likely air escape path before the mold is modified.
Can Poor Cooling Make a PET Bottle Base Look Under-Blown?
Yes. The PET may reach the cavity correctly but still be too warm when the mold opens. The base can then relax or distort, reducing the definition of feet and recessed features. This is why high-performance PET base designs often use dedicated base cooling in addition to venting.
Can Reducing Blow-Molding Speed Help Diagnose the Problem?
Yes. A controlled lower-speed trial can provide useful evidence. If the bottle base becomes noticeably more stable when more cooling time is available, the cooling system and thermal stabilization should be investigated more closely. The test does not prove that cooling is the only cause, but it can narrow the diagnostic direction.
Should I Increase Blow Pressure When the Base Feet Are Not Fully Formed?
Not automatically. Higher pressure may improve final mold contact when the actual forming pressure is insufficient, but it cannot replace an effective air escape path, correct material distribution, or adequate cooling. The underlying cause should be identified before making pressure increases the permanent solution.
Conclusion
A PET bottle base that looks incomplete does not give us enough information to say:
“Add more vent holes.”
The customer case in this article is a good example of why.
The initial suspicion of insufficient venting was reasonable, but modifying the base mold before checking the rest of the system would have been premature.
A stable PET bottle base depends on several connected conditions.
The preform end-cap must deliver material to the required regions.
Stretching must control that material correctly.
High-pressure blowing must bring the PET into intimate contact with the mold.
Trapped air must have a path to escape.
The base must then remove enough heat for the geometry to remain stable after the mold opens.
If any one of those conditions is weak, the bottle can appear less defined than the metal cavity from which it was produced.
For this reason, our approach is to determine first whether the base failed to form or failed to retain its formed shape.
That single distinction can prevent unnecessary mold modification and direct troubleshooting toward the real process limitation.
Venting helps PET reach the mold. Cooling helps PET retain the shape. Material distribution determines whether enough PET reaches the right place in the first place.
Before changing a finished PET blow mold base, we recommend comparing cavities, checking the existing vent paths, verifying base cooling, reviewing gate position and wall distribution, and evaluating the bottle at both reduced and normal production speeds.
If you are troubleshooting a PET bottle base that does not fully reproduce the mold geometry, provide the bottle and preform drawings, bottle weight, preform weight, machine model, cavity number, target output, photos of the base mold and finished bottle, gate position, blow settings, and available cooling information. These details make it much easier to determine whether the next step belongs in the mold, the process, the cooling system, or the preform.
Related PETMOLDER Articles
- PET Bottle Base Rollout Analysis: A 6-Step Guide to Fixing Center Gate Bulging and Rocker Bottoms
- Bottom Gate Off-Center? A 6-Step Protocol to Fix PET Bottle Eccentricity
- Rings on PET Bottle Bottom? A Guide to Fixing Cold Stretch and Chatter Marks
- PET Blow Mold Preventive Maintenance: A Complete Guide for Aluminum and Stainless Steel Tooling
- PET Bottle Lightweighting: A 7-Step Engineering Guide to Reducing Weight Safely