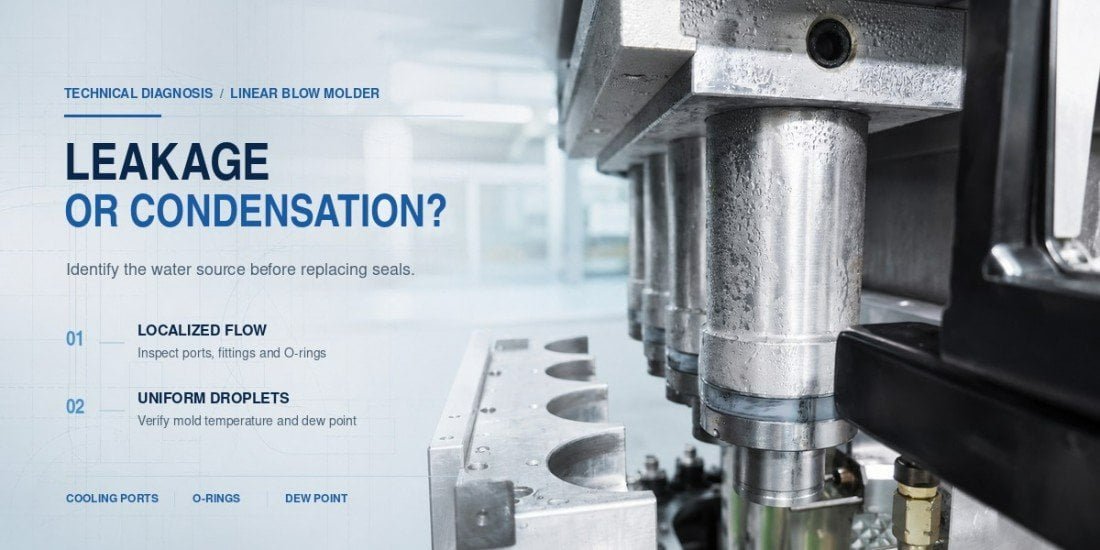
Water appearing on the surface of a PET blow mold does not automatically mean the cooling circuit is leaking. On a linear PET blow molder, the moisture may come from a loose connection, a damaged seal, a machine-side water line, an internal cooling passage, or simply condensation on a cold metal surface.
Before disassembling the mold, the most important step in PET blow mold water leakage troubleshooting is to identify where the water is actually coming from.
This distinction matters because leakage and condensation require completely different corrective actions.
A genuine cooling water leak normally has an identifiable source. Water may continuously appear from one connector, sealing area, joint, or cooling passage.
Condensation behaves differently. When a cold mold surface is below the dew point of the surrounding factory air, moisture in the air can condense across a much larger area of the mold. In that situation, the mold may appear to be “leaking” even when the internal cooling circuit is completely sealed.
We recently encountered exactly this situation with one of our customers in Thailand. What initially looked like a newly manufactured mold leaking water was eventually traced to unusually cold cooling conditions rather than a damaged mold.
The case is discussed later in this article because it shows why finding the water source should come before deciding who or what is responsible for the problem.
Is the PET Blow Mold Actually Leaking—or Is It Condensation?
The first diagnosis should separate a localized water source from moisture forming across the cold mold surface. Water continuously emerging from one fixed location is more consistent with leakage, while fine droplets developing over a broad low-temperature metal area suggest that condensation should be investigated first.
When a customer sends us a photograph of a wet mold, it is often impossible to make a reliable diagnosis from the photograph alone.
Once water has spread across the mold surface, it may run along the aluminum, follow a parting surface, collect around screws, or drip from one metal component onto another. The location where the water is visible may therefore be different from the location where it first appeared.
This is why a wet mold should not immediately be dismantled.
The first question should be:
Is the water coming from inside the cooling system, or is it forming from moisture in the surrounding air?
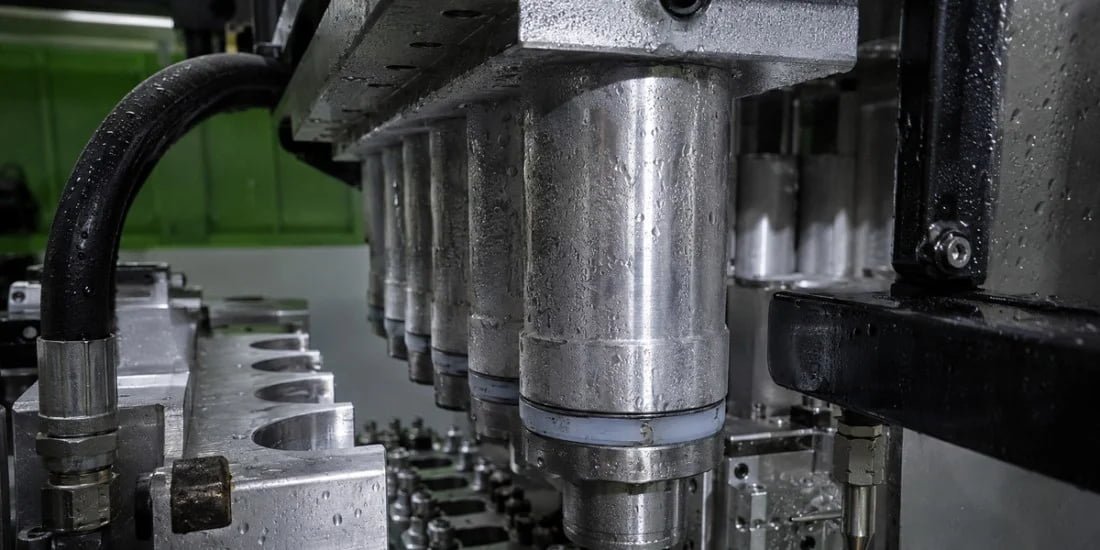
A simple visual comparison can help the operator decide where to investigate first.
| Field Observation | More Likely Direction | First Check |
|---|---|---|
| Water continuously appears from one fixed point | Connector, seal, or cooling circuit leakage | Dry the area and identify the exact point where water first appears |
| One joint or interface remains continuously wet | Seal or water connection problem | Inspect the sealing area after stopping the machine safely |
| Fine droplets appear across most of the mold surface | Condensation is more likely | Check cooling-water temperature, workshop temperature, and humidity |
| Water is dripping onto the mold from above | Machine-side hose, manifold, or external water source | Trace the water upward before inspecting the mold itself |
| Only one mold position is wet while adjacent positions remain dry under similar conditions | Localized mold or connection problem is more likely | Compare the cooling connections and sealing condition of that position |
| Several cold metal parts become wet at the same time | Environmental condensation should be considered | Check whether those surfaces are operating below the local dew point |
This initial distinction can save considerable troubleshooting time.
For example, replacing an O-ring will not stop condensation. In the same way, increasing the cooling-water temperature will not repair a damaged seal.
Correct diagnosis is therefore more important than immediate repair.
Why Does Condensation Form on a Cold PET Blow Mold?
Condensation forms when the temperature of the mold surface falls below the dew point of the surrounding air. Under hot and humid workshop conditions, a sufficiently cold mold can collect large amounts of water on its outer surface even when the internal cooling circuit has no leakage at all.
The basic mechanism is similar to what happens when a cold bottle is taken into a warm, humid room.
The water on the outside does not come through the bottle wall. It comes from water vapor already present in the surrounding air.
A PET blow mold can experience the same phenomenon.
Cooling water removes heat from the mold during production. If the cooling-water temperature is low enough, the aluminum or steel mold surface can become much colder than the surrounding factory environment.
Air close to that cold surface is then cooled.
If the surface temperature falls to or below the local dew point, some of the water vapor in the air condenses into liquid droplets.
The important point for troubleshooting is that the water can cover a large area even though the cooling channel itself is completely intact.
Why Is Condensation More Common in Some Factories?
The risk depends on the relationship between the mold temperature and the surrounding environment.
| Production Condition | Effect on Condensation Risk |
|---|---|
| High workshop temperature | Warmer air can create a larger temperature difference between the air and the mold |
| High relative humidity | More moisture is available to condense on the cold surface |
| Very low cooling-water temperature | Can pull the mold surface below the local dew point |
| Poor ventilation around the mold area | Moist air may remain concentrated around cold machine components |
| Multiple cold pipes and metal components becoming wet together | Often indicates an environmental condition rather than one isolated mold leak |
This is particularly relevant in warm, humid production environments.
A factory can have perfectly functioning cooling channels and still see substantial amounts of water on the mold exterior if the cooling system is operated too far below the ambient dew-point condition.
That is why simply seeing water is not enough evidence to conclude that the mold is defective.
The practical troubleshooting question is:
Is the water leaving the cooling circuit, or is the surrounding air depositing moisture on the cold mold?
The answer determines the next step.
Case Study: A “Leaking” New PET Blow Mold in Thailand Was Actually Condensation
In a recent Thailand project, our customer urgently reported that a newly supplied linear PET blow mold was leaking. During a video inspection, the mold surface was visibly wet, but there was no obvious single leakage point. The cooling-water setting was then checked and found to be 5°C. After changing the cooling condition and drying the mold, the apparent leakage disappeared.
Yesterday, I received an urgent call from one of our customers in Thailand.
He told me:
“Vivian, the new mold is leaking water.”
When a customer has just installed new tooling and sees water on the mold, it is understandable that the first concern is a manufacturing or sealing problem.
I first apologized for the trouble and asked him to show me the actual condition by video.
At that stage, I did not want to argue that the mold could not be the problem. Before seeing the water source clearly, neither side had enough information to make that conclusion.
During the video call, I could see moisture appearing on the outside of the mold.
However, I could not identify one specific location where water was continuously flowing out.
That detail was important.
If a connector, O-ring, or internal cooling passage were leaking significantly, we would normally try to locate a repeatable source. Instead, the visible moisture looked more distributed across the cold mold surface.
This made condensation a reasonable possibility.
I then asked the customer to check the chiller setting.
The displayed cooling-water temperature was 5°C.
In this specific factory environment, we suspected that the cooling setting was too low and was allowing the mold surface to become cold enough for moisture in the surrounding air to condense.
I asked the customer to change the cooling setting to 18–20°C for this troubleshooting test, wipe all visible water from the mold surface, and observe the mold again.
After the surface was dried and the system was operated under the adjusted cooling condition, the customer no longer saw water appearing from the mold.
The important findings from this project are summarized below.
| Item | Thailand Customer Case |
|---|---|
| Customer’s first diagnosis | Newly supplied mold was leaking |
| Machine type | Linear PET blow molding equipment |
| Initial visual condition | Water visible on the mold surface |
| Clear fixed leakage point found | No |
| Chiller setting observed during diagnosis | 5°C |
| Troubleshooting action | Adjust cooling condition and completely dry the mold surface |
| Temperature used during this specific test | 18–20°C |
| Result after adjustment | No further visible water seepage from the mold |
| Final troubleshooting direction | Condensation caused by excessively cold operating conditions was the likely cause |
The 18–20°C value above is not a universal PET blow mold cooling-water specification.
Suitable cooling conditions depend on the bottle, resin behavior, machine design, production speed, mold construction, cooling system, ambient temperature, and humidity.
The lesson is not that every operator should set a PET blow mold chiller to 18–20°C.
The lesson is:
When the mold is broadly wet but no fixed leakage point can be identified, cooling conditions and condensation should be checked before the mold is dismantled.
Where Does Real Cooling Water Leakage Usually Start?
When genuine leakage is present, troubleshooting should follow the cooling-water path instead of immediately opening the mold. Start where water enters the tooling, inspect the sealing and connection areas, follow the circuit through the mold, and then check the return side and machine plumbing.
On a linear blow molder, cooling water usually reaches the mold through a machine-side supply system.
The exact design varies between machine platforms, but the general logic is similar.
Water travels from the cooling system to the machine, from the machine to the mold connection, through the internal cooling passages, and then returns to the cooling system.
A leak can develop at any point along that path.
Start With the External Connections
Before considering internal mold damage, inspect the areas that can be reached and observed without dismantling the tooling.
Connections may become loose during installation, maintenance, transportation, or repeated mold changes.
A hose may also leak above the mold, allowing water to run downward and create the impression that the mold body itself is leaking.
This is especially easy to misdiagnose once the machine has been operating long enough for several surfaces to become wet.
Check the Sealing Areas
O-rings and other seals are common inspection points when a confirmed leak is close to a water connection or interface.
An O-ring can eventually become worn, compressed, cut, incorrectly installed, or damaged during repeated assembly.
From our manufacturing experience, this type of problem is often much simpler to resolve than a damaged internal cooling channel.
For this reason, we normally provide customers with spare sealing rings together with the mold shipment so that a worn seal can be replaced without waiting for a small spare part to arrive internationally.
However, even when spare O-rings are available, the correct sequence is still:
locate the leakage point first, then replace the relevant seal.
Replacing every seal without identifying the source can waste time and may introduce new assembly errors.
Continue Toward the Internal Water Circuit Only When Necessary
If the outside connections and seals are dry but water repeatedly appears from an unexpected location in the mold body, then the internal cooling circuit should be investigated.
Depending on the mold structure, a cooling passage problem may involve damage around a drilled channel, plug, insert, interface, or other sealed section.
At that stage, an independent cooling-circuit test becomes much more useful than visual inspection alone.
How Can You Locate the Exact Source of the Water?
The most reliable field method is to start with a completely dry mold and observe where water first appears. Once the mold is already wet, flowing water can travel along metal surfaces and make the apparent leakage point very different from the true source.
This is one of the simplest troubleshooting methods, but it is also one of the most effective.
When a customer sends us a video of a mold that is already covered in water, we often ask for a second video beginning with a dry mold.
The first appearance of water contains much more diagnostic information than the final wet condition.
A practical troubleshooting sequence is shown below.
| Diagnostic Step | What to Observe | What the Step Helps Determine |
|---|---|---|
| Dry the mold, hoses, and nearby machine surfaces | Where the first droplet or wet area appears | Prevents flowing water from hiding the original source |
| Start the cooling circuit under controlled conditions | Whether water appears before blowing starts | Separates cooling leakage from production-motion effects |
| Observe the inlet and return connections | Whether one connection becomes wet first | Identifies loose fittings or local sealing problems |
| Compare neighboring mold positions | Whether only one position develops water | Helps distinguish a local problem from a common system condition |
| Inspect machine-side hoses and manifolds | Whether water is entering the mold area from above or outside | Prevents unnecessary mold disassembly |
| Monitor the whole cold surface | Whether fine droplets develop gradually over a large area | Supports a condensation diagnosis |
| Stop and isolate the affected cooling circuit if required | Whether the suspected circuit can hold under controlled testing | Helps verify an internal leakage problem |
Why Should the Mold Be Dried First?
Water follows gravity, capillary gaps, machined grooves, bolt areas, and parting surfaces.
A leak originating at a connection near the top of the mold may eventually appear near the lower mold base.
If an operator only looks at the final accumulation point, the wrong component may be removed.
Drying the equipment gives the investigation a new starting point.
Why Is a Multi-Cavity Linear Machine Helpful for Comparison?
A linear PET blow molder often gives the technician a useful reference: neighboring mold positions operating in the same general environment.
Suppose four mold positions are running with the same cooling system and only one position repeatedly develops a localized stream of water from the same connection.
That strongly directs attention toward the local tooling or connector.
Now consider a different situation in which every cold mold half, water hose, and nearby metal plate gradually becomes covered with fine droplets.
That observation points much more strongly toward environmental condensation.
Comparison does not replace testing, but it can reduce the number of possible causes quickly.
For readers working with different PET tooling formats, our guide to semi-automatic, fully automatic, and mechanically compatible PET blow molds explains why mold interfaces and machine structures should always be evaluated according to the actual blowing platform.
How Do You Check Whether the Internal Cooling Circuit Is Leaking?
If external observation cannot identify the source, the cooling circuit should be isolated and tested under controlled conditions. The purpose is to determine whether the circuit can maintain the expected test condition and whether water appears from any location that should remain dry.
Visual inspection is excellent for finding an obvious loose fitting or damaged external seal.
It is less effective when the suspected defect is inside the tooling.
For a more conclusive diagnosis, the mold cooling circuit can be separated from the normal production system and checked independently.
The exact testing arrangement depends on the mold and the equipment available at the factory, but the engineering principle is straightforward.
First, establish which water circuit is being tested.
Then introduce water or an approved test medium using controlled conditions.
Observe the connections and mold surfaces carefully.
If the test system includes pressure monitoring, check whether the circuit maintains the expected pressure condition without an unexplained loss.
If water appears from a location that is not part of the intended circuit, the inspection can then focus on that section.
Do Not Use Excessive Test Pressure
A common troubleshooting mistake is to assume that more pressure will make the leak easier to find.
That approach can create a new problem.
The test pressure must remain within the limits permitted by the mold structure, connections, seals, and machine or test equipment.
A pressure far above the intended operating or approved test condition can damage seals or connections that were not previously defective.
For this reason, we do not recommend a universal pressure number for all PET blow molds.
The suitable test condition should be determined from the actual mold design and equipment specification.
A basic diagnostic interpretation is shown below.
| Test Result | Likely Direction |
|---|---|
| External connector becomes wet immediately | Inspect connector installation and sealing |
| Water appears around a known O-ring interface | Inspect the O-ring and sealing surfaces |
| Circuit cannot maintain the expected test condition but no external water is visible | Continue inspecting concealed connections or internal passages |
| Water emerges from an unintended location in the mold body | Internal cooling circuit or sealed passage requires engineering evaluation |
| Circuit remains stable and mold stays dry during isolated testing | Investigate condensation or machine-side water sources |
| Several circuits show the same external moisture only under cold production conditions | Environmental condensation becomes more likely |
Independent circuit testing is especially useful before deciding to return an overseas mold to the manufacturer.
A remote diagnosis supported by good video, cooling data, and a controlled water-circuit test can often identify whether the next action is a simple seal replacement or a genuine tooling repair.
What Problems Can Water Around the Blow Mold Cause During Production?
Water around the mold should be investigated promptly, but its effect depends on the source. A real leak can disturb cooling performance and machine cleanliness, while heavy condensation can create persistent moisture around the tooling even though the internal cooling circuit is functioning correctly.
Not every droplet will immediately create a bottle defect, and the issue should not be exaggerated.
However, allowing an unidentified water problem to continue is not good production practice.
If the source is a real cooling leak, the machine may gradually lose cooling-water flow or pressure in the affected circuit.
That can change the thermal condition of the mold.
A PET bottle depends on repeatable heat removal during the final forming stage. If one cavity or mold position operates at a different temperature from the others, bottle cooling and dimensional stability may become less consistent.
The exact bottle effect depends on the bottle design and the severity of the cooling problem.
If dimensional instability or bottle deformation is also present, our PET bottle deformation troubleshooting guide provides a broader process-and-tooling diagnostic framework.
Water also affects the production environment.
Persistent moisture around hoses, sensors, machine structures, floors, or moving components can complicate housekeeping and make it harder for operators to distinguish a new leak from old water already present in the area.
Heavy condensation presents a different problem.
The mold may still cool correctly, but the production area remains continuously wet.
If the operator responds by repeatedly repairing seals that are not defective, maintenance time increases without solving the actual cause.
This is why leakage and condensation should never be treated as interchangeable diagnoses.
Should You Repair the Mold, Replace the Seal, or Adjust the Cooling Conditions?
The corrective action should match the confirmed cause. A loose connection should be corrected at the connection, a failed O-ring should be replaced, an internal cooling passage problem should be evaluated as a mold repair, and condensation should be addressed through cooling and environmental conditions rather than unnecessary mold machining.
Once the water source has been identified, the repair decision normally becomes much simpler.
| Confirmed Cause | Primary Corrective Direction | What Should Not Be Done First |
|---|---|---|
| Loose water connection | Reinstall or tighten the connection according to the machine/mold design and inspect sealing | Do not remachine the mold body |
| Damaged or worn O-ring | Replace the correct seal and inspect the mating surfaces | Do not change cooling temperature to hide an actual leak |
| Machine-side hose or manifold leak | Repair the machine cooling supply system | Do not assume the mold is defective |
| Internal cooling passage problem | Isolate the circuit and evaluate mold repair or component replacement | Do not continue raising test pressure |
| Condensation on cold mold surfaces | Evaluate cooling-water temperature, workshop humidity, air temperature, and dew-point conditions | Do not replace seals without evidence of leakage |
| Uncertain source | Dry, observe, isolate, and test again | Do not dismantle multiple components without a diagnostic sequence |
When Is an O-Ring Replacement Enough?
If the leakage point is clearly located at an O-ring sealed interface and the mold surfaces themselves are undamaged, replacement may be a straightforward solution.
The sealing surfaces should still be checked before the new O-ring is installed.
A new seal cannot compensate for a damaged groove, contamination, incorrect assembly, or a mechanical fit problem.
O-rings are also maintenance items.
During long-term production, their condition should be included in routine mold inspection rather than checked only after a visible leak develops.
Our PET Blow Mold Preventive Maintenance Guide discusses why cleaning, sealing surfaces, cooling passages, and general mold condition should be inspected systematically instead of only during emergency maintenance.
When Does the Mold Itself Need Repair?
Mold repair should be considered when testing confirms that water is escaping from the internal cooling structure or from a damaged mold component.
At that point, the repair method depends on the exact construction and location of the defect.
A local replaceable component may be repairable or replaceable without remaking the complete mold.
A damaged internal passage in a main mold component may require a more extensive engineering evaluation.
The decision should be made from drawings, photographs, test results, and the actual location of the leak.
When Should Cooling Conditions Be Adjusted?
If testing shows that the cooling circuit is sealed and water is developing broadly on the cold mold surface, changing the mold hardware may achieve nothing.
The production team should instead evaluate whether the cooling condition is unnecessarily low relative to the surrounding temperature and humidity.
In the Thailand case discussed earlier, this was exactly what happened.
The chiller was displaying 5°C. After the customer changed the setting to 18–20°C for that particular troubleshooting condition and dried the tooling, the apparent leak disappeared.
Again, that temperature should not be copied as a universal production standard.
The correct cooling condition must still support the bottle, machine, mold, and required production output.
Why Should Cooling Temperature Not Be Changed Blindly Just to Stop Condensation?
Raising cooling-water temperature may reduce condensation, but cooling is also part of bottle-forming stability. The correct solution is therefore not simply to make the mold warmer. The production team must balance condensation control with bottle cooling, mold temperature consistency, and required machine performance.
Condensation diagnosis should not create the opposite error.
Once an operator understands that cold molds can “sweat,” it may be tempting to raise the cooling temperature substantially whenever water appears.
That is not a reliable engineering strategy.
The mold cooling circuit exists for a reason.
The bottle needs to be cooled sufficiently before release from the mold, and the tooling temperature must remain stable enough for repeatable production.
If cooling conditions are changed significantly, the bottle should be checked again for dimensional stability, bottom definition, wall distribution, and other relevant quality requirements.
The correct sequence is:
first determine whether the water is condensation,
then identify why the surface is below the local condensation condition,
and finally adjust the process only within a range that remains suitable for the bottle and machine.
This is also why cooling settings should not be copied directly from another factory.
A machine operating in a dry, air-conditioned production room may behave very differently from the same type of mold running in a hot and humid workshop.
What Information Should You Send the Blow Mold Manufacturer for Remote Troubleshooting?
For overseas troubleshooting, a short video showing when and where the water first appears is usually more useful than a photograph of an already wet mold. Cooling conditions, machine position, connection details, and whether the problem continues when blowing stops can help the mold manufacturer narrow the diagnosis before any parts are shipped.
International mold service should begin with evidence, not with unnecessary logistics.
If a mold is already installed in Thailand, Saudi Arabia, Turkey, Mexico, Africa, or another overseas production site, returning the tooling to China should not automatically be the first step.
Many cooling problems can be narrowed down remotely if the customer provides clear information.
| Information to Send | Why It Helps the Mold Manufacturer |
|---|---|
| Video starting with a dry mold | Shows where the water first appears |
| Close-up of the first wet location | Helps identify whether the source is a connector, seal, mold surface, or external pipe |
| Machine brand and model | Provides context for cooling connections and mold installation |
| Exact mold position affected | Allows comparison with other stations on a multi-cavity linear machine |
| Whether neighboring molds show the same condition | Helps distinguish local leakage from a system or environmental problem |
| Cooling-water temperature | Helps evaluate whether condensation is plausible |
| Approximate workshop temperature and humidity if available | Provides additional dew-point context |
| Whether water appears with cooling only | Helps separate cooling leakage from blowing or machine-motion effects |
| Whether the problem continues after production stops | Helps determine how the water source behaves |
| Photos of O-rings and sealing surfaces if dismantling is necessary | Helps evaluate seal condition before new parts are installed |
A photograph taken after ten minutes of operation may show only that the equipment is wet.
A video beginning with a completely dry mold can show the actual sequence of events.
That difference is often enough to prevent unnecessary mold disassembly.
For a new machine and mold installation, the interaction between machine conditions, tooling installation, and commissioning should also be considered. Our article The Commissioning Trap: Why Your First Blow Mold Should Come From Your Machine Supplier explains why a tooling problem and a machine commissioning problem can sometimes appear similar during startup.
A Practical Troubleshooting Sequence for Linear PET Blow Molders
When water is found around a linear PET blow mold, troubleshooting should move from observation to isolation and only then to repair. The objective is to identify the simplest verified cause before changing seals, opening the mold, adjusting the cooling process, or returning tooling to the manufacturer.
The following sequence is the approach we recommend as a practical starting point.
| Stage | Action | Decision |
|---|---|---|
| 1. Observe | Check whether moisture is localized or spread across cold metal surfaces | Localized water suggests a source; widespread droplets suggest condensation should be considered |
| 2. Dry | Wipe the mold, connections, and surrounding machine surfaces completely dry | Creates a clean baseline |
| 3. Restart cooling | Observe where the first water appears | Identifies the earliest visible source |
| 4. Compare positions | Check adjacent molds under similar operating conditions | Separates local problems from common environmental conditions |
| 5. Trace externally | Inspect hoses, manifolds, supply and return connections | Rules out machine-side water |
| 6. Check seals | Inspect the relevant O-ring only after locating the suspected interface | Confirms whether seal replacement is justified |
| 7. Isolate circuit | Test the suspected mold cooling circuit separately | Verifies difficult internal leaks |
| 8. Check environment | Review chiller setting, ambient temperature, and humidity | Confirms whether condensation is plausible |
| 9. Apply the correct action | Repair connection, replace seal, repair cooling passage, or adjust suitable cooling conditions | Matches the repair to the verified cause |
| 10. Verify production | Dry again, run the machine, and inspect bottle quality and cooling stability | Confirms that the problem is actually resolved |
This procedure is intentionally conservative.
It avoids turning a simple condensation problem into unnecessary mold repair, while still providing a path for confirming a genuine cooling-circuit defect.
FAQ
Why Is There Water on My PET Blow Mold During Production?
Water on a PET blow mold can come from an actual cooling-water leak or from condensation.
If water repeatedly emerges from one connector, sealing area, or fixed point, a leak should be investigated.
If fine droplets gradually cover a large area of the cold mold and nearby metal parts, condensation is a strong possibility.
The first step should be to dry the equipment and identify where the water appears first.
How Can I Tell the Difference Between a Leaking Blow Mold and Condensation?
Look at the distribution and behavior of the water.
A genuine leak normally has a more identifiable source and may continue flowing from the same location.
Condensation tends to develop across cold surfaces without one obvious origin, especially under warm and humid factory conditions.
If the source remains unclear, isolate and test the cooling circuit rather than relying on appearance alone.
Can a Damaged O-Ring Cause PET Blow Mold Water Leakage?
Yes.
A damaged, worn, cut, incorrectly installed, or poorly sealing O-ring can allow cooling water to escape at an interface.
However, the leakage point should be confirmed before the seal is replaced.
Machine-side water or condensation can easily be mistaken for an O-ring problem if the mold is already completely wet.
For this reason, we normally supply spare sealing rings with our molds for maintenance and field replacement when a seal problem is confirmed.
How Do You Pressure-Test a PET Blow Mold Cooling Circuit?
The basic method is to isolate the relevant cooling circuit and test it under controlled conditions while monitoring whether the circuit remains stable and whether water appears from an unintended location.
The test pressure should follow the allowable conditions for the specific mold, seals, connections, and equipment.
Using excessive pressure simply to make a leak more visible is not recommended because it can damage components that were previously intact.
Do I Need to Send a Leaking PET Blow Mold Back to the Manufacturer?
Not necessarily.
A loose fitting, damaged O-ring, machine-side hose, or condensation problem can often be diagnosed and corrected at the customer’s factory.
Before arranging international shipment, send the mold manufacturer a video beginning with a dry mold, the exact water source if visible, machine information, cooling-water temperature, and the results of any controlled cooling-circuit test.
A clear leak diagnosis can often save an overseas customer from unnecessary mold disassembly or shipment.
Conclusion
Water on a linear PET blow mold should be treated as a diagnostic problem before it is treated as a repair problem.
A wet mold does not automatically mean that the internal cooling channel is damaged.
The water may be coming from a connection, an O-ring, a machine-side pipe, an internal cooling circuit, or the surrounding air.
Our recent Thailand case illustrates why this distinction matters.
The customer initially reported that his newly supplied mold was leaking. During our video inspection, however, there was no clear point where water continuously emerged. The chiller was found to be operating at 5°C. After the customer changed the cooling setting to 18–20°C for that specific troubleshooting test, dried the mold completely, and observed it again, the apparent leakage disappeared.
The conclusion was not that every PET blow mold should operate at 18–20°C.
The conclusion was that a cold mold can create enough condensation to look like a cooling-water leak.
When genuine leakage is confirmed, the same diagnostic discipline still applies.
Trace the water source before dismantling the mold. Check the external connections before assuming an internal channel is damaged. Inspect the correct O-ring before replacing every seal. If the visual inspection is inconclusive, isolate the circuit and perform a controlled water or pressure test within the allowable conditions of the tooling.
For overseas customers, good troubleshooting information can significantly shorten the service process.
If you are experiencing water around a linear PET blow mold, send us a video beginning with the mold completely dry, the machine model, the affected mold position, cooling-water temperature, connection details, and whether neighboring molds show the same condition. We can then help determine whether the next step should be a seal replacement, machine-side inspection, cooling adjustment, or mold repair.
Related PETMOLDER Articles
- PET Blow Mold Preventive Maintenance: A Complete Guide for Aluminum and Stainless Steel Tooling
- Comprehensive Troubleshooting: Why Do PET Bottles Deform After Blowing and How to Fix Them
- Semi-Auto vs. Fully Auto PET Blow Molds and Mechanical Compatibility
- The Commissioning Trap: Why Your First Blow Mold Should Come From Your Machine Supplier
- Custom Blow Molds: 4 Reasons Your New Mold Won’t Fit Your Blowing Machine