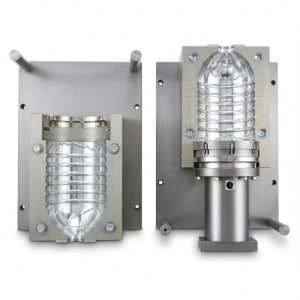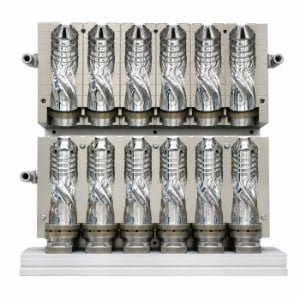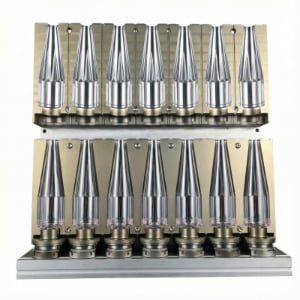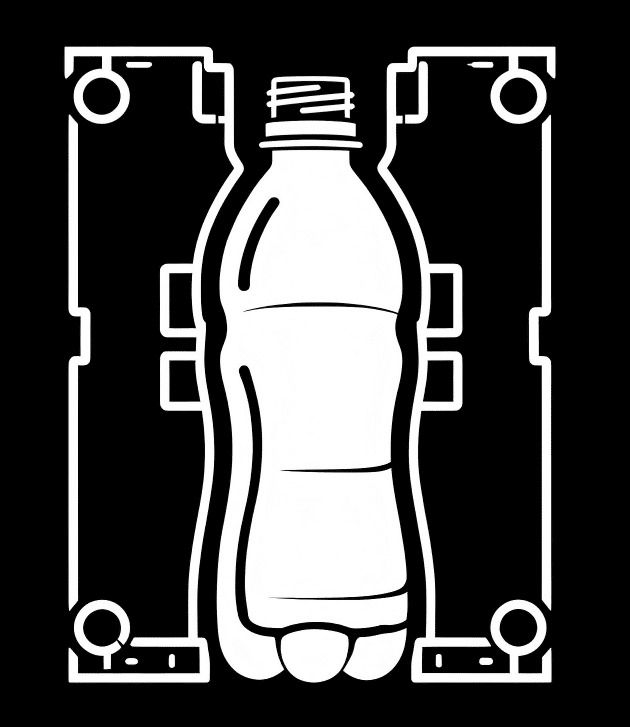
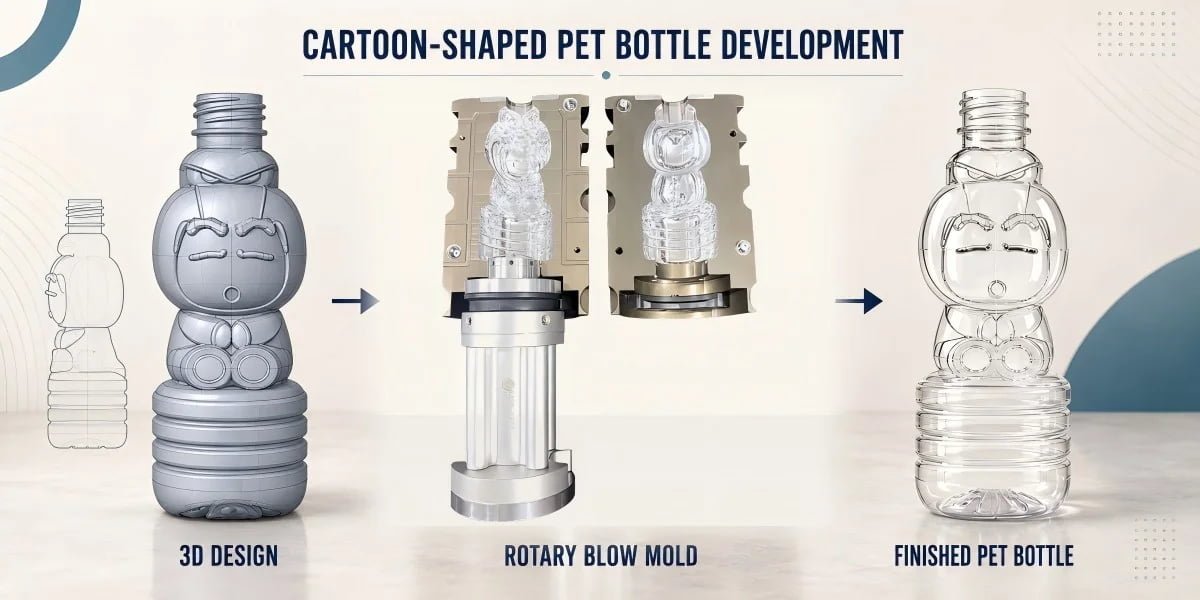
A cartoon character can look excellent in a rendering and still be unsuitable for stable PET bottle production. A face, hairstyle, arm, dress, or leg may be easy to create in 3D software, but every feature changes how the PET must stretch, where the mold can split, how the bottle releases, and whether enough material can reach the deepest areas.
A successful cartoon PET bottle blow mold therefore requires more than accurate CNC machining. The original character must first be converted into bottle geometry that can be stretched, vented, demolded, cooled, and reproduced consistently in mass production.
From our manufacturing experience, this conversion is where much of the real engineering work happens.
The customer normally begins with brand identity and consumer appearance. The mold manufacturer has to preserve that identity while also considering preform geometry, wall thickness distribution, parting-line position, mold opening direction, local cavity depth, venting, bottle stability, and machine compatibility.
This is why we do not treat a character-shaped PET bottle as a decorative version of a standard bottle.
It is a packaging development project in which creative design and blow molding engineering have to progress together.
Why Is a Cartoon-Shaped PET Bottle More Difficult Than a Standard Bottle?
A character-shaped PET bottle contains much more local three-dimensional geometry than a conventional round or square bottle. Facial features, body contours, arms, clothing, and narrow transitions create different stretching distances and mold-opening conditions, so the challenge is not simply machining the character into aluminum but reproducing it consistently in PET.
A conventional beverage bottle normally uses relatively continuous surfaces. Even when the bottle includes ribs, panels, or embossing, the transition from neck to shoulder, body, and base is usually easier to predict.
A cartoon bottle can change geometry repeatedly within a very short distance.
The head may be wider than the upper body. The face can contain local protrusions and recesses. Hair may introduce narrow grooves. Arms can project away from the torso. Clothing may contain raised or recessed decorative structures, while the legs can introduce deep vertical separations close to the bottle base.
All of these features have to be created from one heated PET preform.
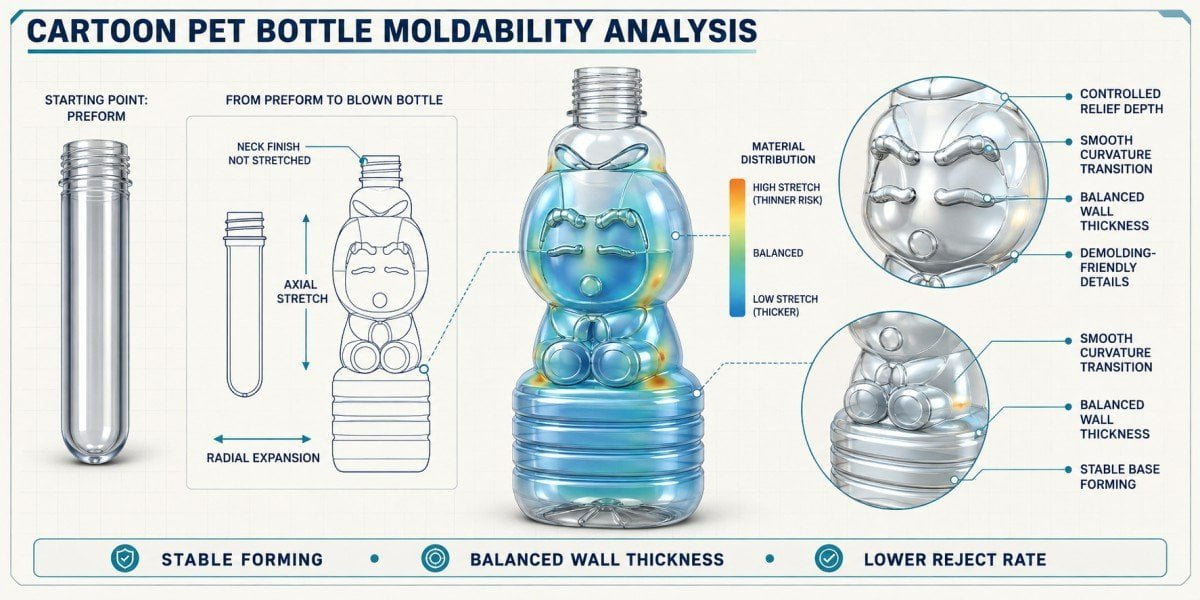
The difference between a standard bottle and a character bottle becomes clearer when the engineering requirements are compared directly.
| Engineering Area | Conventional PET Bottle | Cartoon-Shaped PET Bottle |
|---|---|---|
| Surface geometry | Mainly continuous cylindrical, oval, square, or panel surfaces | Frequent changes between protrusions, recesses, narrow transitions, and decorative features |
| Material movement | Stretching path is usually more predictable | Local features can require very different stretch distances within the same bottle |
| Mold split | Often follows a conventional longitudinal plane | Must consider character appearance and demolding at the same time |
| Deep details | Usually limited to ribs, logos, or local embossing | May include eyes, nose, mouth, hair, clothing, arms, and leg structures |
| Demolding | Normally straightforward when conventional bottle geometry is used | Character protrusions and recesses may interfere with the opening direction |
| Visual requirement | Bottle silhouette and label area are often dominant | The bottle itself may be the main brand element |
| Trial risk | Many conventional geometries are already well understood | Actual PET forming often reveals issues that are not obvious in CAD |
This difference changes the way we review the project.
For a standard bottle, a customer may provide a bottle drawing and a proven preform, allowing the tooling discussion to move relatively quickly toward machine compatibility and mold manufacturing.
For a character bottle, we normally need to review the geometry before treating the design as production-ready.
A detailed cavity can be machined.
That does not mean PET will reproduce the detail.
A beautiful character can be modeled.
That does not mean the bottle can be removed after the mold opens.
A very deep groove can look attractive in a rendering.
That does not mean the available PET material will reach the bottom of the groove consistently.
These are the reasons we describe character bottle development as an engineering conversion rather than a direct copy of the original artwork.
Our previous article on custom PET bottle molds for animal and unique shapes discusses the wider category of irregular PET packaging. Character-shaped bottles require a more specific development approach because the visual identity of the character and the manufacturability of the bottle are tightly connected.
A character can be easy to model in 3D but difficult to reproduce consistently in PET.
How Should a Character Concept Be Converted Into Blowable Bottle Geometry?
The original character should be preserved where its geometry creates recognition, but individual features may need to be softened, reduced, repositioned, or given smoother transitions when the original artistic shape creates excessive stretching or demolding difficulty. The objective is a recognizable character that can also operate as a stable production bottle.
The customer and the mold engineer look at the same character from different perspectives.
The customer may be evaluating whether the character looks cute, youthful, fashionable, friendly, premium, or suitable for a particular beverage brand.
Those are legitimate packaging objectives.
The engineering team has to convert them into physical geometry.
Instead of separating those brand ideas into isolated keywords, we prefer to connect each visual goal with an engineering question.
| Brand or Character Goal | Engineering Question During Bottle Development |
|---|---|
| Cute and youthful facial appearance | Can the face remain recognizable without making the nose, cheeks, or mouth unnecessarily deep? |
| Strong three-dimensional character | Can the required depth be formed with the selected preform and stretching relationship? |
| Distinctive hairstyle | Will grooves and raised hair features reproduce clearly without trapping the bottle during demolding? |
| Visible arms and body posture | Can the silhouette remain recognizable without creating mechanical interference when the mold opens? |
| Clothing details | Which features contribute to recognition, and which details add forming complexity without much visual value? |
| Premium transparent appearance | Will cavity finish, parting-line position, and local material distribution support the required surface quality? |
This is the balance we are trying to achieve.
We are not trying to remove the artistic character from the bottle.
We are also not trying to reproduce the original character model with no engineering adjustment at all.
Character Recognition Is More Important Than Maximum Feature Depth
Consumers do not normally identify a character because one groove is 1 mm deeper or one facial feature is sharper.
Recognition comes from the overall relationship between the head, face, hair, body, and posture.
This gives the engineer some flexibility.
If a very deep local feature creates a narrow blowing window, its depth may sometimes be reduced while retaining the visual identity of the character.
Similarly, a sharp transition can often be converted into a more gradual radius without making the character look fundamentally different.
These adjustments are important because PET does not behave like the cutting tool used to machine the cavity.
A cutting tool follows the programmed surface.
PET has to stretch into that surface.
The deeper and narrower the geometry becomes, the more demanding the local forming condition can become.
The Character Bottle Is Still Functional Packaging
The visual design cannot be evaluated separately from the packaging process.
A character-shaped beverage bottle still needs to work with the filling and packaging operation. Depending on the project, it may need to pass through filling, capping, labeling, conveying, secondary packing, transportation, retail display, and consumer handling.
Instead of treating these requirements as a long list of isolated words, it is more useful to examine where character geometry can affect downstream production.
| Packaging Function | Possible Influence of Character Geometry |
|---|---|
| Filling and capping | Neck finish and bottle stability must remain compatible with the line |
| Conveying | Highly irregular side geometry may affect contact with guides |
| Labeling | Character details can reduce the available label surface or change label behavior |
| Secondary packing | Strong protrusions may influence bottle-to-bottle spacing |
| Transportation | Lightweight decorative regions still need adequate stability |
| Retail display | The character should remain upright and visually oriented as intended |
| Consumer handling | Grip areas should feel intentional rather than accidentally weak or unstable |
This is why the final bottle should not be approved only from a front-view rendering.
A good engineering bottle has to work from every side.
The development approach discussed in our guide from AI PET bottle design to custom blow molds follows the same principle: creative concepts can start the project, but engineering review is what converts them into manufacturable packaging.
How Should the Parting Line Be Planned on a Cartoon PET Bottle?
Parting-line planning should begin while the character orientation is still being developed. The mold split affects both appearance and demolding, so critical facial features, arms, legs, and decorative details should not be positioned without considering where the two cavity halves will separate.
On many conventional bottles, the mold split follows a relatively straightforward longitudinal direction.
A character-shaped bottle makes that decision more sensitive because the bottle has a visually important front side.
The customer may expect the face, torso, and other key elements to remain clean and recognizable.
If the mold parting position passes through the most visually sensitive region, even a normal fine parting trace can become more noticeable.
However, moving the parting line away from the face is not the only requirement.
The resulting mold must still open.
That means the character orientation and the mold split should be reviewed as one problem.
| Character Area | Design Risk | Mold Engineering Consideration |
|---|---|---|
| Face | Parting trace can affect the main visual identity | Position the split away from critical facial features where the geometry permits |
| Nose and cheeks | Strong local projections may complicate the split | Control depth and surface transition around the mold-opening direction |
| Mouth | Small recessed detail can be visually sensitive | Avoid unnecessary complexity across the cavity split |
| Hair | Deep narrow grooves can create both forming and release challenges | Balance recognition with manufacturable groove geometry |
| Arms | Projections can create local mechanical interference | Review character pose relative to mold opening |
| Legs | Deep separation can create narrow trapped geometry | Control depth and consider lower-body material distribution |
| Lower decorative features | May approach the side-mold/base-mold transition | Plan character geometry together with the base structure |
The main engineering point is that the mold split should not be treated as an afterthought.
If the customer approves the complete character first and only then asks where the mold can be divided, the project may require significant redesign.
It is much more efficient to establish the likely split during the 3D engineering stage.
Parting-Line Planning Is Not the Same as Parting-Line Repair
There is an important distinction between this article and a troubleshooting article about an existing bottle with a heavy seam.
Here, the objective is preventive design.
We know that a two-half blow mold needs a parting relationship.
The engineering task is therefore to place and shape that relationship so it interferes as little as practical with the character appearance while still allowing reliable mold operation.
That is different from diagnosing an existing mold for alignment wear, parting-line mismatch, or installation problems.
The most effective parting-line improvement can therefore happen before CNC machining begins.
Why Are Deep 3D Details Difficult to Reproduce in PET?
The metal cavity can contain a very sharp feature while the finished bottle reproduces it only partially. Detail formation depends on how far the PET must stretch, how the preform is heated, how much material reaches the region, whether cavity air can escape, and whether the local geometry provides a realistic forming path.
This is one of the most common misunderstandings in complex custom-bottle projects.
The customer may look at a freshly machined mold and see very clear character details.
The expectation is understandable:
if the mold has a sharp nose, the bottle should have a sharp nose.
If the mold has a deep hair groove, the bottle should reproduce the same groove.
The actual stretch blow molding process is more complicated.
PET Has to Reach the Detail
The preform begins as a relatively simple cylindrical geometry.
During blowing, PET is stretched both axially and radially until it contacts the cavity.
A detail that is located farther away from the original preform surface requires more local material movement.
The deeper or narrower the feature is, the more demanding this movement can become.
| Cavity Geometry | Possible Forming Challenge | Engineering Review |
|---|---|---|
| Deep facial recess | PET may not reach the full depth consistently | Review local depth, radius, heating, and venting |
| Narrow hair groove | Material can bridge rather than fully enter | Increase practical transition width or reduce unnecessary depth |
| Sharp decorative corner | Local definition can remain soft | Review radius and available stretch |
| Strong protruding feature | Adjacent bottle wall may receive greater stretch | Check wall thickness around the feature |
| Several deep features close together | Material demand becomes concentrated in one area | Evaluate complete regional material distribution |
| Detail far from the preform body | Greater radial expansion is required | Review preform geometry and final cavity relationship |
This is why the phrase “A sharp cavity does not automatically create a sharp bottle” is useful in character bottle engineering.
CNC accuracy is essential.
It is not the only condition required for good character definition.
Preform Selection Matters
A character bottle still begins with a PET preform.
The preform establishes the starting material distribution.
If the starting geometry does not support the final bottle, the blow mold alone cannot redistribute the material without limits.
Preform weight should also not be treated as the only solution.
A heavier preform may provide more PET overall, but that does not guarantee that the additional material reaches the difficult character detail.
If the material remains concentrated around another region, the difficult area can remain weak while the overall bottle becomes unnecessarily heavy.
Heating Has to Support the Geometry
PET stretching is temperature-sensitive.
The heating condition helps determine which preform regions stretch more easily and which retain more material.
This gives the process engineer some ability to influence material distribution.
However, a character bottle should not depend on an extremely narrow heating window simply because the geometry was made unnecessarily difficult.
The goal is stable mass production.
A design that forms only when the oven settings are exceptionally sensitive may become difficult for the customer to operate consistently over time.
This is why we prefer to make reasonable geometric changes during bottle development instead of expecting the blowing process to compensate for every artistic decision.
How Do Demolding and Undercut Risks Limit Character Design?
The finished character bottle must release from the cavity when the mold halves open. A feature becomes problematic when its shape creates mechanical interference in the opening direction. Deep geometry is not automatically unacceptable, but the relationship between feature depth, curvature, character pose, and mold movement has to be reviewed before tooling is produced.
A 3D character rendering does not need to leave a mold.
A real PET bottle does.
That single difference changes many design decisions.
The Real Question Is Mechanical Release
Clients sometimes hear the word “undercut” and assume that any deep recess is forbidden.
That is too simple.
The practical question is whether the bottle can move away from the mold half after the cavity opens.
Consider an arm.
If it projects outward but the surrounding geometry still releases in the opening direction, it may be feasible.
If the arm creates a reverse feature that mechanically traps the bottle behind part of the cavity, it creates a different problem.
The same principle applies to hair, clothing, legs, and accessories.
| Character Feature | Potential Release Problem | Possible Engineering Direction |
|---|---|---|
| Arm projects far away from body | Local surface may trap behind cavity geometry | Move arm closer to body or adjust projection angle |
| Hair creates a hook-like recess | Bottle may not release smoothly | Reduce reverse geometry and increase transition radius |
| Deep gap between legs | Narrow internal geometry may hold the PET | Reduce depth or modify leg relationship |
| Strong clothing edge | Local reverse angle can interfere with opening | Smooth the transition while maintaining visual identity |
| Complex side accessory | May require geometry inconsistent with two-half mold opening | Integrate accessory more closely into body contour |
This type of engineering review should happen before production molds are released.
Changing an arm position in CAD is relatively easy.
Correcting the same issue after several production cavities have already been machined is much more costly.
Character Pose Is an Engineering Variable
The pose of the character is not purely artistic.
A slightly different arm angle, leg position, or body rotation can make the same character easier to manufacture without destroying recognition.
This is where collaboration between the customer’s design team and the mold engineering team becomes valuable.
The customer explains which character features cannot change.
The mold engineer identifies which geometric areas create the greatest manufacturing risk.
The final design should preserve the highest-value visual elements while simplifying lower-value features that add significant production difficulty.
How Do Venting and Material Distribution Affect Character Detail?
Character details form successfully only when the PET can reach the cavity and the air displaced by the expanding bottle can leave the relevant region. Local venting, preform material distribution, heating, and cavity depth therefore need to be evaluated together instead of assuming that incomplete detail automatically means the mold was machined incorrectly.
The cavity contains air before the PET reaches the wall.
As the preform expands, this air has to move away.
Simple bottle geometry may allow the air to escape relatively easily.
A character cavity can create more local pockets.
The face, hair, clothing, arms, and leg regions can each contain geometry where air movement becomes less straightforward.
Venting Should Follow the Actual Geometry
We do not treat venting as a competition to create the largest number of vents.
The correct venting arrangement depends on the character geometry and what we observe during actual blowing.
If one specific detail repeatedly forms incompletely, the team should determine whether the limitation comes from air evacuation, material availability, heating, cavity geometry, or a combination.
| Production Observation | What Should Be Investigated |
|---|---|
| Facial detail appears soft while surrounding surface forms normally | Local cavity depth, material availability, heating, and venting |
| One narrow groove repeatedly remains incomplete | Trapped air or an overly narrow/deep cavity feature |
| One side of the character looks weaker than the other | Circumferential heating, preform centering, and local stretch |
| Head or shoulder stays relatively thick while body becomes thin | Preform geometry and material redistribution |
| Lower decorative detail is difficult to reproduce | Whether too much material has already been stretched into upper regions |
| Good detail appears only under one very narrow machine setting | Geometry may require a wider production window before mass tooling |
This method avoids a common troubleshooting mistake.
If the face is unclear, drilling more vents immediately is not always the correct answer.
Likewise, if a groove is incomplete, increasing pressure without understanding the geometry may not address the real limitation.
Material Has to Serve the Whole Character
The bottle has one finite amount of PET.
That material must form the head, body, arms, decorative features, lower structure, and base.
Each deep feature competes for material with nearby regions.
This is why character bottle design is fundamentally a distribution problem.
The engineer has to decide where three-dimensional depth creates the greatest visual value and where a shallower treatment can achieve nearly the same appearance with a more stable material distribution.
The best character bottle is not necessarily the bottle with the maximum number of deep features.
It is the bottle where the available PET is used effectively enough to reproduce the important visual features consistently.
How Should a Prototype and Test Mold Be Used Before Mass Production?
For a complex character bottle, moving directly from a final 3D rendering to full production tooling creates unnecessary risk. A better development sequence uses the 3D design and physical prototype to confirm appearance, then uses test tooling to verify actual PET forming, detail reproduction, demolding, parting-line behavior, and material distribution before the design is multiplied into production molds.
We strongly prefer staged validation for character packaging.
The reason is simple.
Different development tools answer different questions.
A rendering answers a visual question.
A prototype answers a physical shape question.
A test mold answers a blowability question.
Production tooling answers a repeatability and scale question.
Trying to make one stage answer every question creates risk.
| Development Stage | Main Purpose | What It Cannot Fully Prove |
|---|---|---|
| Character concept | Confirm brand direction and consumer identity | Actual PET blowability |
| Engineering 3D model | Convert the character into bottle geometry | Final material distribution under blowing |
| Physical prototype | Confirm real-scale appearance and proportions | Actual stretch-blow behavior |
| Test mold | Verify PET forming and demolding | Full multi-cavity production consistency |
| Blow trial | Evaluate details, wall distribution, base, and visual quality | Long-term production before repeat testing |
| Engineering revision | Correct issues discovered during validation | Commercial performance until production begins |
| Production tooling | Reproduce the approved geometry at required scale | Market success |
| Production validation | Confirm the bottle and tooling under factory conditions | Consumer acceptance beyond the packaging project |
A Test Mold Should Be Used to Find Problems
A test mold should not be treated as a ceremonial step where everyone expects the first bottle to be approved automatically.
Its real value is finding weaknesses early.
During the test stage, we want to know whether the character still looks correct after PET forming, whether the critical details are clear, whether the bottle releases smoothly, whether the parting position is acceptable, and whether the material is distributed in a workable way.
If the test exposes a weakness, that is useful information.
Correcting a detail during this stage is far less expensive than modifying several production cavities later.
Production Tooling Should Be the Result of Validation
Once the test bottle has been evaluated and the necessary geometry adjustments are completed, the production mold can be released with much more confidence.
This sequence becomes especially important when the final order requires multiple cavities or several sets of molds.
A small error multiplied across many cavities becomes a large tooling problem.
For this reason, our preferred principle for complex character bottles is:
Prototype first, production tooling second.
The broader development sequence is also discussed in our From Concept to Production: What Are the 8 Steps to Custom PET Bottle Molds? article.
Real Project: From a Peach-Flavored Cartoon Girl Concept to Mass Production
PETMOLDER participated in the development of a cartoon-shaped PET bottle for a well-known Chinese beverage company launching a peach-flavored drink targeted toward younger female consumers. The project progressed from the original character concept through 3D bottle engineering, physical prototype review, test tooling, blow trials, production molds, and final commercial launch.
This project represents the type of character bottle development discussed throughout this article.
The customer wanted the packaging itself to have strong shelf recognition.
Instead of relying only on graphics or a conventional bottle with a label, the bottle body was designed around a cute cartoon girl character.
The creative concept was therefore central to the package.
But the project could not move directly from the character image to CNC machining.

The Project Began With Character Recognition
At the concept stage, the main objective was to establish the overall character direction.
The bottle needed to communicate the youthful and cute visual positioning selected for the peach-flavored beverage.
At this point, the character was still primarily a brand concept.
Before it could become a bottle mold, several engineering questions had to be answered.
The design needed a practical bottle volume and neck system. The character surfaces needed to become manufacturable bottle geometry. The split between the two mold halves had to be planned, and the bottle needed to stand, release from the mold, and operate as real beverage packaging.
The 3D Engineering Stage Converted the Character Into a Bottle
During the engineering stage, we worked directly with the customer to review the geometry.
The purpose of this communication was not simply to offer one-to-one service.
Each design decision had a manufacturing consequence.
A character bottle may look correct from the front but become difficult from the side.
A local feature may improve the artistic image but create too much cavity depth.
Another feature may look attractive in the 3D model but create a less suitable mold split.
For this reason, the customer and our technical team reviewed the bottle as both a character and an industrial package.
| Project Requirement | What Needed to Be Balanced |
|---|---|
| Recognizable cartoon girl appearance | Preserve the key visual features consumers would notice immediately |
| Three-dimensional face and body | Keep enough depth for recognition without making local forming unnecessarily difficult |
| Character posture | Maintain the intended silhouette while allowing practical mold opening |
| Bottle volume and neck | Integrate normal packaging functions into the character |
| Parting-line position | Reduce interference with important visual regions while maintaining moldability |
| Lower body and base | Preserve character appearance while providing a stable bottle bottom |
| Transparent PET appearance | Ensure that actual blown surfaces still present the character clearly |
This engineering process is where a character design becomes a production bottle.
The Physical Prototype Provided a Different Type of Confirmation
The 3D model was useful for engineering discussion, but the project also needed a physical form.
A real-scale prototype makes proportions easier to judge.
The customer can hold the bottle shape, look at it from different directions, and decide whether the character still has the intended personality.
This is particularly important with a human-shaped bottle because small changes in head-to-body ratio, facial depth, or body width can look different on a screen and in a physical object.
The prototype therefore provided an appearance checkpoint before metal tooling.
The Test Mold Verified Actual PET Behavior
The next stage was critical.
We manufactured test tooling and evaluated the character through actual PET blowing.
At that point, the question changed from:
“Does the character look good?”
to:
“Can PET reproduce the character?”
The test bottle allowed us to review actual detail formation, material distribution, parting-line appearance, demolding, and overall bottle quality.
This is the stage where CAD assumptions meet the real stretch-blow-molding process.
The test process was valuable because any detail that required adjustment could still be reviewed before the project entered full production tooling.
We Did Not Treat the First Blown Bottle as Automatic Production Approval
A bottle coming out of a test mold proves that a bottle can be formed.
It does not automatically prove that the geometry is ready for mass production.
The test result still needed to be reviewed for the important character features and general production stability.
Where a design requires adjustment, the correct time to make that adjustment is before the same geometry is multiplied across the final production tooling.
This is one of our strongest engineering views for complex character packaging:
The highest-risk approach is to approve an attractive 3D character and immediately manufacture the complete production mold set. The bottle should first prove that it can be blown, demolded, and reproduced consistently.
Production Tooling Came After the Design Had Been Physically Verified
After the concept, engineering model, physical prototype, test tooling, and blowing evaluation had established the production direction, the project moved into the final mold-manufacturing stage.
At this point, the tooling was based on much more than an artistic image.
The character had already been converted into a bottle geometry and physically tested.
That development sequence reduced the risk of discovering a fundamental problem after the production molds were complete.
The Project Progressed Into Commercial Production
The final bottle entered production and supported the successful market launch of the peach-flavored beverage series.
Consumers ultimately saw a cute cartoon girl bottle on the shelf.
The manufacturing process behind that bottle was much more structured.
| What the Consumer Sees | Engineering Work Behind the Final Bottle |
|---|---|
| Recognizable cartoon character | Conversion from artwork into manufacturable PET geometry |
| Three-dimensional facial features | Control of local depth, stretch, and detail formation |
| Character body and posture | Demolding and parting-line review |
| Clear decorative details | Material-distribution and venting evaluation |
| Stable finished package | Base and overall bottle-function review |
| Consistent commercial bottle | Test tooling followed by production tooling |
| Market-ready packaging | Continuous communication between brand, bottle design, and mold engineering |
This is why we regard the complete development chain as the strongest part of this project.
The work was not finished when the character looked good in a 3D file.
It was not finished when CNC machining was completed.
The character needed to survive every stage from artwork to actual PET production.
Our Engineering View From This Project
For a character-shaped PET bottle, the best design is not necessarily the one with the deepest facial feature, the most complicated hairstyle, or the largest number of decorative grooves.
Those details only create value if they can be reproduced consistently.
Our objective is therefore to preserve the character features that consumers recognize most strongly while engineering the remaining geometry around the realities of PET stretch blow molding.
This approach also explains why the customer and mold manufacturer need to communicate throughout the project.
The customer understands the brand.
The mold manufacturer understands what the bottle has to do in production.
A successful character bottle requires both perspectives.
When we evaluate a new character project, the questions we ask are therefore broader than whether the shape can be machined.
We want to know whether the selected character features can be formed with the available PET, whether the bottle can leave the cavity correctly, whether important details remain visible after blowing, whether the bottle works as practical packaging, and whether the final geometry can be reproduced at the required production scale.
That is the difference between a character-shaped prototype and a production-ready PET package.
Frequently Asked Questions
Can Any Cartoon Character Be Turned Into a PET Bottle?
Not every original character model should be transferred directly into a PET bottle without engineering changes.
Deep recesses, strong protrusions, narrow gaps, character posture, and parting-line position should first be reviewed against the selected preform and the mold-opening direction.
In many projects, the main character identity can be preserved while individual features are adjusted to improve blowability and demolding.
Why Do Some Character Details Disappear After Blow Molding?
The cavity may contain a clear detail while the PET bottle reproduces it only partially because the material still has to stretch into that region.
Insufficient material, excessive local stretch, unsuitable heating, trapped cavity air, or overly deep geometry can all reduce detail definition.
The mold surface therefore needs to be evaluated together with the preform and blowing process.
Should a Cartoon PET Bottle Use a Prototype and Test Mold Before Mass Production?
For complex character bottles, staged validation is strongly recommended.
A physical prototype helps confirm real-scale appearance, while a test mold verifies actual PET forming, detail reproduction, demolding, parting-line behavior, and material distribution.
These checks can reveal necessary changes before the design is multiplied into full production tooling.
How Do You Choose the Parting Line for a Character-Shaped PET Bottle?
The parting line should be planned together with the character orientation and mold-opening direction.
Important facial or branding features should be protected from unnecessary visual interruption where practical, but the bottle must still release from the two mold halves.
Parting-line planning is therefore both an appearance decision and a mechanical engineering decision.
What Information Is Needed to Develop a Custom Cartoon PET Bottle Mold?
A customer with an existing character concept can provide the artwork, 3D model, or reference images together with the target bottle capacity, neck finish, product application, preform information, and blow molding machine details.
If the character has not yet been converted into packaging geometry, the project can begin with a feasibility and bottle-design review before production tooling is discussed.
Machine information should also be confirmed before the final mold design is frozen, especially for unusual bottle geometry. Our article Custom Blow Molds: 4 Reasons Your New Mold Won’t Fit Your Blowing Machine explains why mechanical compatibility remains important even when the bottle design itself has been approved.
For a new character bottle project, the first question should not be how complicated the 3D model can become.
The better question is:
Which features make the character immediately recognizable, and how can those features be preserved in a bottle that PET can reproduce consistently?
If you are developing a character-shaped PET package, you can send us the original character concept, bottle volume, product application, neck finish, preform information, machine model, cavity requirement, and required production output.
We can review the character geometry, parting-line position, deep details, demolding direction, preform relationship, and machine compatibility before the production mold design is finalized.
Related PETMOLDER Articles
- Custom PET Bottle Molds: Solutions for Animal & Unique Shapes
- How to Guide: From AI PET Bottle Design to Custom Blow Molds for Prototyping & Manufacturing
- From Concept to Production: What Are the 8 Steps to Custom PET Bottle Molds?
- How to Develop a 500ml PET Bottle: The Step-by-Step Timeline Guide
- Custom Blow Molds: 4 Reasons Your New Mold Won’t Fit Your Blowing Machine