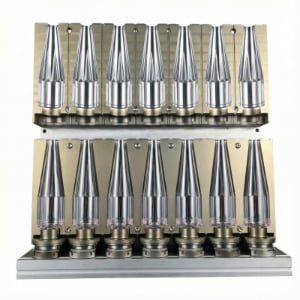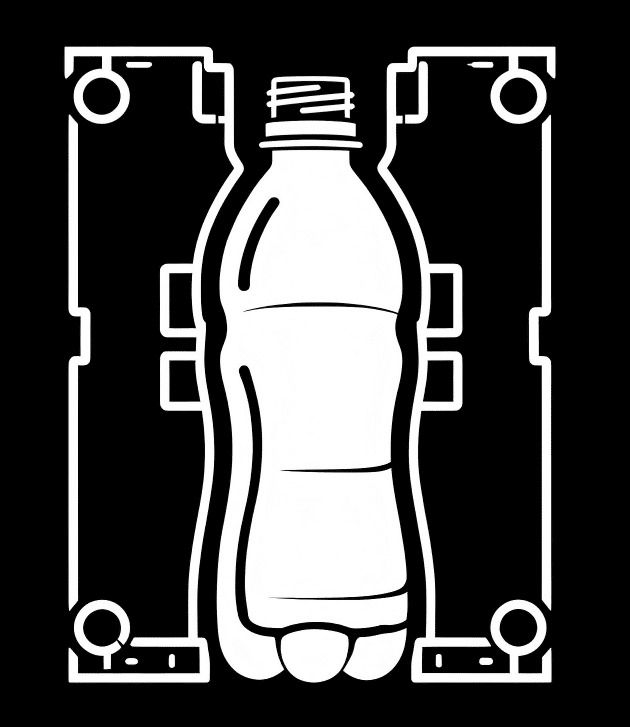
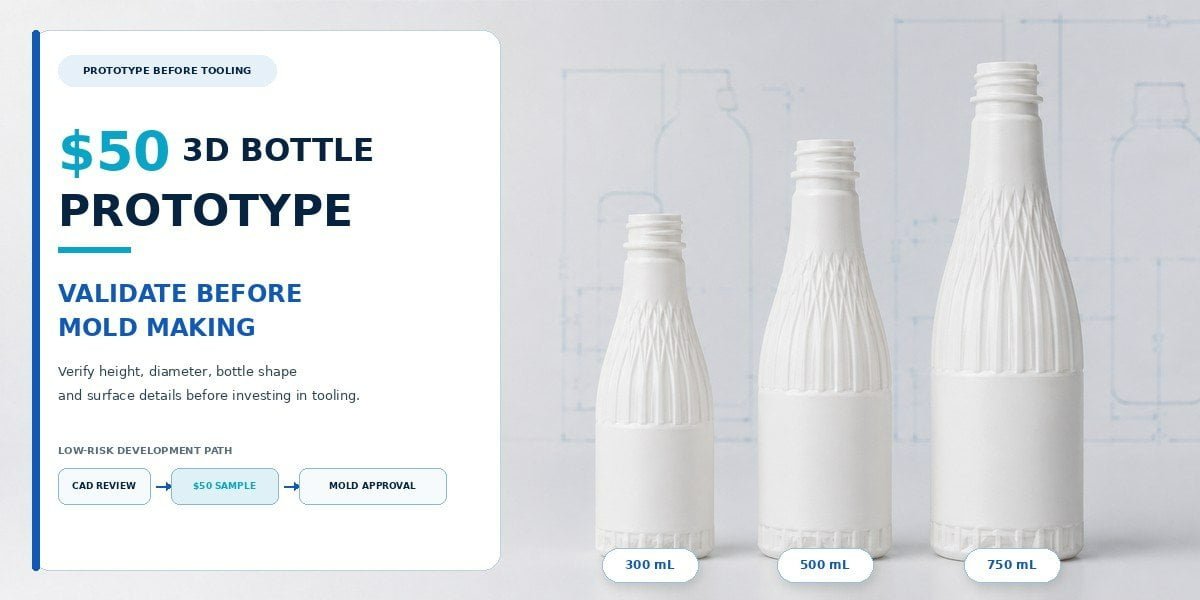
One of our customers was developing an entirely new family of PET water bottles in 300ml, 500ml and 750ml sizes.
The customer uses Sidel rotary blow molding equipment, so once the bottle designs were approved, the next step could easily have been to manufacture the complete production blow mold sets.
I did not recommend doing that immediately.
For this customer, changing a complete production mold format represented an investment of more than USD 100,000 in their actual project. When the tooling investment reaches that level, I do not think the first physical bottle the customer sees should come after all of the production molds have already been machined.
So I suggested something much simpler first.
We made a physical 3D bottle prototype for each size: 300ml, 500ml and 750ml.
The customer could finally hold the designs in his hands instead of looking only at a 2D drawing or a 3D rendering on a computer screen. He could measure the actual height and diameter, look at the shoulder proportion, inspect the body ribs and compare how the three bottle sizes looked as one product family.
But I still did not consider the project fully verified.
Before we proceeded with the complete 15-cavity rotary blow mold order, I recommended making one trial mold set first. We would use that first tooling set to produce real PET bottles under actual blowing conditions. Only after the bottle, machine interface and downstream packaging requirements were confirmed would we continue manufacturing the remaining 14 sets.
Why did I not simply accept the full order and manufacture everything at once?
Because a completely new bottle has to work with much more than the blow mold.
The customer still needs to consider filling, labelling, caps, cartons, bottle handling and the actual appearance of a blown PET container. If one of those interfaces reveals a problem after all 15 mold sets have already been manufactured, the cost of correction can be much larger than changing a 3D drawing or remaking one trial tool.
That is why I see prototyping as a risk-control step rather than a 3D-printing service.
A PET bottle prototype is valuable because it gives the customer a low-cost opportunity to reject or improve a design before an expensive production blow mold turns that design into metal.
Sidel itself uses a similar distinction in its packaging-development services. It identifies 3D-printed physical models as part of the packaging design process, while pilot moulds, equipment trials and packaging qualification are used later to evaluate whether the package can perform under industrial conditions.
Those are two different questions:
Does the bottle design look and feel right?
And later:
Can the bottle actually be produced and perform correctly?
A good development project should answer both before full industrialisation.
Why Make a PET Bottle Prototype Before Blow Mold Manufacturing?
A PET bottle prototype allows the buyer to verify the physical size, proportion and appearance of a new bottle before the production blow mold is machined. It cannot replace a real blowing trial, but it can expose design decisions that are much cheaper to correct while they still exist only in CAD.
A bottle can look surprisingly different on a computer screen and in your hand.
This is especially true when the design is completely new.
A tall shoulder may look elegant in a rendering but make the actual bottle feel too long. A body diameter that seemed acceptable in CAD may look too wide when compared with other products in the same range. Decorative ribs may appear subtle on a large monitor and become visually aggressive when reproduced at actual bottle scale.
This is one reason we prefer to separate design approval from tooling approval.
Before machining, most appearance changes are still CAD work.
After machining begins, a request such as “reduce the diameter,” “make the shoulder shorter,” or “change the body ribs” is no longer only a design revision. Those surfaces may already exist in aluminum or steel.
The farther the tooling project progresses, the fewer inexpensive options remain.
This is particularly important for rotary blow molds.
A customer is rarely buying only one isolated bottle cavity. The same bottle geometry may eventually be reproduced across many blowing stations.
If the design itself is wrong, multiplying it across 10, 15 or 20 production molds does not make the problem smaller.
It multiplies the correction scope.
Sidel’s packaging services similarly position physical prototypes and digital models early in the creative process, before pilot tooling and industrial qualification. The purpose is to identify and optimise the package before full production investment.
From our manufacturing perspective, that sequence is very logical.
First make the design cheap to change. Only then make it expensive to reproduce.
What Can You Check With a 3D Printed PET Bottle Prototype?
A physical prototype is most useful for checking geometry, dimensions, proportion and packaging appearance. It allows information that looks abstract on a drawing to be judged at actual scale, especially when the bottle is part of a completely new product family.
In our customer’s 300ml, 500ml and 750ml project, one important purpose was to view all three bottles together.
A bottle family needs more than three independent capacities.
The shoulder language, body proportions, ribs and overall visual identity should make sense when the bottles are placed next to each other.
That is much easier to judge with physical samples.
| What the prototype can help check | What the customer is actually evaluating |
|---|---|
| Bottle height | Whether the bottle looks proportionate and fits expected packaging or equipment space |
| Maximum diameter | Whether the bottle feels too wide or creates packaging-space concerns |
| Shoulder and neck proportion | Whether the transition looks balanced at actual size |
| Label area | Whether there is sufficient practical space for the intended label |
| Ribs, grooves and decorative details | Whether features that looked good in CAD remain visually appropriate at full scale |
| Grip and handling | Whether the bottle feels comfortable and practical in the hand |
| Overall family appearance | Whether different capacities look like one coherent packaging series |
A prototype can also be physically placed next to the intended closure, label mock-up or existing products.
For some projects, customers use it to make a preliminary check against carton dimensions or shelf space.
That does not replace line engineering, but it can identify an obvious conflict early.
For example, if a carton has already been defined and the new bottle diameter means the intended number of bottles no longer fits comfortably, discovering this with a plastic model is much better than discovering it after mold machining.
The same applies to labels.
A designer may technically provide enough label-panel height, but an actual sample can reveal that the shoulder transition begins too early or that strong ribs visually interfere with the intended artwork.
These are not stretch-blow-performance tests.
They are design confirmation tests.
And that is exactly what the prototype should be used for.
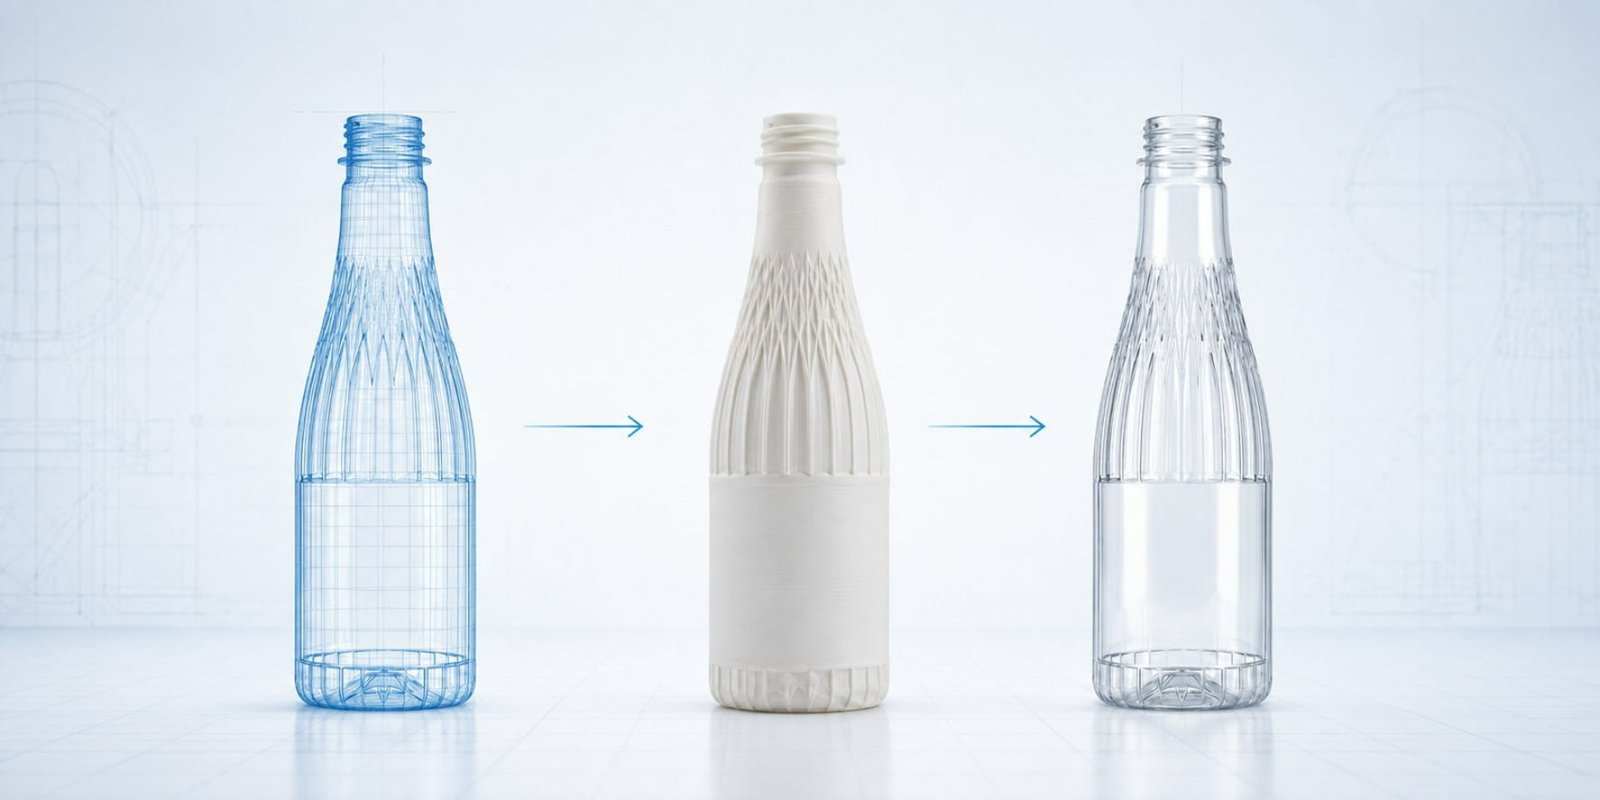
For projects still moving from concept to engineering drawing, our How to Guide: From AI PET Bottle Design to Custom Blow Molds for Prototyping & Manufacturing discusses how a visual bottle concept eventually needs to become manufacturable geometry.
What a 3D Bottle Prototype Cannot Tell You
A 3D-printed bottle model can confirm the geometry you designed, but it cannot prove how a real PET preform will stretch, how material will distribute through the bottle, or whether the final container will meet mechanical and production requirements. Those questions require real PET blowing and qualification.
This distinction is essential.
A physical prototype can look very convincing.
It may have the exact outside bottle shape, the correct height and the intended ribs.
But it is not necessarily made from the same PET resin, with the same molecular orientation, wall-thickness distribution or thermal history as a stretch-blown production bottle.
Sidel makes this separation very clearly in its own packaging-development process. Its published services distinguish 3D-printed physical prototypes from packaging qualification using virtual modelling, pilot moulds, actual equipment and physical tests such as dimensions, mechanical properties, thickness, weight, compression and drop performance.
Therefore, we should not use a 3D model to approve performance that it was never designed to reproduce.
| A 3D prototype can help validate | A 3D prototype cannot reliably validate |
|---|---|
| Overall bottle dimensions | Real PET wall-thickness distribution |
| Shoulder/body/base appearance | Actual axial and radial stretching behaviour |
| Label-area geometry | Top-load performance |
| Decorative features | Drop performance |
| Grip and physical proportion | Pressure or vacuum resistance |
| Carton/shelf fit at a dimensional level | Real mold cooling behaviour |
| Visual family consistency | Production transparency and final PET optical quality |
| Preliminary cap/bottle proportion | Industrial blowing process window |
This is why I would never tell a customer:
“The 3D bottle looks good, so the PET bottle has been fully tested.”
It has not.
The correct conclusion is:
“The design is ready to move to the next level of validation.”
That next level may involve a trial blow mold, depending on the project.
Why We Added a One-Station Trial Before Making the Remaining 14 Molds
For our customer’s new Sidel bottle family, the 3D prototype reduced design risk, but we still wanted to validate actual PET blowing before reproducing the bottle across the complete 15-cavity tooling order. We therefore recommended manufacturing one trial tooling set first and completing the remaining 14 only after successful production validation.
This second step is one of the most important parts of our customer’s project.
If we had stopped after the 3D prototypes, we would have confirmed the bottle’s appearance but not its industrial behaviour.
The customer would still need to know whether the real PET bottle could be produced correctly from the intended preform and whether the mold worked properly in the Sidel blow molding machine.
So before manufacturing the entire 15-cavity order, I suggested another layer of protection:
make one first.
This first tool is no longer a visual model.
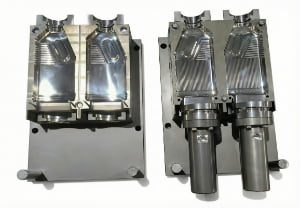
It is real blow-mold tooling.
It can be installed and used to produce an actual PET bottle under the intended process conditions.
Now we can begin evaluating questions that a 3D print cannot answer.
Does the intended preform distribute material correctly?
Does the shoulder form as expected?
Does the bottom blow properly?
Does the bottle release normally from the mold?
Are the actual bottle dimensions acceptable?
Does the finished bottle work with the cap, label and downstream packaging requirements?
If those results are correct, we have much stronger evidence before repeating the same geometry across the remaining 14 positions.
This approach is also consistent with the way major equipment suppliers separate packaging design from industrial qualification. Sidel describes packaging feasibility and performance studies using pilot moulds and Sidel equipment before full production, specifically to identify production issues before complete industrialisation.
The principle is not complicated.
Do not multiply an unverified result.
This becomes more important as cavity or station count increases.
A revision to one trial mold is one engineering problem.
The same revision after 15 tooling sets have been completed is a very different commercial problem.
How Does the $50 PET Bottle Prototyping Process Work?
For relatively simple projects, our physical bottle prototypes can start from around USD 50, depending on bottle size, complexity and sample requirements. The purpose is not to sell a low-cost plastic model; it is to create a physical design checkpoint before production tooling is released.
The process starts with the bottle itself.
Sometimes the customer already has a complete 3D drawing.
Sometimes there is only a reference bottle, sketch or design concept.
In that case, we first develop the bottle geometry and confirm the main dimensions, neck finish, capacity target and appearance.
Once the CAD reaches a version that everyone believes is close to final, we produce the physical sample.
For a simple bottle prototype, the cost can start from around USD 50 in our projects. More complex shapes, larger samples or special prototype requirements can cost more, so USD 50 should not be interpreted as a fixed price for every bottle.
The customer then reviews the real object.
If the result is correct, the CAD can proceed toward tooling engineering.
If the bottle feels too tall, too wide or visually unbalanced, we modify it while the expensive part of the project has not started.
A typical development sequence looks like this:
| Stage | Main purpose | Cost of design change |
|---|---|---|
| Bottle concept / 3D drawing | Establish basic shape and dimensions | Lowest |
| Physical 3D prototype | Confirm actual-scale appearance and dimensions | Low |
| Trial blow mold | Confirm real PET blowability and machine/tooling behaviour | Higher |
| Complete production mold set | Industrial production | Highest correction risk after completion |
That is why I do not judge the prototype by the price of the printed sample.
A USD 50 prototype can be inexpensive.
Its real value is what it prevents us from machining too early.
PETMOLDER’s How to Develop a 500ml PET Bottle: The Step-by-Step Timeline Guide discusses the broader development timeline. The focus here is narrower: using a physical prototype as a decision gate before mold manufacturing.
What Should You Check After Receiving the Prototype?
When the prototype arrives, do not only ask whether it “looks good.” Review it from three perspectives: physical dimensions, visual and ergonomic proportion, and compatibility with the intended commercial packaging. This creates much more useful feedback for the final CAD revision.
For our customer’s bottle family, I wanted them to physically measure the 300ml, 500ml and 750ml samples.
The numbers were already in the drawing.
But measuring the finished sample forces the team to compare the design with the real objects around it.
That is useful.
The marketing team may look at the bottle differently from the filling engineer.
The label supplier may notice something that the bottle designer did not.
The purchasing team may care about carton utilisation.
This is why a prototype is particularly useful when several departments need to approve the new package.
| Check item | Why it matters | Possible adjustment before mold making |
|---|---|---|
| Overall height | Affects appearance, cartons, shelf space and potentially line compatibility | Shorten body or shoulder; reconsider proportions |
| Maximum diameter | Affects grip, packaging density and equipment clearance | Adjust body width or capacity proportions |
| Shoulder | Strongly influences bottle identity and visual balance | Change shoulder height or curvature |
| Label panel | Determines available label size and flatness | Increase panel area or move decorative features |
| Ribs / grooves | May look stronger or deeper in physical form than in CAD | Reduce depth, width or spacing |
| Grip | Difficult to judge from a screen | Modify contour or gripping area |
| Cap and neck proportion | Influences the visual balance of the complete package | Adjust bottle shoulder/neck relationship where possible |
| Carton arrangement | Affects secondary-packaging efficiency | Adjust external bottle dimensions before tooling |
For an entirely new bottle, I also recommend photographing the prototype next to the customer’s current products.
This can reveal whether the new bottle looks too large or too small relative to the brand family.
For multi-size projects like our customer’s 300ml, 500ml and 750ml series, put all three prototypes together.
The question becomes:
“Do these look like the same product family?”
That is difficult to judge from three independent CAD windows.
It is obvious when three physical bottles are sitting on the same table.
Why Can a $50 Prototype Reduce the Cost of a Wrong PET Blow Mold?
The financial value of a prototype comes from moving design changes to the cheapest stage of the project. A CAD revision may require only engineering time; the same change after CNC machining can affect cavity surfaces, mold components, trial schedules and the launch date of the complete bottle project.
This is where comparing only “USD 50 versus mold price” misses the point.
The cost of a wrong mold is not one number.
Imagine that the customer sees the physical bottle after tooling has already been completed and says:
“The shoulder is too high.”
If that shoulder is already machined into the cavity, we are not simply moving a CAD curve.
The mold may need to return to machining.
Depending on the direction and size of the change, the existing material may or may not allow the surface to be corrected.
Now imagine the customer says:
“The body needs to be narrower.”
That can involve a much larger cavity change.
If the bottom, diameter and total bottle height all need to move, the project may start approaching major rework rather than a small modification.
The cost chain can include machining, additional finishing, replacement components, another trial, additional shipping and longer project time.
For a customer preparing a new product launch, time may be as important as the tooling cost.
This is why our Sidel customer was a good candidate for prototyping.
In their actual project, the complete format tooling represented an investment starting above USD 100,000.
I did not want us to discover a visual or packaging issue only after that investment had been fully converted into production molds.
The 3D samples created one early approval point.
The single trial mold created another.
Only after those two stages did it make sense to multiply the design across the remaining tooling.
So I would describe the value this way:
A $50 prototype is not buying a plastic model. It is buying a low-cost opportunity to say, “No, change this first,” before the same change becomes expensive.
Why Packaging Compatibility Should Be Checked Before Full Tooling
A bottle is part of a packaging and production system. Even when the bottle shape itself looks correct, the customer should use the prototype and later trial bottle to confirm interfaces with labels, cartons, closures, filling and handling before committing to a complete multi-station tooling package.
This was one of the main reasons I did not want our customer to manufacture all 15 molds immediately.
A mold maker can focus too narrowly on the bottle cavity.
But the customer does not make cavities.
He sells a packaged product.
The bottle has to move into filling.
It has to receive the intended cap.
It may need to travel through conveyors or neck-handling systems.
The label has to sit correctly.
The finished product has to fit the carton.
And the carton still has to work with the customer’s logistics.
Sidel describes new packaging introduction in exactly this broader way. Its current mould and line-conversion services state that a new package runs through a process from container engineering and mould design to line conversion and validation, while its packaging-design services consider supply-chain conditions and consumer handling alongside brand appearance.
Not every prototype can verify every one of those interfaces.
A rigid 3D print, for example, does not behave exactly like a thin stretch-blown PET bottle on a conveyor.
But it can still identify many geometric problems.
Then the real trial bottle verifies the next level.
This layered approach is much more reliable than asking one sample type to answer every question.
Which Custom PET Bottle Projects Benefit Most From Prototyping?
Not every PET bottle project needs a 3D prototype. It is most valuable when the bottle design is new, visually important, unusually shaped or still subject to approval. A mature bottle being copied from an existing physical sample normally has much less appearance uncertainty.
We should not tell every customer that a prototype is mandatory.
If the customer already owns the physical bottle and simply needs us to reproduce a proven design, the existing bottle is already a physical reference.
Making another visual model may add little value.
The situation is different when the package is completely new.
| Project situation | Prototype recommendation |
|---|---|
| Completely new bottle design | Highly recommended |
| New multi-size bottle family | Highly recommended |
| Special or irregular bottle shape | Highly recommended |
| Premium beverage or cosmetic packaging requiring visual approval | Recommended |
| New ribs, grooves or grip features | Recommended |
| Minor modification to a proven bottle | Depends on the modification |
| Exact copy of an existing physical bottle | Usually optional |
Premium packaging is particularly suitable because relatively small proportion changes can affect whether the bottle feels expensive or ordinary.
The same applies to shampoo and personal-care bottles, where grip, pump proportion and label appearance matter strongly.
Edible-oil bottles may benefit when handles, panels or rectangular geometry are being developed.
A completely new beverage bottle family benefits because the sizes can be compared side by side before mold manufacturing.
Our customer’s 300ml, 500ml and 750ml water-bottle project falls directly into this category.
For unusual shapes, PETMOLDER’s Custom PET Bottle Molds: Solutions for Animal & Unique Shapes explains why attractive CAD geometry must eventually be translated into a shape that can actually be produced by stretch blow molding.
What Is the Difference Between a 3D Prototype and a Trial-Blown PET Bottle?
A 3D prototype confirms design intent; a trial-blown bottle confirms how the design behaves as a real PET container. The two stages should not be confused because they answer different engineering questions.
This distinction is especially important for buyers who receive a very realistic 3D sample.
A printed bottle may look finished enough to feel like a production sample.
But it was not made through the same process.
A real PET bottle begins as a preform.
The preform is reheated, stretched axially, expanded radially, brought into contact with the blow mold and cooled.
That process determines the final wall thickness and material orientation.
The 3D prototype bypasses all of it.
| Development sample | Main question it answers |
|---|---|
| 3D physical prototype | Is this the bottle design we actually want? |
| Trial-blown PET bottle | Can the real preform, mold and process produce the bottle correctly? |
| Production validation | Can the package run repeatedly at the required industrial conditions? |
Sidel’s own packaging-services structure follows the same logic: 3D-printed physical models belong to the design/prototyping capability, while pilot moulds, equipment trials, finite-element analysis and physical qualification tests are used for performance validation.
That is why our customer’s project used both.
We did not replace trial blowing with the 3D model.
We used the 3D model to make the trial tooling safer to manufacture.
From Approved Prototype to PET Blow Mold Manufacturing
Prototype approval means the bottle design is ready to enter tooling engineering; it does not mean every production parameter has already been confirmed. Before machining the final blow mold, the bottle must still be checked against the preform, blow molding machine, cavity configuration and actual manufacturing requirements.
Once the customer says:
“Yes, this is the bottle we want.”
our work changes.
Now we stop asking mainly visual questions and start freezing engineering interfaces.
The neck finish needs to be confirmed.
The preform has to be evaluated against the bottle geometry and target weight.
The actual blow molding machine must be known because a Sidel rotary mold is not designed like a generic semi-automatic mold.
The bottle dimensions also have to remain within the equipment’s available working range.
Then comes the mold configuration.
For our customer, the final project involved a 15-cavity/15-position production tooling package.
Because the bottle was new, I still recommended producing and testing one mold set before manufacturing the remaining 14.
This is not always necessary for every replacement-mold order.
If we are reproducing a mature bottle and all engineering information has already been validated, the risk profile is very different.
But for a completely new packaging family with a large tooling investment, I prefer to know the first real bottle works before we replicate the tool across all stations.
This is also why our wider article From Concept to Production: What Are the 8 Steps to Custom PET Bottle Molds? treats bottle development and mold manufacturing as connected engineering stages rather than one CNC purchase.
The project logic is:
Physical prototype first when design uncertainty is high. Trial tooling next when industrial uncertainty remains. Full production tooling only after the important risks have been reduced.
FAQ
How much does a PET bottle prototype cost?
For the relatively simple bottle-prototyping projects we handle, a physical 3D prototype can start from around USD 50. This is not a fixed global price. Bottle size, geometry complexity, surface requirements and the prototype method can change the cost. The purpose of the sample is to confirm the bottle design before committing to much more expensive production tooling.
Is a 3D printed prototype made from PET material?
Not necessarily. The primary purpose of this type of prototype is to reproduce bottle geometry and dimensions so the customer can check appearance and proportion. The printing material and manufacturing process may differ from production stretch-blown PET. Therefore, the prototype should not be used to approve final PET transparency, wall behaviour or mechanical performance.
Can I test bottle strength with a 3D printed prototype?
No, not as a substitute for a real PET bottle test. Production bottle performance depends on preform design, PET material distribution, stretch ratio, heating, blowing conditions and mold cooling. Top load, drop resistance, pressure performance and similar properties should be validated using the real container development and qualification process. Sidel likewise separates 3D physical prototypes from pilot-mould and physical performance qualification.
Can the bottle design be modified after seeing the prototype?
Yes, and this is one of the main reasons to make the prototype. Height, diameter, shoulder proportion, body curvature, ribs and other appearance details can still be changed in the 3D drawing before production tooling is released. In many cases, this is substantially easier than requesting the same geometry change after cavity machining has started.
Do I still need a trial bottle after the PET blow mold is finished?
Yes. The two samples solve different problems.
| Sample | Purpose |
|---|---|
| 3D prototype | Validate design, dimensions and appearance |
| Trial-blown PET bottle | Validate real blowability, material distribution and bottle performance |
A visually approved prototype does not remove the need to test the real PET bottle.
What information is needed to make a custom PET bottle prototype?
A useful starting point is the desired bottle capacity, neck finish, approximate height and diameter, product application and any reference image, sketch or preliminary 3D concept. If the customer already has a complete engineering drawing, the prototype can be made from the approved geometry. If there is only an idea, the bottle design should be developed first and the physical prototype produced after the main geometry is agreed.
Conclusion
For a completely new PET bottle, I do not think the most expensive sample should be the first sample.
Our customer’s 300ml, 500ml and 750ml water-bottle family is a good example.
They use Sidel blow molding equipment, and the complete production mold investment for their project started above USD 100,000.
We could have finished the drawings and moved directly into the full tooling order.
Instead, I recommended making one 3D physical bottle for every size first.
The customer could see the real proportions, measure the height and diameter and look carefully at the body ribs before we cut production tooling.
Then I recommended another step.
For the planned 15-position blow-mold package, we would first make one trial tooling set and produce the real PET bottle.
Only when that bottle had been tested against the customer’s actual requirements would we continue with the remaining 14 sets.
Some people may ask why a mold manufacturer would voluntarily slow down a larger order.
The reason is simple.
If the bottle is new, I do not only want to know whether we can machine the mold.
I want to reduce the chance that the customer later discovers a problem with filling, labelling, cartons, bottle proportions, the blowing process or another packaging interface after every production mold has already been completed.
A good blow-mold project should not make design changes expensive earlier than necessary.
That is why I see a small physical prototype as an engineering decision rather than a printing product.
The value of a $50 prototype is not the plastic sample itself. It is the opportunity to change the bottle while changing it is still inexpensive.
If you are developing a new PET bottle and currently have only a sketch, reference bottle or 3D drawing, you can send PETMOLDER the bottle concept, capacity, neck finish and main dimensions.
We can first determine whether a physical prototype would be useful for design approval.
After the bottle geometry is confirmed, we can continue with preform evaluation, machine compatibility and PET blow mold development.
For high-value multi-cavity or rotary tooling projects, we can also evaluate whether a single trial mold before the complete production set is appropriate for the project.
The goal is not to add another unnecessary development step.
It is to make sure that when the CNC machining finally begins, we are machining the bottle the customer actually wants.
Related PETMOLDER Articles
- How to Develop a 500ml PET Bottle: The Step-by-Step Timeline Guide
- From Concept to Production: What Are the 8 Steps to Custom PET Bottle Molds?
- How to Guide: From AI PET Bottle Design to Custom Blow Molds for Prototyping & Manufacturing
- Custom PET Bottle Molds: Solutions for Animal & Unique Shapes
- Comprehensive Analysis: How Much Does a PET Blow Mold Cost?
-1-300x300.jpg)