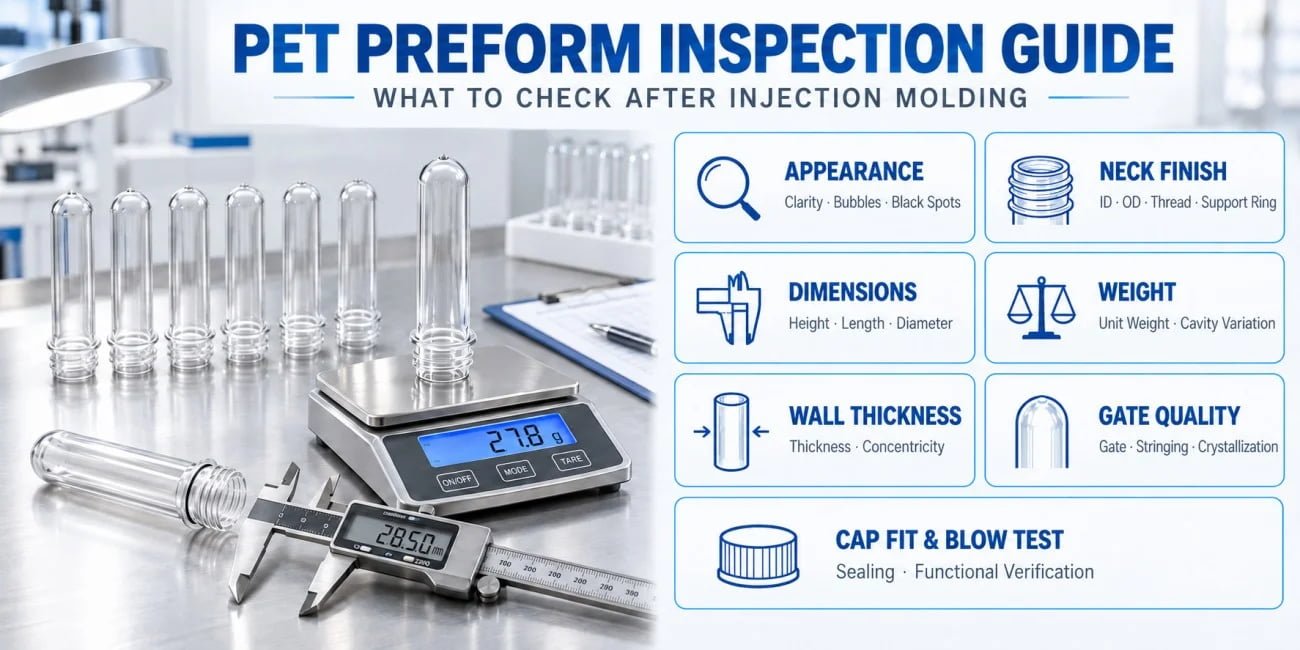
PET preform inspection should cover much more than transparency and appearance. After injection molding, a production QC program should verify neck-finish dimensions, weight, overall geometry, wall thickness, concentricity, gate quality, visual defects, cavity-to-cavity consistency, closure compatibility, and final blow-molding performance. For multi-cavity molds, the inspection data should remain traceable to each cavity rather than being based only on random mixed samples.
A PET preform can look clear and complete while still having a dimensional or material-distribution problem that appears later during capping or stretch blow molding.
This is particularly important for 24-cavity, 32-cavity, 48-cavity, 72-cavity, and higher-cavity PET preform molds.
When we evaluate preform quality in actual production, we are not only asking:
"Does this preform look good?"
The more important question is:
Can every cavity repeatedly produce a preform that meets the approved drawing and performs correctly in the next production process?
One of our New Zealand customers learned this during the first week after installing two new 32-cavity PET preform molds.
Real Case: Why We Asked Our New Zealand Customer to Run 300 Consecutive Cycles Before Judging Preform Quality
Our New Zealand customer purchased two 32-cavity PET preform molds: one for a 25 g 3025 preform and another for a 28 g PCO 1881 preform. During the first week of production, he contacted us almost every day with individual preform samples and asked whether they were acceptable. Instead of evaluating isolated pieces, we asked him to establish a cavity-by-cavity inspection record after continuous production.
The customer was new to operating these two mold configurations at his own factory.
One mold produced 3025, 25 g PET preforms, while the second mold produced PCO 1881, 28 g PET preforms.
During the first week after production started, the customer contacted us frequently.
He would show us several preforms and ask questions such as whether a particular appearance was normal, whether a weight reading was acceptable, or whether a dimensional difference indicated a mold problem.
After several conversations, we asked an important question:
"Have you already run the mold continuously for at least 300 molding cycles before evaluating the production data?"
The answer was no.
We therefore suggested that, for this project, he first allow each mold to reach a more representative continuous production condition and run at least 300 consecutive cycles before making a detailed quality judgment.
The purpose was not to establish "300 cycles" as a universal PET industry standard.
It was a practical commissioning method for this customer's project.
A few preforms produced during repeated startup, machine adjustment, temperature stabilization, and short trial runs do not provide the same information as samples collected after the mold has entered a more stable production condition.
After continuous production, we asked the customer to stop treating all 32 cavities as one anonymous production batch.
Instead, he needed to inspect the preforms by cavity number.
Cavity #1 needed its own record.
Cavity #2 needed its own record.
The same principle continued through cavity #32.
We then sent the customer an electronic PET preform inspection sheet so that his QC team could record the relevant measurements for every cavity.
The sheet included the main preform measurements and quality observations, including neck inner diameter, key outer diameter, preform weight, overall height, wall thickness, and gate condition.
We also asked the customer to record other relevant characteristics instead of using weight as the only acceptance criterion.
That experience leads to the central principle of this article:
A good preform inspection does not only ask whether the preform looks correct. It asks whether every cavity can consistently produce a preform that performs correctly in capping, handling, reheating, and blow molding.
What Should Be Included in a PET Preform Inspection Checklist?
A complete PET preform inspection should combine visual inspection, neck-finish measurement, overall dimensions, weight control, wall-thickness and concentricity evaluation, gate inspection, cavity traceability, and functional validation. The exact tolerances should come from the approved preform and neck-finish drawings rather than from a generic inspection table.
One of the most common QC mistakes is to reduce preform inspection to two operations:
weigh the preform and measure one diameter.
Those measurements are useful, but they do not tell the complete story.
Different inspection categories protect against different downstream risks.
| Inspection Category | Typical Inspection Items | Why the Inspection Matters |
|---|---|---|
| Visual appearance | Transparency, black specks, contamination, bubbles, haze, scratches, incomplete filling, abnormal discoloration, and other visible defects | Provides the fastest screening for obvious molding or material abnormalities |
| Neck finish | Inner diameter, critical outer diameters, thread profile, support ring, sealing-related geometry, and relevant heights | Determines closure compatibility, handling, and neck-related production performance |
| Overall dimensions | Total preform height, body length, body diameter, and other drawing-defined dimensions | Confirms compatibility with the approved preform design and downstream equipment |
| Weight | Individual preform weight and cavity-to-cavity consistency | Confirms material quantity and reveals cavity or process variation |
| Wall geometry | Wall thickness at defined locations and circumferential positions | Helps identify uneven material distribution |
| Concentricity | Relationship between the internal core-formed surface and external cavity-formed surface | Detects eccentric material distribution that may affect reheating and blowing |
| Gate | Gate position, gate vestige, stringing, crystallization, whitening, and other project-relevant gate conditions | Helps identify injection-point and valve-gate abnormalities |
| Functional validation | Closure fit, handling compatibility, reheating behavior, stretching, and actual bottle blowing | Confirms that dimensional approval also translates into usable production performance |
The inspection frequency does not have to be identical for every category.
A factory may inspect appearance and weight more frequently than detailed concentricity or destructive wall-thickness sections.
However, every factory should understand which risks each measurement is intended to control.
The complete philosophy is:
Measure what matters to the next process, not only what is easiest to measure in the QC room.
How Should You Inspect PET Preform Appearance, Threads, and Gate Quality?
Visual inspection is the fastest PET preform screening method, but it should be performed systematically under stable lighting and should include the body, neck finish, thread profile, support ring, and gate area. A visually acceptable preform has passed only the first stage of inspection; dimensional and functional checks are still required.
PET preforms should be inspected under a consistent lighting condition so that operators are not comparing samples under different visual environments.
For transparent preforms, changes in clarity or local discoloration can be easier to identify when the lighting and background are standardized.
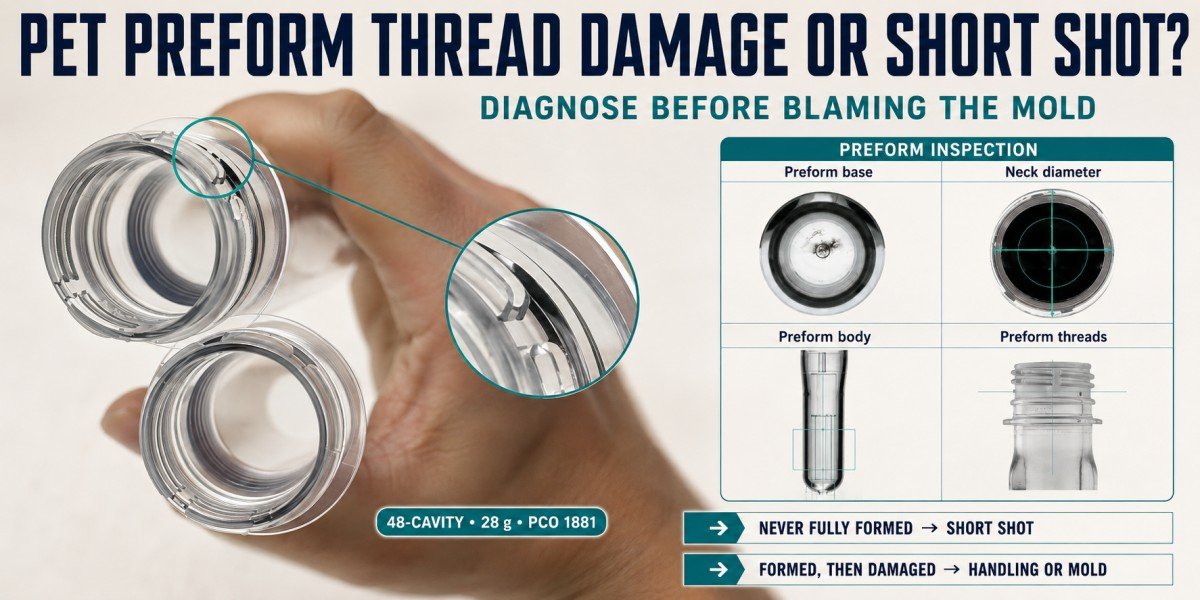
Instead of giving operators a long list of disconnected defect names, it is more practical to organize visual inspection according to the area being examined.
| Preform Area | What QC Should Observe | Why It Matters |
|---|---|---|
| Main body | Clarity, contamination, black specks, bubbles, haze, obvious scratches, incomplete filling, and abnormal surface condition | Body defects may affect appearance, heating, stretching, or final bottle quality |
| Thread area | Continuous thread profile, complete molding, local damage, incomplete filling, or unwanted material at the thread | The thread must work with the intended closure |
| Sealing-related neck area | Surface condition, molding completeness, and any damage relevant to the approved neck drawing | Defects in this area can affect closure performance |
| Support ring | Complete shape, absence of obvious deformation, and consistency with the approved drawing | The support ring is important for handling on many preform and blow-molding systems |
| Gate | Position, gate vestige, stringing, local whitening, crystallization, or abnormal damage | Gate abnormalities can indicate injection or hot runner issues |
| Entire preform | Unexpected color change, deformation, contamination, or damage during handling | Confirms that molding and post-molding handling have not introduced obvious defects |
Thread inspection deserves special attention.
The operator should not simply confirm that "a thread exists."
The thread profile should be complete and should correspond to the approved neck-finish design.
A partially filled or damaged thread can still look acceptable from one viewing angle while creating a closure problem later.
Gate inspection should follow the same principle.
A QC inspector should not judge only whether the gate "looks small."
The acceptance condition should be connected to the approved product requirement and the expected downstream application.
Visual inspection is the fastest screening method, but it should never replace dimensional inspection.
PETMOLDER has a separate article focused on purchasing-related preform defects. Buyers who want a broader defect overview can refer to How to Procure PET Preforms: A Guide to Avoiding 8 Critical Defects.
Which PET Preform Neck Finish Dimensions Should Be Measured?
PET preform neck inspection should be based on the approved neck-finish drawing rather than the nominal neck name alone. Depending on the neck standard, QC may need to verify the inner diameter, critical outer diameters, thread-related geometry, support-ring dimensions, sealing-related surfaces, and relevant vertical dimensions.
A neck name such as PCO 1881, 3025, or a nominal diameter does not replace a technical drawing.
This was particularly relevant to our New Zealand customer because his two molds did not use the same neck finish.
One mold was designed for a 3025, 25 g preform.
The other was designed for a PCO 1881, 28 g preform.
The QC team therefore could not use one common neck measurement table for both molds.
Each preform had to be inspected against its own approved drawing.
| Neck Inspection Area | What Should Be Verified | Why the Approved Drawing Is Required |
|---|---|---|
| Inner diameter | Drawing-defined internal neck dimension | The nominal neck name does not define every internal measurement |
| Critical outer diameter | Relevant external neck dimensions | These dimensions affect closure and equipment compatibility |
| Thread geometry | Drawing-defined thread form and relevant dimensions | Different neck finishes use different thread designs |
| Support ring | Diameter, position, and relevant height | Handling systems may depend on the support-ring geometry |
| Sealing-related area | Geometry and surface condition according to the neck specification | Closure performance depends on the complete neck interface |
| Vertical neck dimensions | Relevant heights between drawing reference surfaces | Ensures the different neck features are positioned correctly |
This is why a QC department should not write:
"Check 28 mm neck."
That instruction is too vague.
A better instruction is:
Inspect the preform against the approved neck-finish drawing and record the specified control dimensions.
The same principle applies when buying a preform mold.
The mold supplier, cap supplier, and bottle producer should be working from the same neck-finish definition.
For more detail on this subject, see The Ultimate Guide to Preform Neck Finishes: How to Choose the Right Standard for Your Bottle.
For projects specifically using PCO 1881, PETMOLDER also has a detailed guide: What is PCO 1881 Neck Finish? A Complete Guide to Preforms and Blow Molds.
How Do You Measure PET Preform Height, Body Diameter, and Overall Dimensions?
Overall preform dimensions should be measured from clearly defined reference surfaces on the approved drawing. Total height, body length, body diameter, and other critical geometry are only meaningful when every inspector uses the same measurement reference and method.
A measurement without a defined reference can create false QC disagreements.
For example, two inspectors may both report "preform height," but one may measure from a different neck reference surface.
The values can then differ even though the physical preform has not changed.
This is why every dimensional inspection sheet should connect the recorded value with a drawing reference.
| Dimensional Item | Recommended QC Principle | Downstream Reason |
|---|---|---|
| Overall preform height | Measure from the drawing-defined upper and lower references | Confirms the complete axial geometry |
| Body length | Use the same neck/body transition reference for every sample | Influences the material region available for reheating and stretching |
| Body outer diameter | Measure at the specified height or drawing location | Confirms compatibility with the intended preform design |
| Bottom / gate-side geometry | Inspect only according to drawing-defined dimensions or project requirements | Changes in this region can influence heating and stretching behavior |
| Neck-to-body positional relationship | Use drawing references rather than visual estimation | Ensures the body geometry begins at the intended axial position |
A dimensional inspection plan does not need to measure every possible feature on every production cycle.
Instead, the drawing should identify which dimensions are critical and how frequently they need to be checked.
This is especially important when the preform will be used on high-speed blow-molding equipment.
Preform length and body geometry influence how the preform passes through handling and heating systems, although the exact compatibility limits depend on the machine design.
The useful QC principle is:
A dimension is useful only when the measurement reference is clearly defined.
How Should PET Preform Weight Be Checked Across Different Mold Cavities?
PET preform weight should be evaluated by cavity number when validating a multi-cavity mold or investigating a quality problem. Random samples can describe the batch average, but they cannot show whether one specific cavity consistently differs from the other 31, 47, or 71 cavities.
This was one of the most important instructions we gave our New Zealand customer.
With a 32-cavity mold, the QC department should not treat all 32 production positions as anonymous.
If the factory mixes all preforms before weighing them, a cavity-specific pattern can disappear inside the average.
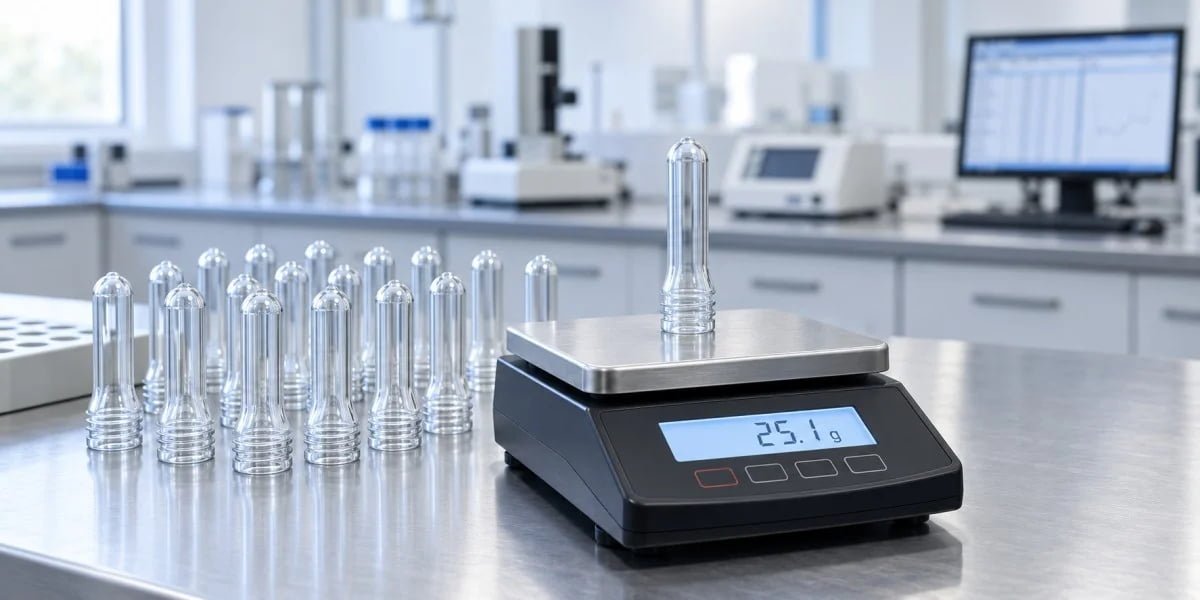
A simple cavity-based weight table can look like this:
| Cavity | Sample 1 | Sample 2 | Sample 3 | Average | Specification Result |
|---|---|---|---|---|---|
| #1 | 24.9 g | 24.9 g | 25.0 g | 24.93 g | Compare with approved specification |
| #2 | 24.8 g | 24.9 g | 24.9 g | 24.87 g | Compare with approved specification |
| #3 | 25.0 g | 24.9 g | 25.0 g | 24.97 g | Compare with approved specification |
| #4 | Record actual value | Record actual value | Record actual value | Calculate | Compare with approved specification |
The exact number of samples should follow the factory's quality plan and the stage of the project.
During new-mold validation or troubleshooting, more cavity-level data is generally more useful than a small random sample.
During stable routine production, the factory may use an agreed sampling plan.
The important point is to preserve traceability when cavity-to-cavity consistency matters.
A useful weight record can answer several different questions.
| QC Question | What Cavity-Based Weight Data Shows |
|---|---|
| Is the complete production batch moving heavier or lighter? | Compare the average distribution across all cavity positions |
| Is one cavity repeatedly different? | Track the same cavity over multiple samples or cycles |
| Does the abnormal cavity change from cycle to cycle? | Helps separate fixed cavity patterns from process variation |
| Did process adjustment improve the problem? | Compare cavity data before and after adjustment |
| Is the new mold stable after commissioning? | Compare several production batches after the process reaches stable operation |
The principle is:
Do not only measure average preform weight. Measure weight consistency across cavities.
For a deeper discussion of cavity-specific weight problems and troubleshooting, see PET Preform Mold Cavity-to-Cavity Weight Variation: Mold Problem or Injection Process?.
Why Did We Ask the New Zealand Customer to Inspect All 32 Cavities?
During new-mold commissioning, checking every cavity provides a cavity map that random sampling cannot provide. For our New Zealand customer's two 32-cavity molds, the objective was to establish whether the entire mold was producing consistently before deciding that an individual preform represented a mold problem.
The customer originally sent isolated examples.
That created a problem for troubleshooting.
If one preform weighed slightly differently, we could not immediately answer several important questions.
Was it always cavity #7?
Was it produced during startup?
Was the process already stable?
Did the same difference appear in the next production cycle?
Did the 3025 mold show the same pattern as the PCO 1881 mold?
A cavity-by-cavity QC sheet turns these questions into measurable data.
| Without Cavity Traceability | With Cavity Traceability |
|---|---|
| "One preform looks different." | "Cavity #14 shows the same appearance over repeated samples." |
| "Some preforms seem heavy." | "Cavities #6 and #18 are consistently above the rest of the cavity population." |
| "The wall looks uneven." | "The same wall-thickness difference appears repeatedly at cavity #9." |
| "We think the mold has a problem." | "The data shows whether the pattern follows one cavity, all cavities, or the process condition." |
For our customer's project, we wanted each of the 32 cavity positions recorded.
The objective was not to create more paperwork.
It was to establish a reliable production baseline for both molds.
This approach is particularly valuable during the early stage after mold installation.
Once the factory has established a stable process and understands the cavity behavior, it can develop a routine QC sampling plan appropriate to its production requirements.
PETMOLDER 32-Cavity PET Preform Inspection Record Template
A useful QC sheet should connect every measured preform with its cavity number, mold identity, production batch, and approved specification. The following template is designed as a practical starting point for a 32-cavity mold and should be adapted to the actual preform drawing and factory quality plan.
The downloadable version should contain separate specification fields for different preform designs so that, for example, a 3025 25 g preform is not inspected against the PCO 1881 28 g specification.
Download the 32-Cavity PET Preform Inspection Record Template
Website note: Replace <code>DOWNLOAD-LINK-TO-BE-ADDED</code> with the final XLSX or CSV file URL after the inspection template is uploaded to PETMOLDER.com.
A practical inspection record can use the following structure:
| Cavity No. | Appearance | Neck ID | Critical Neck OD | Thread / Neck Finish | Support Ring | Overall Height | Body OD | Weight | Wall Thickness | Concentricity | Gate Condition | Cap Fit | Blow Test | Result / Notes |
|---|---|---|---|---|---|---|---|---|---|---|---|---|---|---|
| 1 | Record | Measure | Measure | Inspect | Inspect / Measure | Measure | Measure | Weigh | Measure | Evaluate | Inspect | If required | If required | Pass / Fail / Notes |
| 2 | Record | Measure | Measure | Inspect | Inspect / Measure | Measure | Measure | Weigh | Measure | Evaluate | Inspect | If required | If required | Pass / Fail / Notes |
| 3 | Record | Measure | Measure | Inspect | Inspect / Measure | Measure | Measure | Weigh | Measure | Evaluate | Inspect | If required | If required | Pass / Fail / Notes |
| 4 | Record | Measure | Measure | Inspect | Inspect / Measure | Measure | Measure | Weigh | Measure | Evaluate | Inspect | If required | If required | Pass / Fail / Notes |
| 。。。 | Record | Measure | Measure | Inspect | Inspect / Measure | Measure | Measure | Weigh | Measure | Evaluate | Inspect | If required | If required | Pass / Fail / Notes |
| 32 | Record | Measure | Measure | Inspect | Inspect / Measure | Measure | Measure | Weigh | Measure | Evaluate | Inspect | If required | If required | Pass / Fail / Notes |
The electronic version should also contain a header section so that the inspection record can be traced later.
| QC Record Header | Information to Record |
|---|---|
| Mold identification | Mold number and cavity count |
| Preform specification | Neck finish, nominal weight, and drawing revision |
| Production batch | Batch or production order identification |
| PET material | Resin identification when required by the factory QC system |
| Production date and time | Identifies when the samples were molded |
| Injection molding machine | Machine identification |
| Inspector | Person responsible for the measurements |
| Approved drawing | Drawing number and revision used for acceptance |
| Measurement equipment | Scale, caliper, gauge, wall-thickness instrument, or other equipment used |
| Process status | Stable production, commissioning, troubleshooting, or other relevant condition |
This header is important.
If a factory finds a problem three months later, a sheet containing only 32 cavity numbers and several dimensions may not be enough to reconstruct the production condition.
A useful QC record should tell the factory what was produced, by which mold, against which drawing, and under which production batch.
How Do You Measure PET Preform Wall Thickness and Concentricity?
PET preform wall inspection should evaluate material distribution rather than only one thickness value. Measurements should be taken at defined axial and circumferential positions so that QC can detect whether one side of the preform is consistently thicker than another or whether the wall profile changes abnormally along the preform body.
Two preforms can both weigh 25 g and still have different wall distributions.
Weight tells us the total amount of PET.
It does not tell us where that PET is located.
If the internal core-formed geometry and the external cavity-formed geometry are not properly centered, one side of the preform can contain more material while the opposite side contains less.
The total weight may still appear acceptable.
That is why wall-thickness and concentricity inspection should not be replaced by weighing.
| Inspection Concept | What It Means | What QC Is Trying to Detect |
|---|---|---|
| Wall thickness | Material thickness at one defined location | Whether the local material amount matches the intended geometry |
| Circumferential wall variation | Comparison around the same cross-section | Whether one side is thicker and the opposite side thinner |
| Axial wall distribution | Comparison at several heights along the preform | Whether material is distributed correctly from upper body to lower body |
| Concentricity | Relationship between internal and external geometry | Whether the preform body is reasonably centered rather than eccentric |
| Cavity-to-cavity comparison | Comparison of the same measurement positions between mold cavities | Whether one cavity repeatedly differs from the mold population |
A good wall-thickness inspection therefore needs defined measurement positions.
For example, a factory may define several axial sections on the approved drawing and measure at several circumferential positions around each section.
The exact number of positions and the tolerance should be defined by the project's quality standard.
We do not recommend inventing a universal wall-thickness tolerance for every PET preform because preform design, weight, length, bottle application, and stretch requirement are different.
The important methodology is:
Do not measure one wall-thickness point and call the preform uniform.
If a destructive sectioning method is used, the cutting position and measurement method should also be standardized so that different inspectors obtain comparable results.
PETMOLDER has already covered the manufacturing significance of this issue in PET Preform Concentricity: Why Mold Precision Matters. In this article, the focus is different: how QC should detect the problem in finished preforms.
Why Can Wall Thickness Matter Even When Preform Weight Is Correct?
Correct total weight does not prove correct material distribution. A preform can contain the intended total amount of PET while still placing too much material on one side and too little on another, which may lead to different heating and stretching behavior during bottle production.
This is why weight and wall thickness should be treated as complementary measurements.
| Inspection Result | Possible Interpretation |
|---|---|
| Correct weight + balanced wall distribution | Stronger evidence that total PET and its distribution are both reasonable |
| Correct weight + uneven circumferential wall thickness | Total material is correct, but material location may be incorrect |
| Incorrect weight + uniform wall distribution | Geometry may be relatively balanced, but the overall material quantity or process center needs investigation |
| Incorrect weight + uneven wall distribution | Both total material and geometry/process balance require investigation |
In two-stage PET stretch blow molding, the preform body is reheated before stretching.
If one side contains significantly different material thickness, the thermal and stretching response may also differ.
The final bottle can then reveal a problem that was not obvious when the preform was viewed casually.
This is why:
A scale tells you how much PET is in the preform. Wall-thickness inspection helps tell you where the PET is.
How Should PET Preform Gate Quality Be Inspected?
Gate inspection should evaluate the condition of the injection point rather than only whether a gate mark is visible. QC should compare the gate with the approved project standard and observe whether stringing, crystallization, whitening, abnormal vestige, damage, or an off-center condition is present.
The gate is located at the lower end of the PET preform and plays an important role during injection molding.
Depending on the hot runner and valve-gate system, different abnormalities can appear around this area.
A practical gate inspection can be organized as follows.
| Gate Inspection Item | What QC Should Check | Possible Reason for Further Investigation |
|---|---|---|
| Gate location | Whether the gate appears in the intended central position | Repeated off-center appearance may justify checking alignment or gate-related conditions |
| Gate vestige | Whether the remaining gate condition matches the agreed appearance requirement | An abnormal vestige may indicate gate or process problems |
| Stringing | Whether material forms an unwanted string at the gate | Requires review of gate, valve pin, temperature, or timing conditions |
| Crystallization / whitening | Whether an abnormal white or crystalline area appears around the gate | Thermal and process conditions may require investigation |
| Surface damage | Whether the gate region has cracks, damage, or abnormal marks | May affect downstream blowing or bottle-base quality depending on severity |
| Cavity repeatability | Whether the problem repeatedly follows one cavity number | Helps distinguish a local cavity position from a general process issue |
Gate-related issues should also remain cavity-traceable.
If every gate looks similar, the problem may be process-wide.
If one cavity repeatedly has a different gate condition, the investigation can focus on that local position.
PETMOLDER has discussed gate-related process mechanisms in Eliminating PET Preform Gate Stringing and Crystallization: The Role of Beryllium Copper and Valve Pin Timing.
Why Should PET Preform Inspection Include Closure Fit?
Neck-finish dimensions should be confirmed with measurement, but actual closure compatibility can provide an additional functional check. The approved cap and neck system should assemble correctly according to the project's requirements rather than relying only on the nominal neck description.
A preform neck does not become a different neck after blow molding.
The bottle body changes during stretch blow molding, but the preformed neck is intended to remain the closure interface.
For this reason, neck-related quality should be established at the preform stage.
The functional verification method depends on the project.
| Verification Level | What It Confirms |
|---|---|
| Dimensional neck inspection | Confirms drawing-defined geometry |
| Thread-profile inspection | Confirms that the molded thread is complete and consistent |
| Approved closure fit | Confirms practical assembly compatibility with the intended cap |
| Project-specific sealing verification | Confirms functional sealing performance when required by the application |
A closure fitting onto the neck does not replace dimensional inspection.
Likewise, a dimension appearing acceptable on a caliper does not automatically replace the functional check required by a particular filling or closure system.
The two methods answer different questions.
Why Should PET Preform Inspection Include Actual Blow Molding Validation?
A preform can pass visual and dimensional inspection and still require actual blow-molding validation. The final test for a new preform design is whether it can be transported, reheated, stretched, and blown into the intended bottle with an acceptable process window and wall distribution.
This is what separates a complete PET preform QC program from a dimensional inspection article.
The preform is not the final package.
It is an intermediate product designed for a subsequent stretch blow-molding process.
A new preform project should therefore eventually answer:
Can this preform reliably make the intended bottle?
Functional blow-molding validation can examine several areas together.
| Blow-Molding Validation Area | What It Helps Confirm |
|---|---|
| Preform handling | Whether the preform works with the intended transport and handling system |
| Oven passage | Whether the preform geometry is compatible with the reheating system |
| Heating behavior | Whether the body can be heated into a usable temperature distribution |
| Stretching | Whether the preform geometry supports the intended axial and radial deformation |
| Bottle formation | Whether the PET reaches the bottle geometry correctly |
| Final wall distribution | Whether material is reasonably distributed after stretching |
| Bottle appearance | Whether whitening, haze, asymmetry, or other problems appear |
| Final bottle performance | Whether the resulting bottle meets the project's functional requirements |
This leads to an important distinction:
Dimensional approval and production approval are not exactly the same thing.
A preform can comply with the drawing yet still require process optimization for the intended bottle.
Conversely, if a bottle repeatedly cannot be blown correctly, the factory should not automatically blame the preform dimensions without checking heating, stretching, pre-blow, high-pressure blowing, and machine conditions.
The preform and blow-molding process have to be evaluated together.
How Should a Factory Build a Repeatable PET Preform QC Routine?
A practical PET preform QC system should combine frequent production screening with scheduled dimensional verification and deeper periodic validation. Every record should remain connected to the approved drawing, cavity identity where relevant, production batch, and measurement method so that later problems can be traced rather than guessed.
Not every preform needs every possible laboratory measurement during every shift.
That would create unnecessary inspection workload.
A more useful approach is to divide inspection into different levels according to production risk.
| QC Level | Typical Purpose | Appropriate Inspection Content |
|---|---|---|
| Routine production screening | Detect obvious process drift quickly | Appearance, weight, gate condition, thread appearance, and selected critical dimensions according to the factory sampling plan |
| Scheduled dimensional verification | Confirm geometry remains within the approved drawing | Neck ID, critical neck OD, thread-related dimensions, support ring, total height, body diameter, and other specified dimensions |
| Cavity-consistency verification | Confirm multi-cavity production remains balanced | Cavity-number weight records, key dimensions, selected wall-thickness checks, and comparison of cavity patterns |
| Periodic deeper inspection | Detect material-distribution and geometric problems not visible in routine checks | Wall-thickness mapping, concentricity, detailed neck measurement, and other project-specific measurements |
| Functional validation | Confirm the preform works in the complete packaging system | Closure compatibility, handling, reheating, blow molding, and final bottle evaluation |
The frequency should be established by the factory according to the project, production volume, customer specification, process capability, and quality risk.
A new mold during commissioning generally deserves more intensive cavity-level monitoring than a mature process that has already demonstrated long-term stability.
This is exactly why we asked our New Zealand customer for a detailed 1–32 cavity inspection table during the first production stage.
We wanted a baseline.
Once a factory knows what normal production looks like, later deviations become much easier to identify.
Why Should QC Records Include the Approved Drawing, Cavity Number, and Production Batch?
Measurement data without traceability loses much of its troubleshooting value. A PET preform QC record should identify the drawing revision, mold, cavity where relevant, production batch, date, and measurement method so that a later complaint can be compared with the actual production history.
Consider a factory that finds an eccentric preform three months after production.
If the old QC record contains only:
Wall thickness: OK.
the record provides little help.
If the sheet instead identifies the mold, cavity, batch, drawing revision, measured positions, and actual values, the engineering team can investigate whether the deviation was already developing at that time.
| Traceability Item | Why It Matters |
|---|---|
| Approved drawing number and revision | Confirms which geometry was being accepted |
| Mold number | Identifies the production tool |
| Cavity number | Identifies whether the problem follows one molding position |
| Batch / production order | Connects inspection data to a production lot |
| Production date and time | Helps compare the result with machine and material records |
| Measurement equipment | Helps explain differences between QC methods |
| Actual measurement value | Provides more diagnostic value than only "PASS" |
| Inspector | Provides accountability and allows method clarification |
| Corrective-action notes | Records what was changed if a problem was detected |
This is especially important for overseas mold projects.
When a customer sends us a quality complaint, a properly completed cavity-level QC sheet allows us to understand the production pattern before making recommendations.
Without data, remote troubleshooting often begins with assumptions.
How Should New PET Preform Molds Be Inspected During the First Production Week?
During the first production period, the factory should focus on establishing a stable process baseline rather than making conclusions from isolated startup samples. Once the mold and process have reached a representative production condition, cavity-level inspection can establish whether weight, dimensions, appearance, wall distribution, and gate quality are consistent across the mold.
Our New Zealand customer's first week is a good example.
The customer was actively checking the mold, which was good.
The problem was that the data was fragmented.
He would produce some preforms, stop, adjust something, send photographs, restart production, and then ask whether an individual sample represented the mold's true performance.
We suggested a more structured sequence.
| Production Stage | Recommended QC Objective |
|---|---|
| Initial machine setup | Confirm that the mold, hot runner, cooling, injection process, and machine are operating safely |
| Process stabilization | Establish a repeatable injection condition rather than judging isolated startup parts |
| Continuous production | Allow the mold and process to reach a more representative operating state |
| Cavity-level sampling | Collect preforms with cavity identity preserved |
| Detailed inspection | Measure weight, neck dimensions, height, body diameter, wall thickness, gate, and other project-specific items |
| Data review | Compare all cavity positions and determine whether any repeatable pattern exists |
| Corrective adjustment if needed | Adjust the process or investigate the mold based on evidence |
| Revalidation | Repeat the cavity-level inspection after changes |
For this specific customer, we requested at least 300 consecutive molding cycles before the more detailed production evaluation.
Again, this is presented as our actual project approach, not a universal acceptance standard for every PET preform mold.
The important idea is broader:
Do not judge a production mold only from a few unstable startup samples. Establish a repeatable condition, then inspect it systematically.
What Should You Do If One Cavity Fails the PET Preform Inspection?
One failed cavity should trigger a pattern-based investigation rather than immediate mold modification. The QC team should confirm that the same cavity repeatedly fails, determine which inspection category is abnormal, compare it with the rest of the mold, and then decide whether the next step belongs to process adjustment, hot runner diagnosis, or mechanical inspection.
The type of failure matters.
A weight-only problem should not be diagnosed in exactly the same way as an incorrect neck dimension.
A gate problem requires a different investigation from circumferential wall-thickness variation.
| Repeated Cavity Failure | First Diagnostic Direction |
|---|---|
| Weight differs while dimensions remain consistent | Check injection and packing balance before assuming cavity geometry is wrong |
| Wall thickness is uneven around the circumference | Evaluate concentricity and core-to-cavity relationship |
| Neck dimensions repeatedly fail | Inspect neck-forming components and relevant mold condition |
| Gate appearance differs from all other cavities | Investigate valve pin, gate, hot runner thermal condition, and process |
| Body OD or height repeatedly differs | Confirm measurement method, then inspect forming geometry and process shrinkage conditions |
| Visual contamination appears randomly across cavities | Investigate material and production environment rather than one mold position |
| Same cavity fails several categories simultaneously | Local mold-position inspection becomes more strongly justified |
This method prevents one common mistake:
using the same repair logic for every preform quality problem.
PET Preform Inspection Checklist for Buyers and QC Teams
The following checklist provides a practical summary for post-injection PET preform inspection. Actual acceptance limits should always come from the approved drawing, customer specification, closure requirement, mold agreement, and validated production process.
| Inspection Item | Measurement / Inspection Method | Main Acceptance Reference | Main Downstream Risk |
|---|---|---|---|
| Appearance | Controlled visual inspection | Approved sample and quality specification | Visible defects and material/process abnormalities |
| Neck inner diameter | Appropriate dimensional measuring equipment | Approved neck drawing | Neck compatibility and project-specific handling requirements |
| Critical neck outer diameter | Caliper, gauge, or specified metrology method | Approved neck-finish drawing | Closure and equipment compatibility |
| Thread geometry | Visual and dimensional inspection / appropriate gauge | Approved neck-finish drawing | Incorrect closure engagement |
| Support ring | Dimensional and visual inspection | Approved drawing | Handling and positioning problems |
| Overall height | Drawing-defined measurement reference | Approved preform drawing | Geometry and downstream equipment mismatch |
| Body diameter | Measurement at specified axial position | Approved preform drawing | Preform geometry mismatch |
| Weight | Calibrated scale | Agreed nominal weight and tolerance | Material quantity inconsistency |
| Cavity-to-cavity weight | Cavity-number tracking over defined samples | Project QC plan | Multi-cavity inconsistency |
| Wall thickness | Wall-thickness instrument or controlled section measurement | Approved inspection plan | Uneven material distribution |
| Concentricity | Circumferential wall comparison or appropriate metrology | Approved project criteria | Uneven reheating and stretch behavior |
| Gate position and appearance | Visual / specified measurement | Approved sample and project specification | Gate and hot runner quality problems |
| Cap compatibility | Approved production closure / specified test | Closure specification | Capping or sealing problems |
| Blow-molding validation | Actual production or controlled bottle trial | Approved bottle specification | Failure to produce the intended bottle consistently |
The checklist should be adapted rather than copied blindly.
A water-bottle preform, CSD preform, edible-oil preform, and personal-care preform can have different downstream requirements.
Likewise, a PCO 1881 neck and a 3025 neck should not share an invented universal dimensional acceptance table.
FAQ
What should be checked on a PET preform after injection molding?
A complete inspection should normally cover appearance, preform weight, neck-finish dimensions, thread condition, support-ring geometry, overall height, body dimensions, wall thickness, concentricity, gate quality, and cavity-to-cavity consistency.
For new preform projects, closure compatibility and actual blow-molding validation should also be included where relevant.
How do you measure PET preform wall thickness?
Wall thickness should be measured at predefined locations rather than at one random point.
A QC plan can establish several axial sections along the preform body and compare multiple circumferential positions at each section. This allows the factory to evaluate both local wall thickness and whether the internal and external geometry remain reasonably concentric.
The exact measurement positions and acceptance criteria should come from the approved inspection plan.
Why is PET preform inner diameter important?
The inner diameter is part of the approved neck geometry and should be controlled together with the other neck-finish dimensions.
Depending on the downstream equipment and handling design, neck-related internal dimensions may also influence compatibility. The correct value should therefore come from the approved neck-finish drawing rather than from the nominal neck name alone.
Should every cavity of a PET preform mold be inspected?
During new-mold acceptance, commissioning, or troubleshooting, cavity-number traceability is very valuable because it allows the factory to identify repeatable cavity-specific patterns.
Routine mature production may use a qualified sampling plan rather than performing every measurement on every cavity continuously.
However, relying only on long-term random samples without cavity identity can make cavity-specific problems much harder to diagnose.
Can a PET preform pass dimensional inspection but still fail during blow molding?
Yes.
Dimensional inspection confirms important geometric characteristics, but actual bottle production also depends on material distribution, wall thickness, concentricity, reheating, stretching, pre-blow, high-pressure blowing, and the relationship between the preform and bottle design.
A new preform project should therefore include actual blow-molding validation before final production approval.
Conclusion
The purpose of PET preform inspection is not simply to generate measurement reports. It is to detect a small preform deviation before that deviation becomes a closure problem, blow-molding defect, production interruption, or customer complaint.
Our New Zealand customer's two 32-cavity molds illustrate why a structured QC system matters.
The customer had purchased one 3025, 25 g preform mold and one PCO 1881, 28 g preform mold.
During the first week of production, he frequently sent us individual samples and asked whether each preform was acceptable.
The problem was not that he was inspecting too much.
The problem was that isolated samples did not provide enough production context.
We therefore asked him to establish a more representative continuous production condition first. For this project, we recommended at least 300 consecutive molding cycles before carrying out the detailed cavity-level evaluation.
We then sent him an electronic QC inspection sheet and asked the factory to record data for cavities #1 through #32 rather than mixing all samples together.
The inspection included neck inner diameter, relevant outer dimensions, preform weight, height, wall thickness, gate condition, and other quality items required by the approved preform design.
That process changed the customer's question.
Instead of asking:
"Does this one preform look OK?"
the factory could ask:
"Are all 32 cavities repeatedly producing preforms that meet the same approved specification?"
That is a much stronger quality-control question.
A complete PET preform inspection system should connect three elements:
| QC Foundation | Purpose |
|---|---|
| Approved Drawing | Defines what the preform is supposed to be |
| Cavity Number | Shows where a repeatable deviation originates |
| Production Batch / Process Record | Shows when and under what production condition the deviation occurred |
When these three pieces of information remain connected, QC data becomes useful for troubleshooting, mold maintenance, supplier communication, and production improvement.
When they are missing, factories often rely on random samples and subjective judgments.
From our manufacturing experience, the most useful preform QC principle is therefore:
Do not inspect only the preform in your hand. Inspect the production pattern behind that preform.
If you are purchasing or commissioning a 24-cavity, 32-cavity, 48-cavity, 72-cavity, or other multi-cavity PET preform mold, we recommend preparing the inspection method before mass production begins.
Provide the approved preform drawing, neck finish, nominal weight, cavity number, final bottle application, closure specification, and production requirements. These details allow the mold supplier and QC team to establish the measurements that actually matter for the project.
Related PETMOLDER Articles
- How to Procure PET Preforms: A Guide to Avoiding 8 Critical Defects
- PET Preform Concentricity: Why Mold Precision Matters
- PET Preform Mold FAT Checklist: How to Inspect a 48-Cavity Mold Before Delivery
- The Ultimate Guide to Preform Neck Finishes: How to Choose the Right Standard for Your Bottle
- What is PCO 1881 Neck Finish? A Complete Guide to Preforms and Blow Molds